Games
Tables
The Tables section (under Games in the admin sidebar) is where you create and configure the cash-game tables your players join. Think of each table as a permanent “room”: it has its own settings, its own web address, and its own look. Most changes you make here apply live to players already seated; a few deeper settings need a quick server restart, and the admin always tells you which.
The tables list
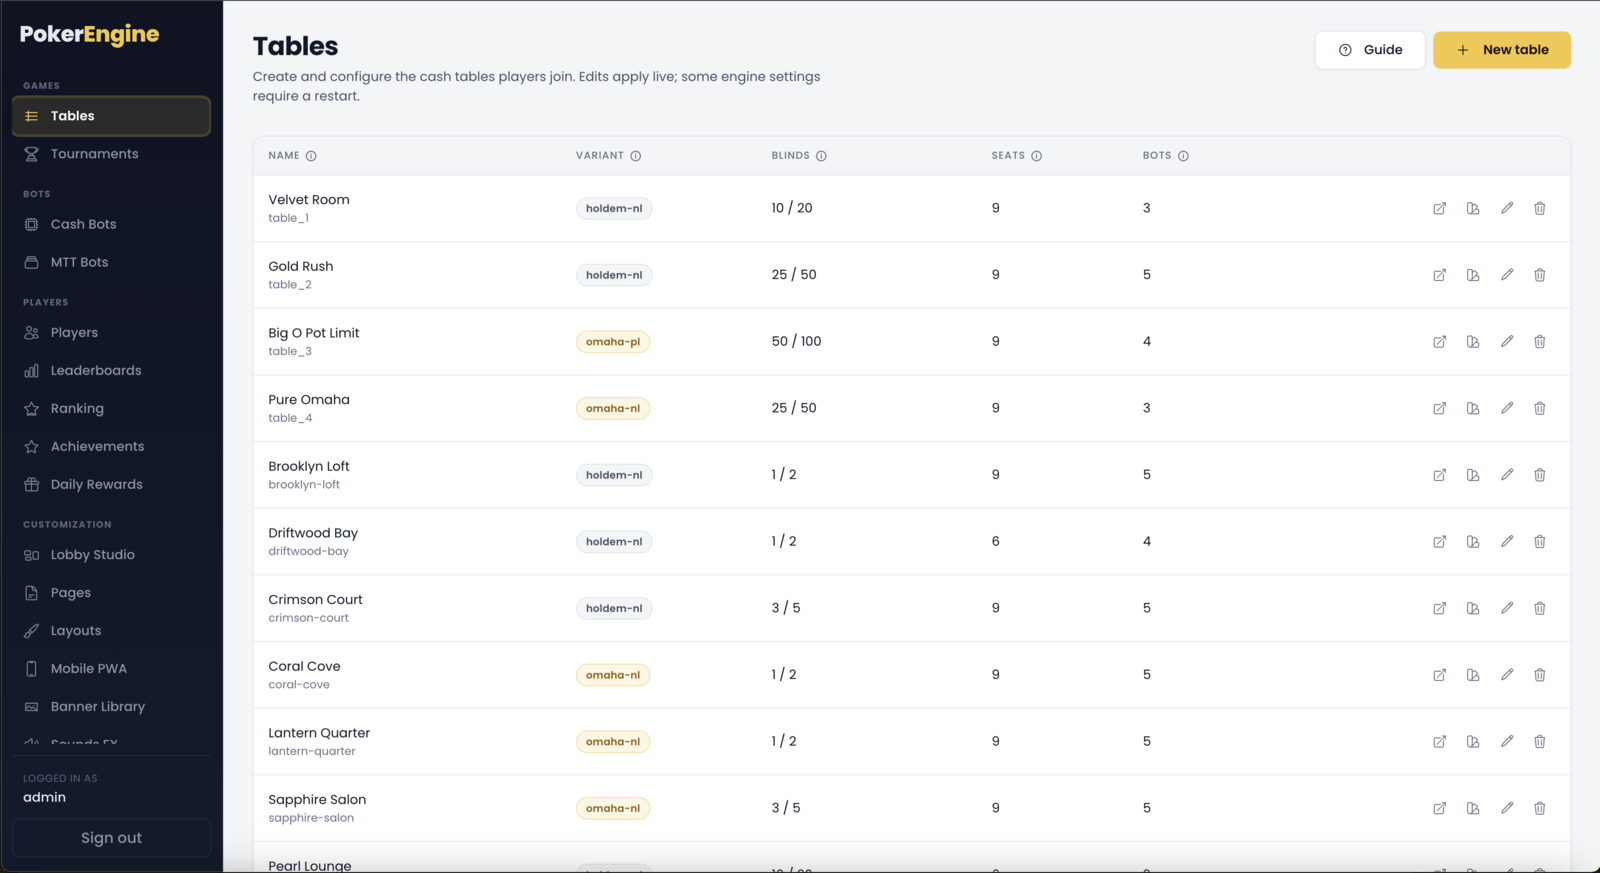
When you open Tables you see every table you’ve created, one per row:
| Column | What it shows |
|---|---|
| Name | The player-facing table name, with its internal table ID underneath. |
| Variant | The poker rules — Hold’em No-Limit, Omaha Pot-Limit, or Omaha No-Limit. |
| Blinds | The small blind / big blind (e.g. 10 / 20). |
| Seats | How many seats the table has (6 or 9). |
| Bots | How many AI players sit down automatically when the server starts. |
If a setting you changed is waiting to take effect at the end of the current hand, a small “Pending” badge appears under the table’s name. If a change needs a restart, a banner appears above the list (“Some changes require a server restart”) and stays until the server catches up — even if you refresh the page.
Each row has four buttons on the right:
- Open — opens the live table in a new tab, so you can test your settings as a real player would see them.
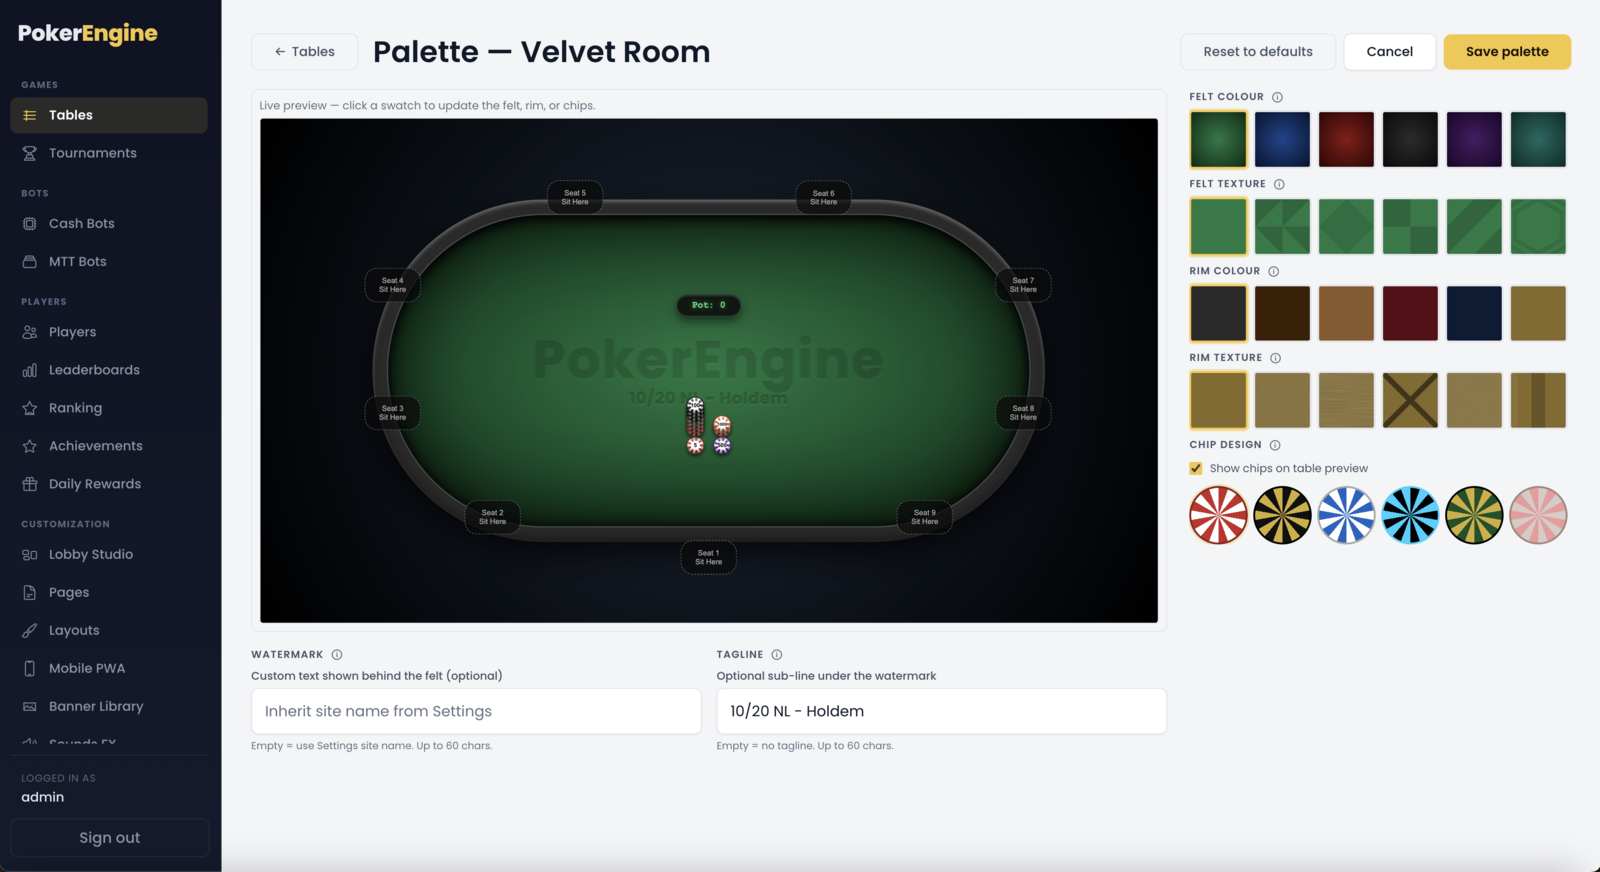
- Palette — opens the per-table look editor (felt colours, rim, chip style, texture, tagline, watermark). Changes here re-skin the table live for anyone already seated.
- Edit — reopens the settings form, pre-filled, to change this table.
- Delete — removes the table (see Deleting a table below).
Creating your first table
Click New table (top-right). A form opens with four short groups of settings. Fill them in and save — that’s it.
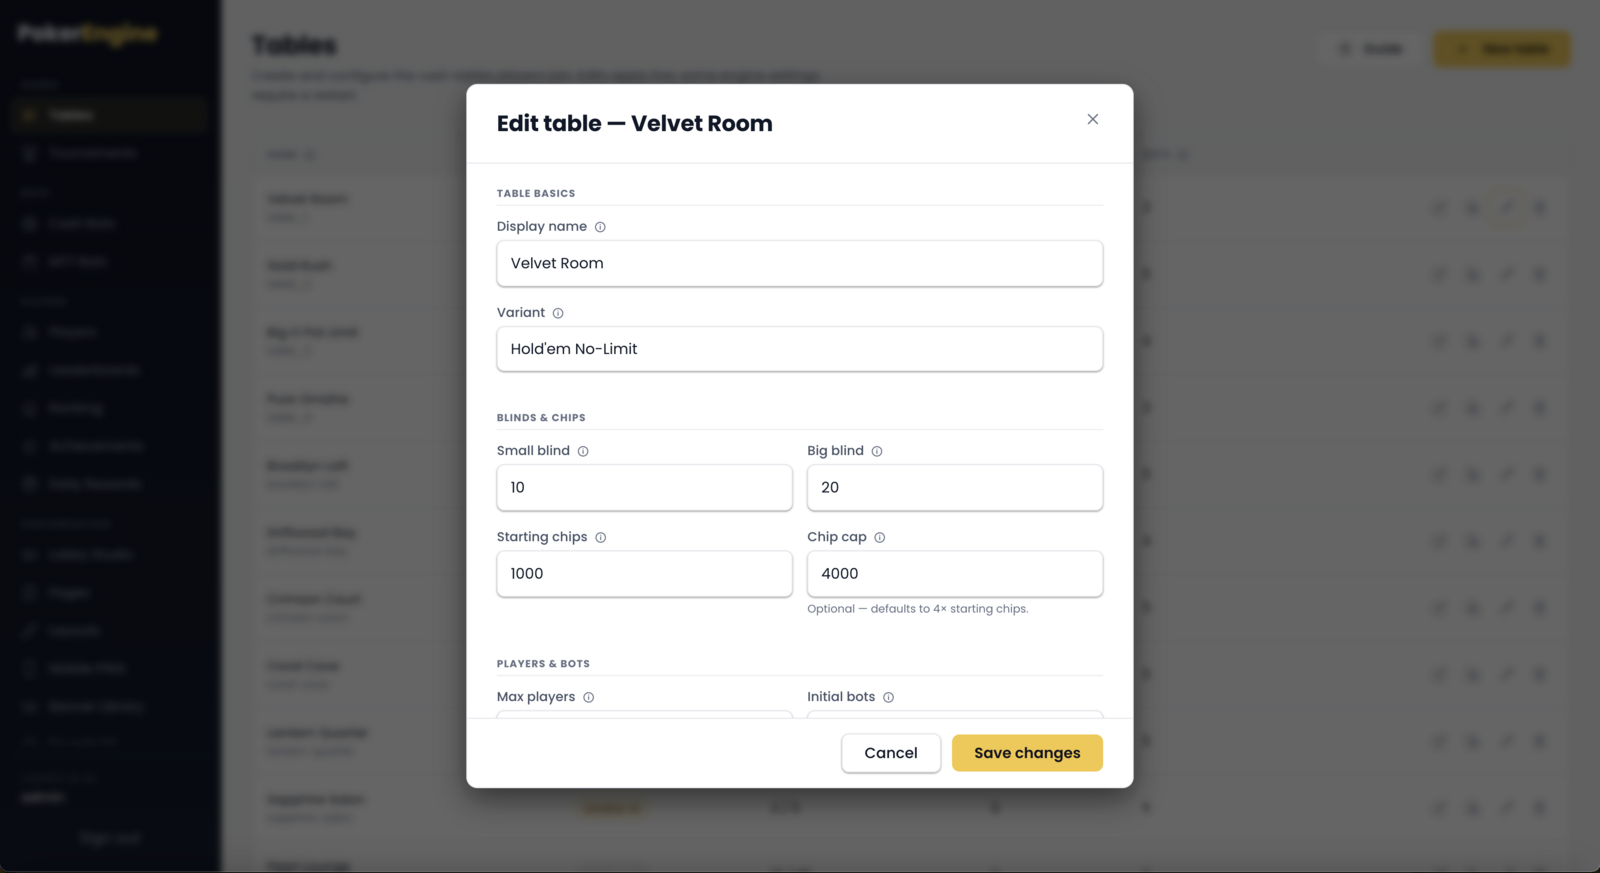
1. Table basics
- Table ID — a short unique name using only letters, numbers, dashes or underscores (for example
velvet-room). This becomes the table’s web address,/table/velvet-room, and cannot be changed later, so pick it carefully. - Display name — the friendly name players see (up to 60 characters), e.g. Velvet Room.
- Variant — the poker rules for this table:
- Hold’em No-Limit — classic Texas Hold’em.
- Omaha Pot-Limit — 4 hole cards, pot-limit betting.
- Omaha No-Limit — 4 hole cards, no-limit betting.
2. Blinds & chips
- Small blind / Big blind — the forced bets. The big blind must be larger than the small blind (e.g.
10 / 20). - Starting chips — the default stack a player buys in with when they sit down. Must be at least twice the big blind.
- Chip cap (optional) — the largest stack a bot will sit down with. Leave it blank to use the default of 4× the starting chips.
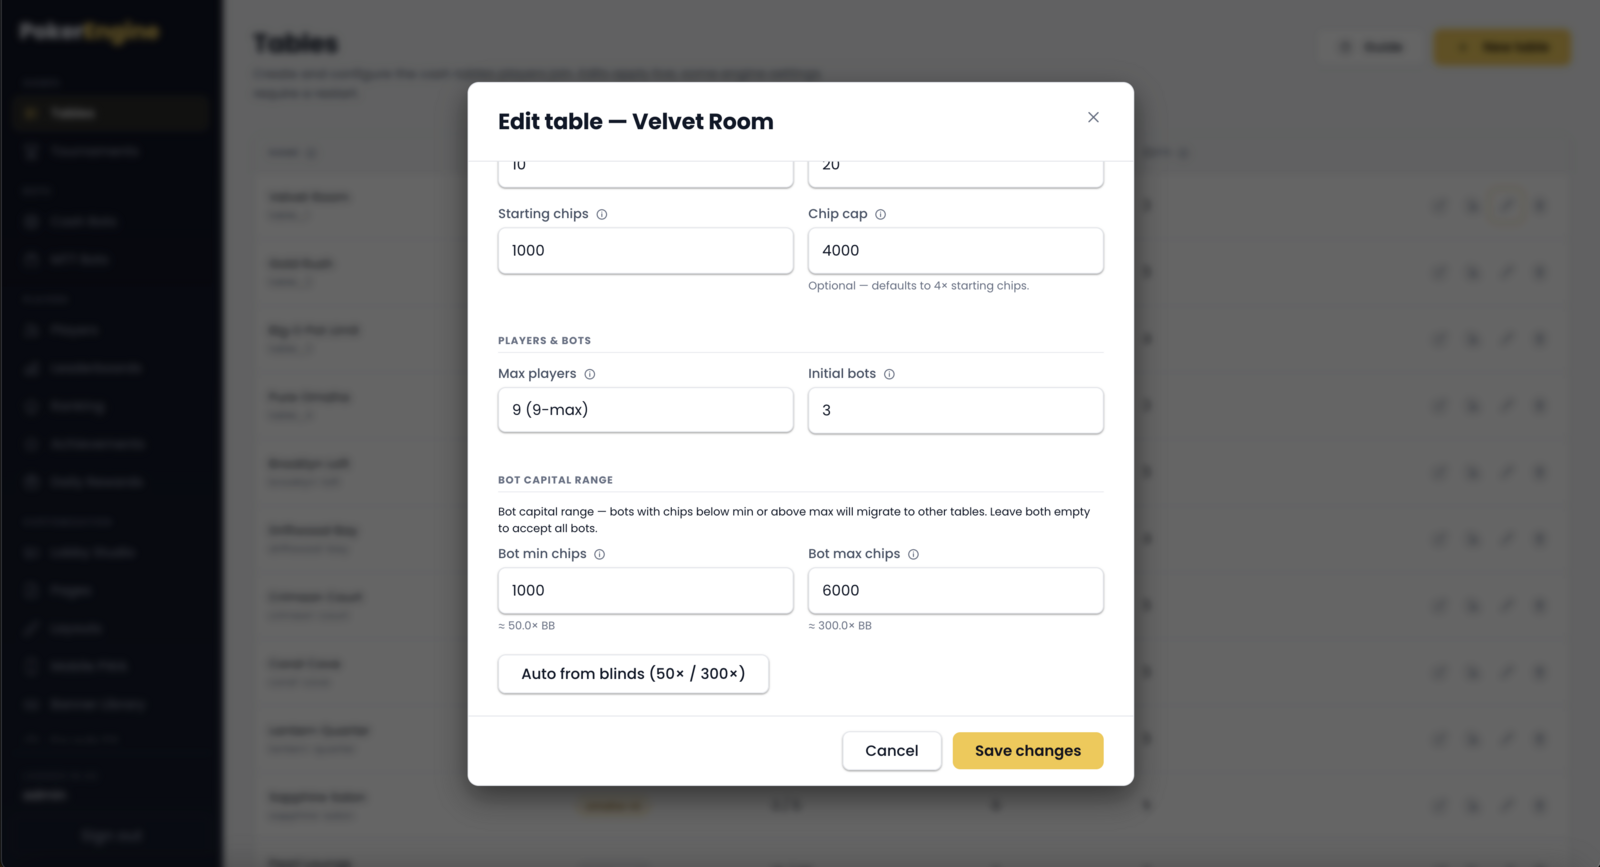
3. Players & bots
- Max players — the number of seats: 6-max or 9-max.
- Initial bots — how many AI players are seated automatically when the server starts, so the table never looks empty. Set
0for a bot-free table, or up to one less than the seat count.
4. Bot capital range (optional)
Bots roam between tables to keep games full. This range decides which bots are a good fit for this table based on their current chip stack:
- Bot min chips / Bot max chips — bots with fewer chips than the minimum, or more than the maximum, will drift off to a better-matched table. Leave both blank to accept any bot.
- The “Auto from blinds (50× / 300×)” button fills in sensible defaults based on your big blind.
Click Save and your table is created.
Editing tables live — and the few changes that need a restart
One of PokerEngine’s strengths is that you can tune your tables while players keep playing — no downtime for the changes you make day to day:
- Display name — instantly.
- Table look / palette (felt, rim, chip style, tagline, watermark) — instantly, and it re-skins players already seated.
- Bot chip cap and bot capital range — instantly.
- Small blind, big blind, starting chips — at the end of the current hand (a “Pending” badge shows on the row until it takes effect, so no hand is disrupted mid-play).
These are the structural ones you rarely touch once a table is set up:
- Creating a new table or deleting one
- Changing the variant (poker rules)
- Changing the seat count (6-max ↔ 9-max)
- Changing the number of initial bots
When one of these is pending, the admin shows a banner to remind you. A restart on your
server takes only a few seconds — for example docker compose restart,
pm2 restart, or systemctl restart depending on how you deployed —
and the change goes live.
Deleting a table
Clicking Delete asks you to confirm. When you delete a table:
- Players currently seated are ejected at the end of the current hand (never mid-hand).
- The table’s settings are removed, but each player’s chip balance is preserved in the ledger.
There’s a useful side effect of this: if you later re-create a table with the same ID, the preserved balances are restored — seated players get their old stacks back. If you want a truly fresh table, use a new ID.
Tips & good to know
- Test as you go. Use the Open button after any change to jump onto the live table and see it exactly as a player would.
- The table ID is permanent and forms the join URL, so choose it before creating the table. Everything else can be edited later.
- Seats are 6 or 9. These are the two layouts with polished, tested seat geometry.
- Bots keep your tables alive. A few initial bots mean new players always find action instead of an empty room. The bot capital range simply keeps well-matched bots at each stake.
- Many tables = more to load. There’s no hard limit on the number of tables, but each one (and its bots) is created when the server starts, so a very large number of tables and bots increases startup time and memory use. Size your setup to your audience.
Tournaments
The Tournaments section (under Games in the admin sidebar) is where you create, schedule and run tournaments. PokerEngine ships three tournament formats, each on the same page, one below the other.
| Format | What it is | Starts when | Prize |
|---|---|---|---|
| Sit & Go | A single table that begins as soon as it fills up. | Seats are full (6 or 9). | Buy-in pool split across the top 3. |
| Spin & Go | A fast 3-player hyper-turbo with a random prize multiplier revealed at the start. | 3 seats are full. | Buy-in pool × a randomly drawn multiplier. |
| MTT (Multi-Table) | A large tournament across many tables that merge as players bust. | A minimum number of players have registered. | Buy-in pool paid out across a top-N payout curve. |
How the section works: templates and instances
Everything is built around templates and instances:
- A template is a reusable blueprint — the buy-in, blind structure, payouts, bot settings and so on. You create it once.
- An instance is a live tournament spawned from a template. One template can spawn many instances over time.
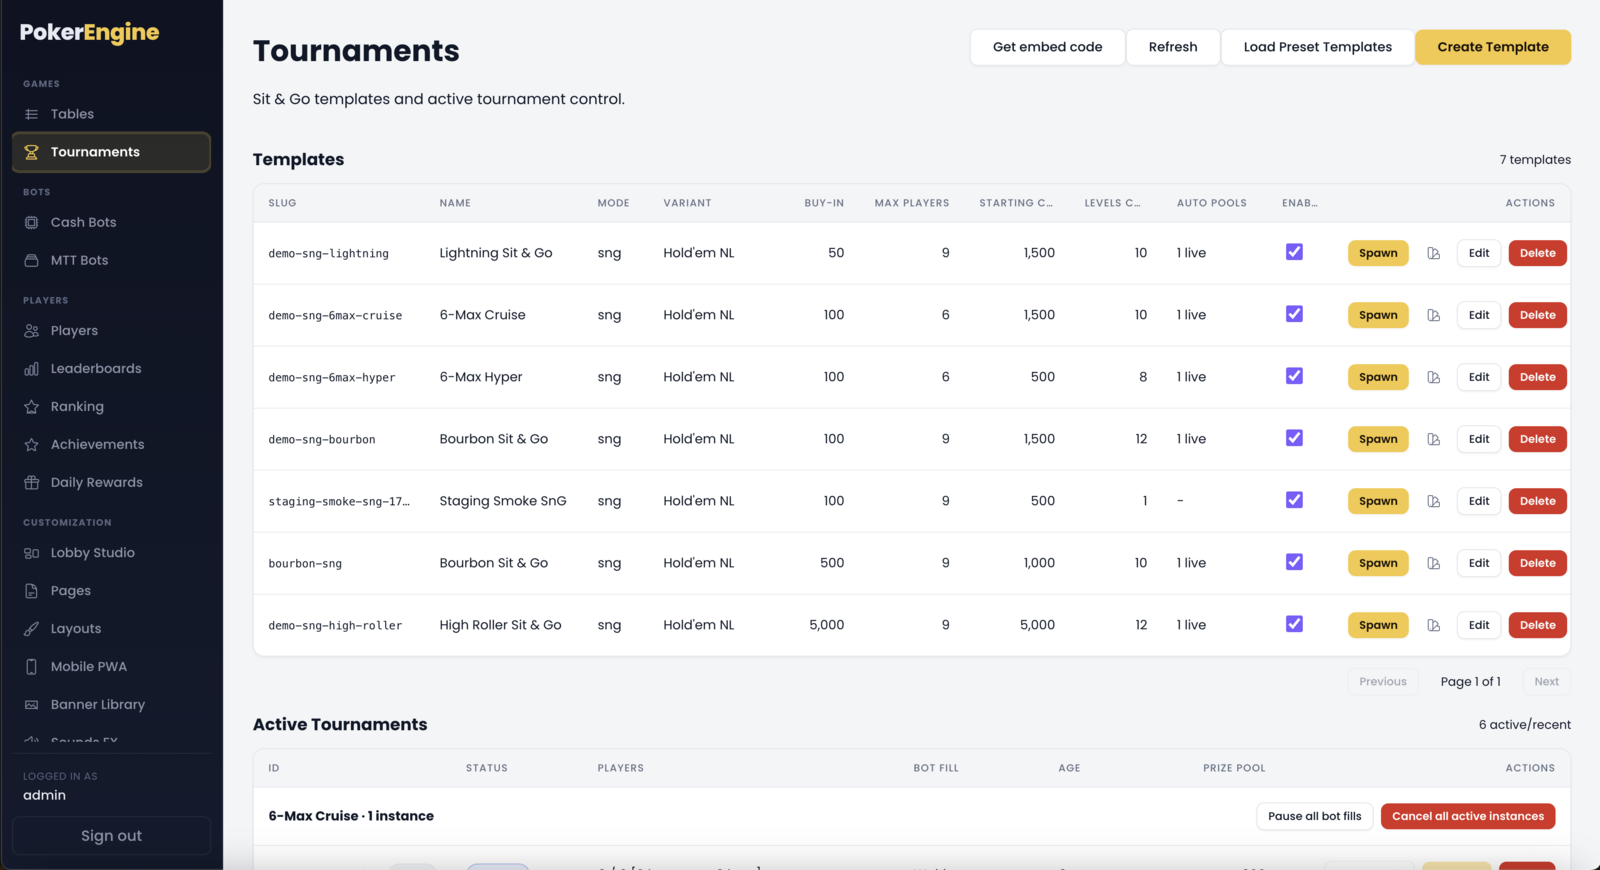
For each format you get two lists: your Templates (the blueprints) and the Active Instances (tournaments currently registering or playing). The active lists refresh on their own so you can watch registrations, bot fill and prize pools live.
To run a tournament you: create a template → enable it → spawn an instance (or let auto-spawn do it for you).
Creating a Sit & Go template
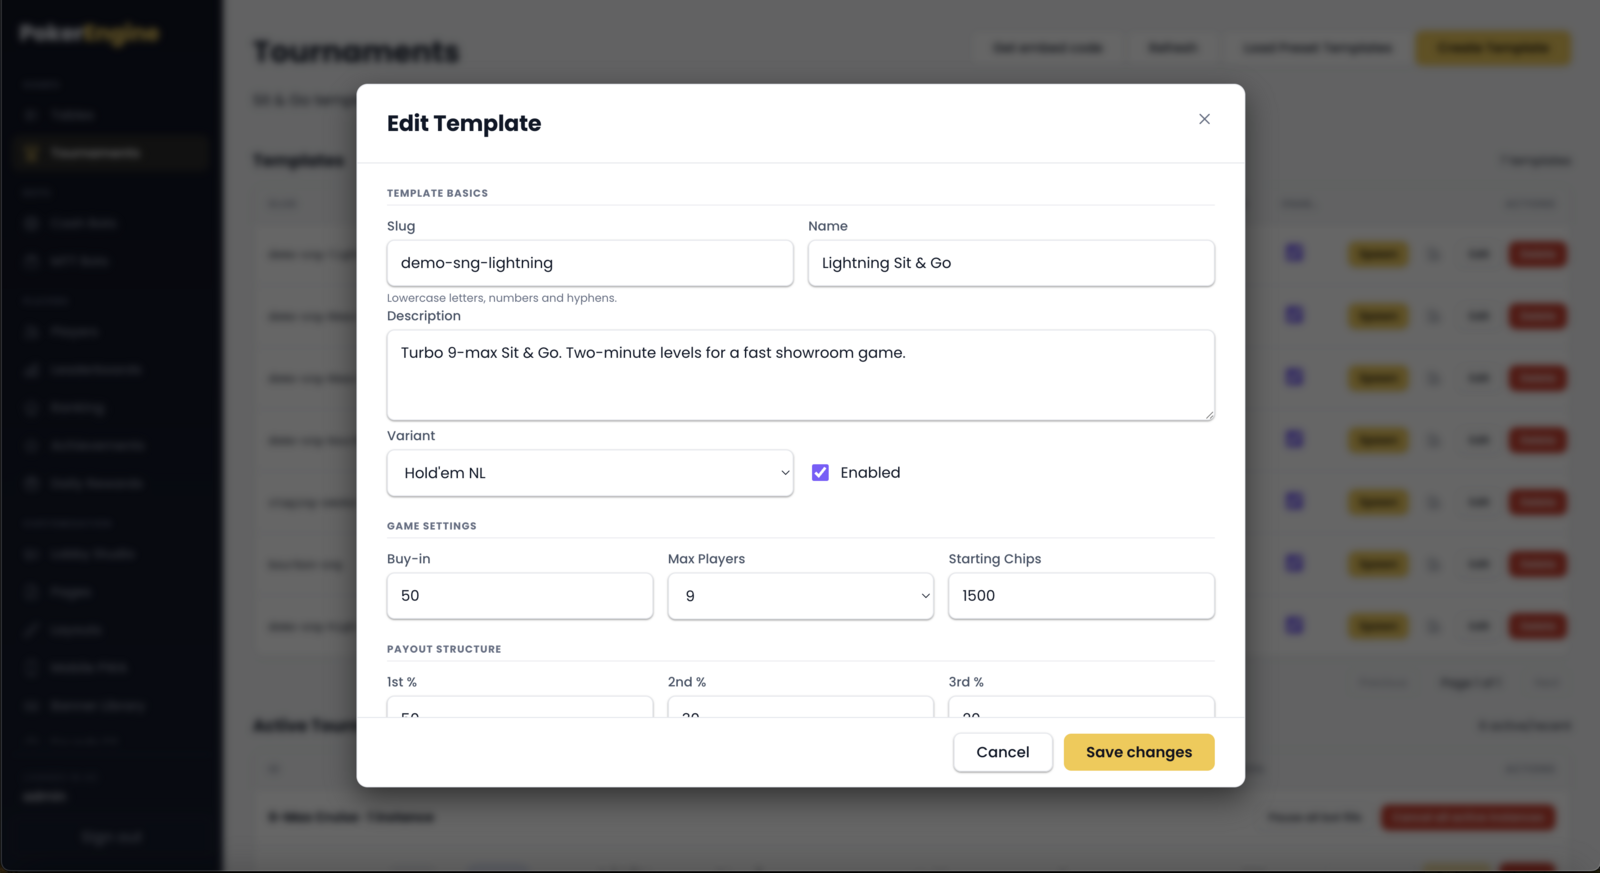
Click Create Template in the Sit & Go block. The important settings:
- Slug — a short unique ID for the template (lowercase letters, numbers, dashes). Permanent once created.
- Name / Description — what players see.
- Variant — Hold’em No-Limit, Omaha Pot-Limit, or Omaha No-Limit.
- Buy-in — the entry cost in chips.
- Max players — table size, 6 or 9.
- Starting chips — each player’s stack.
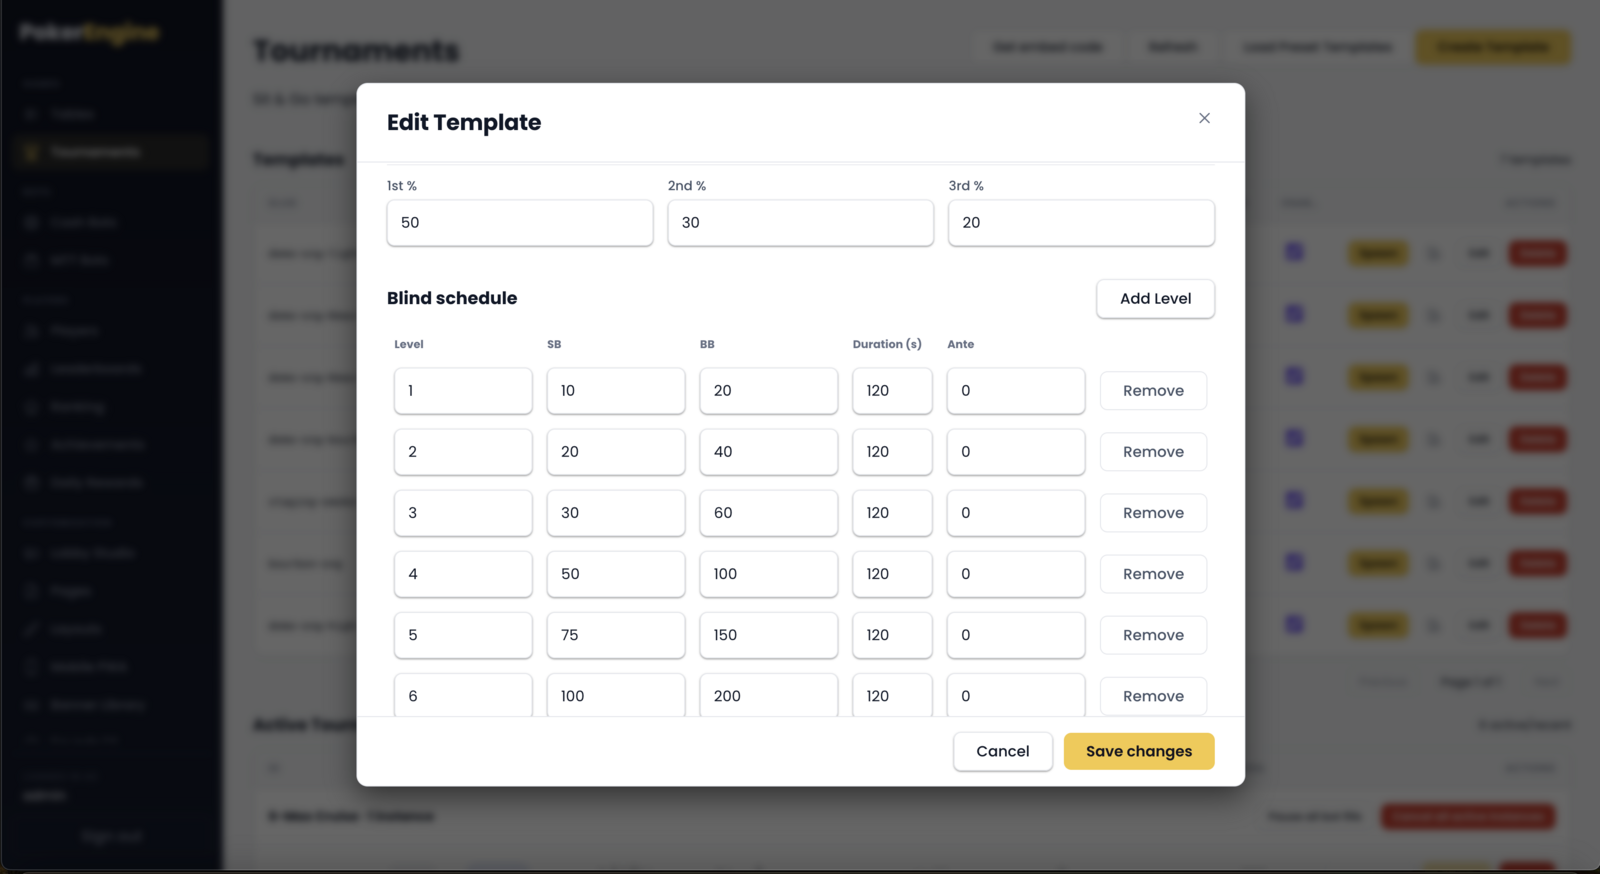
- Payout split — how the prize pool is shared between 1st / 2nd / 3rd (must total 100%). Default 50 / 30 / 20.
- Blind schedule — the levels (small blind, big blind, and how long each level lasts). You edit them in a small table; blinds must increase level to level. (Antes are not used in v1.2.)
- Bots & auto-spawn — see Keeping tournaments populated below.
Creating a Spin & Go template
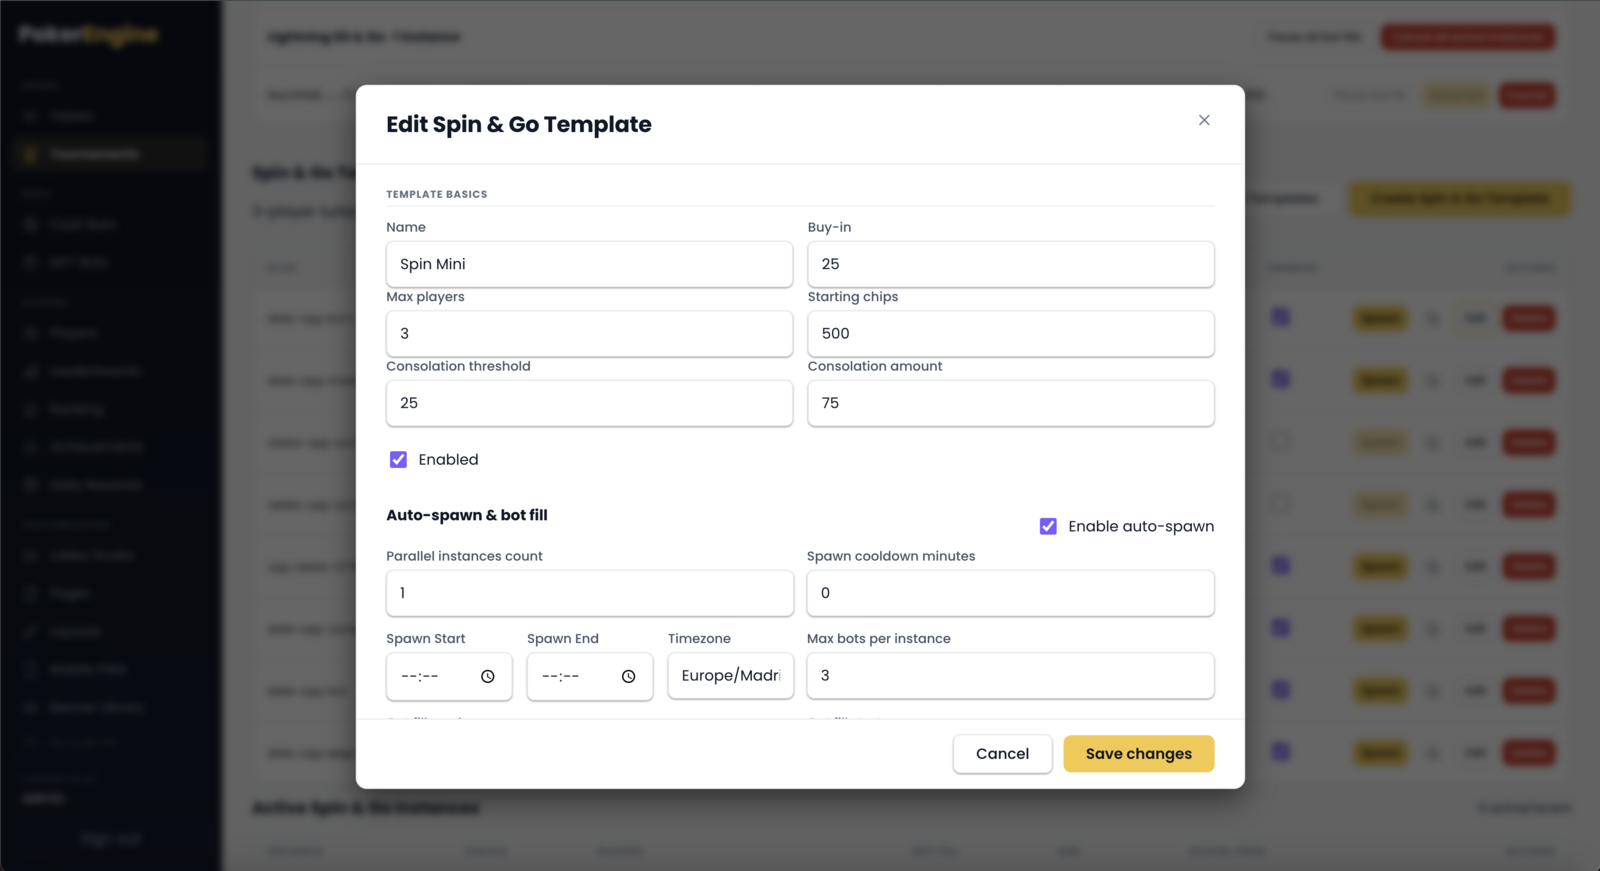
Spin & Go is the quick, exciting format. Most of its shape is fixed to keep it true to the hyper-turbo style:
- Name, Buy-in, Starting chips, Enabled.
- Max players is locked to 3 — that’s what makes it a Spin & Go.
- Blind structure — a fast 10-level ladder by default (short levels), fully editable.
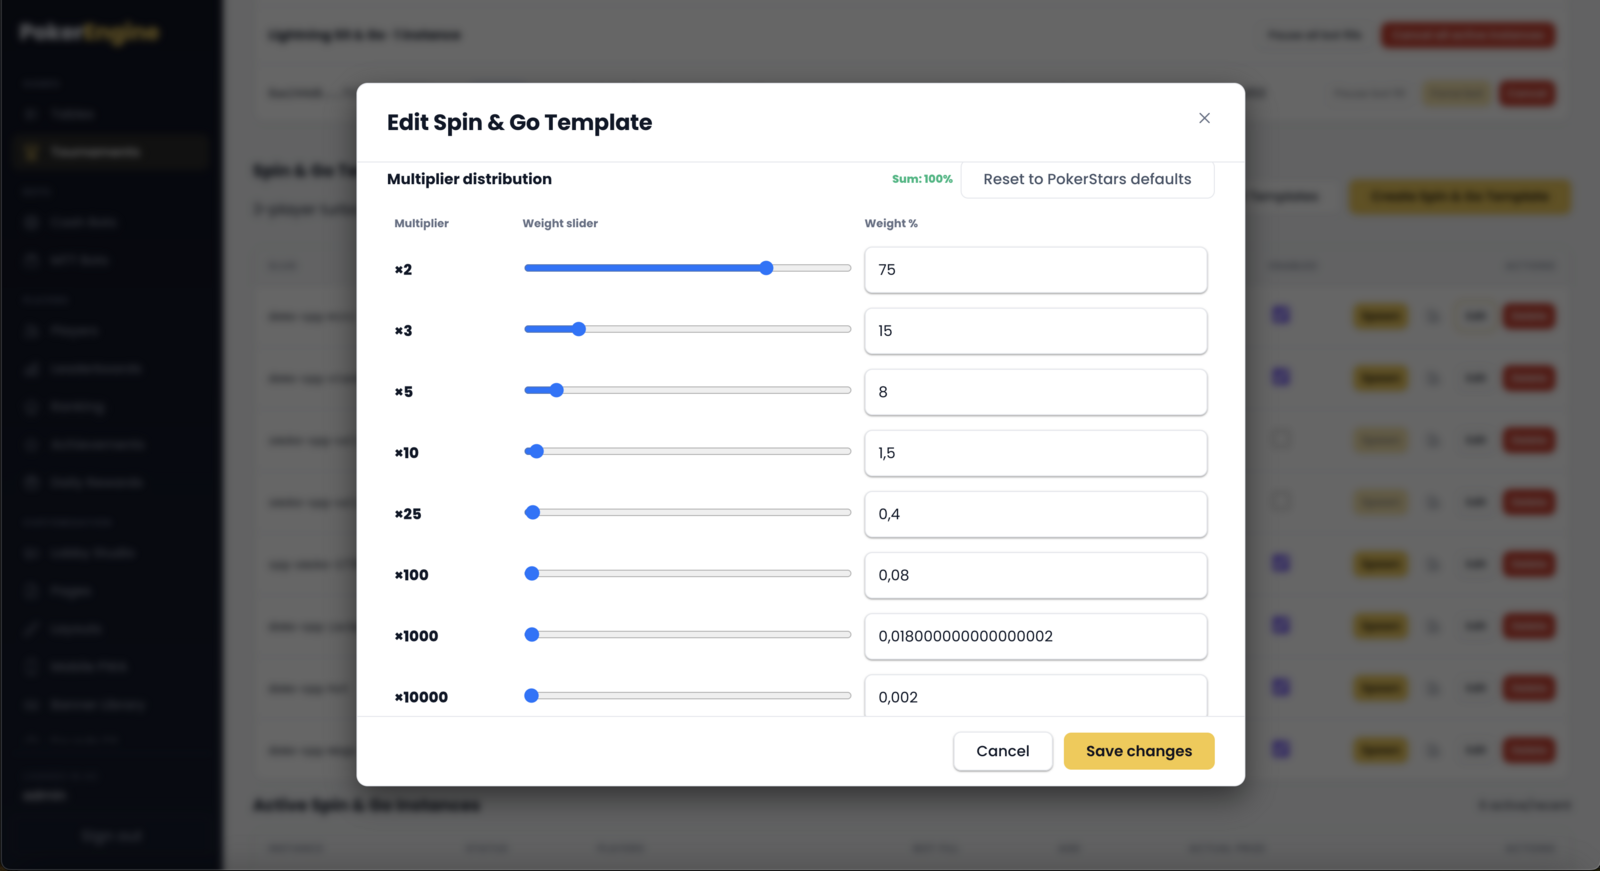
- Prize multiplier distribution — this is the heart of Spin & Go. When an instance starts, PokerEngine randomly draws a multiplier (using a fair, cryptographically-seeded draw) that decides the prize pool. The eight multiplier tiers (×2, ×3, ×5, ×10, ×25, ×100, ×1000, ×10000) are fixed to match the classic format; you adjust only their weights (how likely each is), and the weights must total 100%.
- Consolation rule — for the big multipliers, you can pay 2nd and 3rd a small consolation instead of winner-take-all. You set the threshold (the multiplier at which consolation kicks in) and the amount.
Creating an MTT (Multi-Table) template
MTTs are the flagship “big event” format:
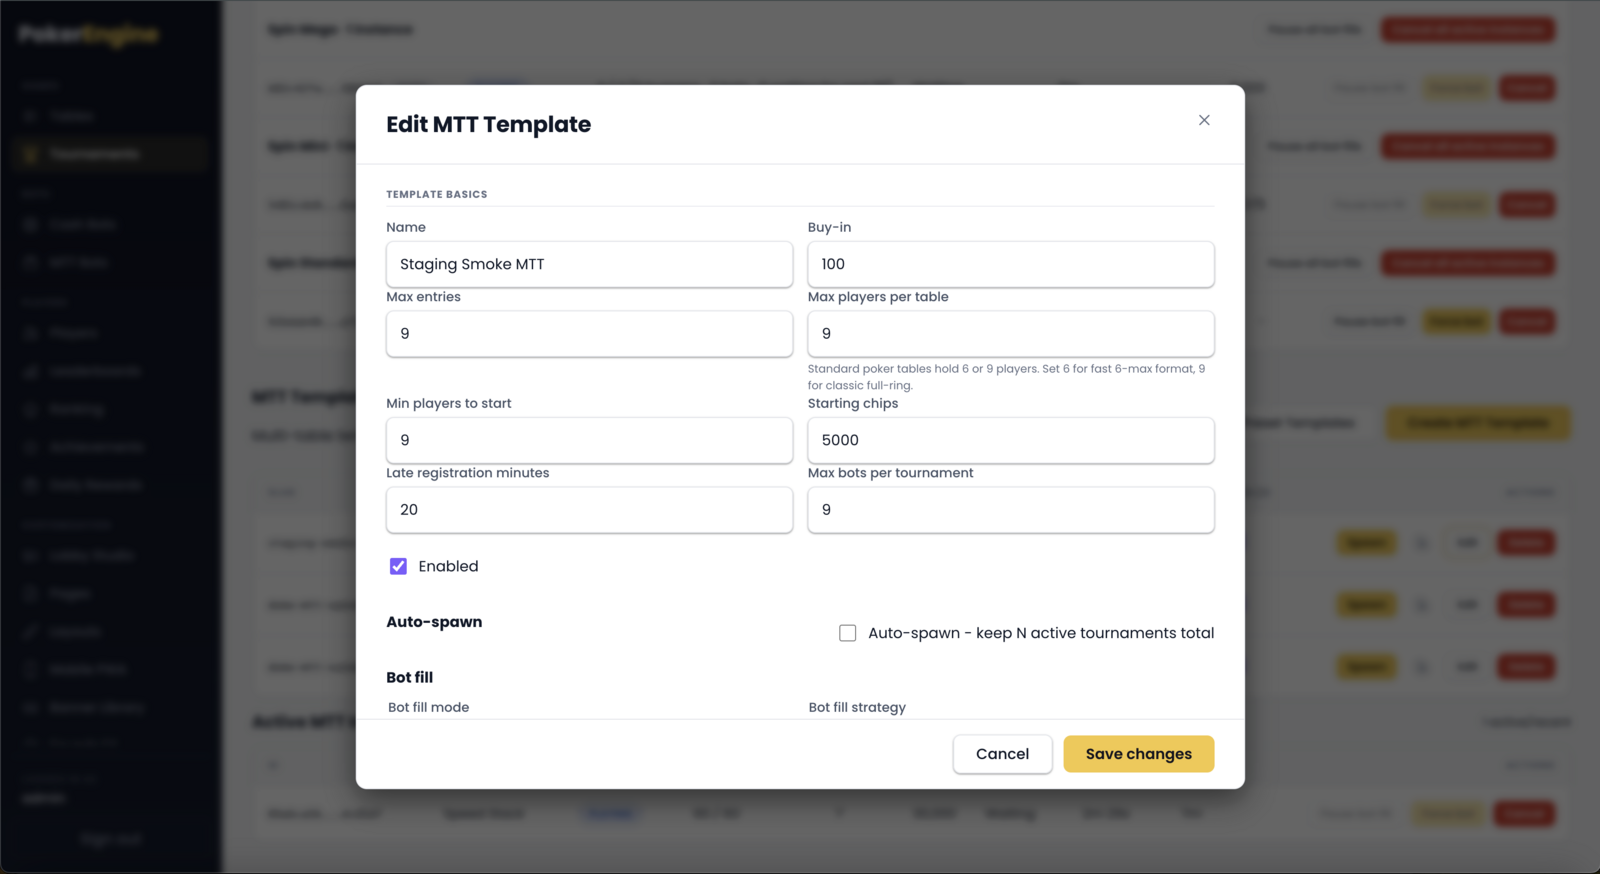
- Name, Buy-in, Starting chips, Enabled.
- Max entries — the total field size (6–100).
- Max players per table — 6 (faster 6-max) or 9 (full ring). Tables fill to this size, then more tables are created.
- Min players to start — the tournament begins once this many players have registered.
- Late registration (minutes) — how long after the start players can still buy in (0–30). Great for filling the field.
- Blind structure — a longer 20-level ladder by default.
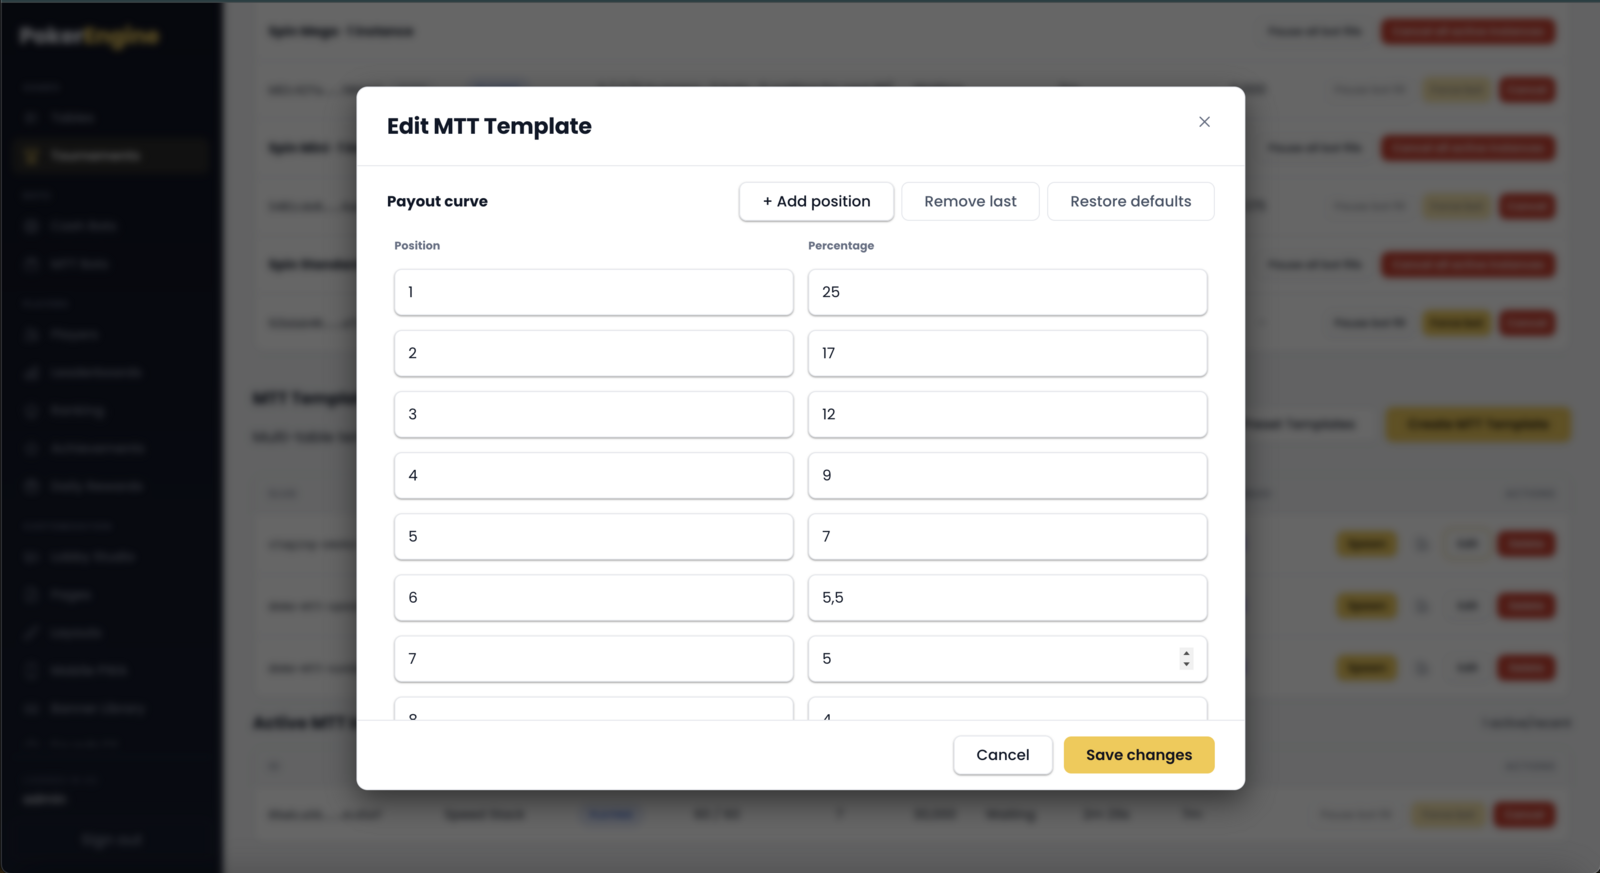
- Payout curve — how many places get paid and each place’s share (must total 100%). Default pays the top 15.
- Max bots per tournament — a hard ceiling on how many AI players can join (default 50).
Keeping tournaments populated (bots & auto-spawn)
The magic that keeps your tournaments alive even with a small player base:
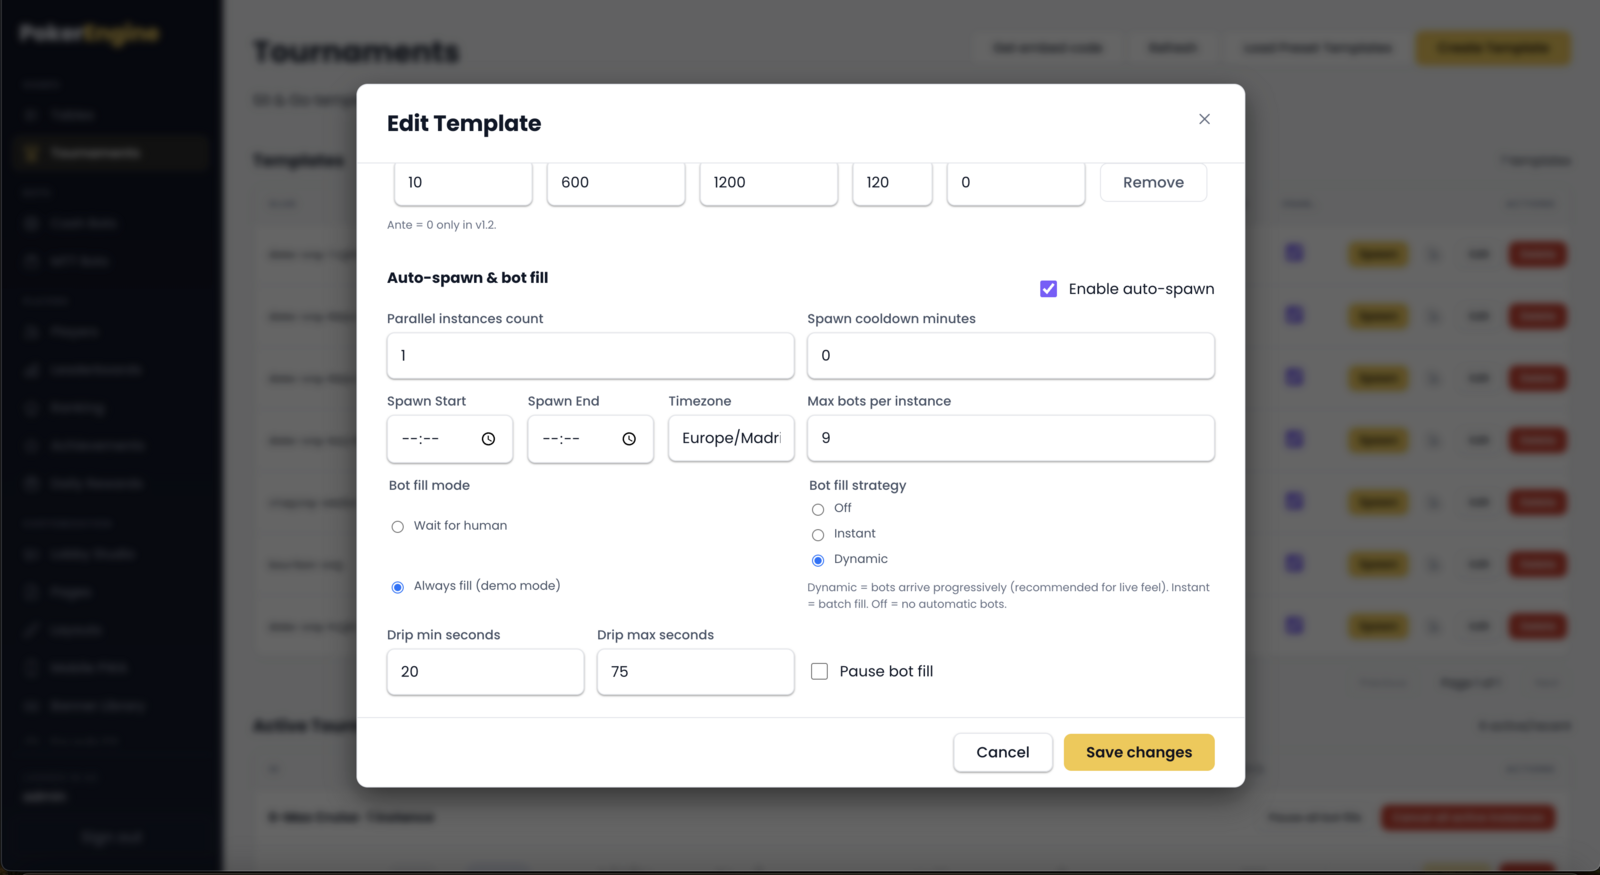
- Bot fill — bots automatically join tournaments so they start and feel busy. You control:
- Fill mode — wait for human (bots only top up once a real player is present) or always fill (great for demos).
- Fill strategy — off, instant (fill right away), or dynamic (bots trickle in at a natural pace).
- Drip timing — the pace for dynamic fill.
- Auto-spawn — instead of spawning tournaments by hand, let PokerEngine keep N instances running at all times. You set how many run in parallel, a cooldown between spawns, and an optional daily time window (with timezone). When one finishes, another appears.
- Max bots per instance — cap the number of bots per tournament so real players always have room.
You can pause bot fill globally on a template or on a single instance at any time.
Managing live tournaments
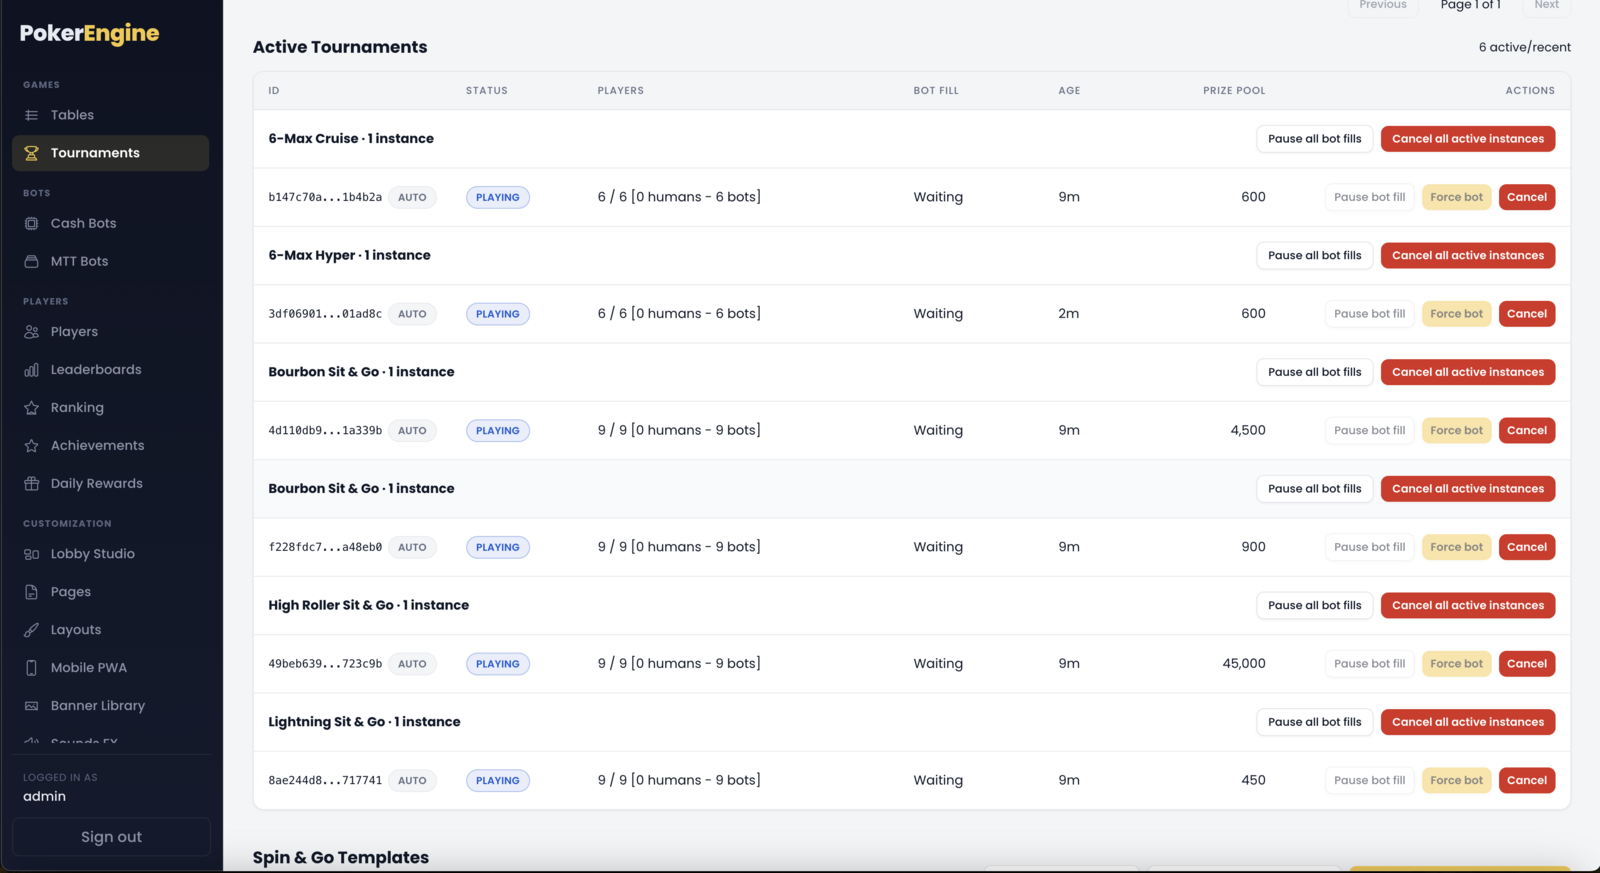
Each active instance row gives you full control:
- Force bot — add one bot immediately (while still registering).
- Pause / Resume bot fill — freeze or restart automatic bots for that instance.
- Cancel — end a tournament that’s still registering or running. You’ll see a refund preview first — every registered player (humans and bots) is refunded their buy-in, and you can enter a reason. Bots are removed cleanly.
- Expanding a row shows who’s registered, with the option to remove & refund an individual bot.
At the group level (per template) you also get Pause all bot fills and Cancel all active instances for quick bulk control.
Ready-made presets
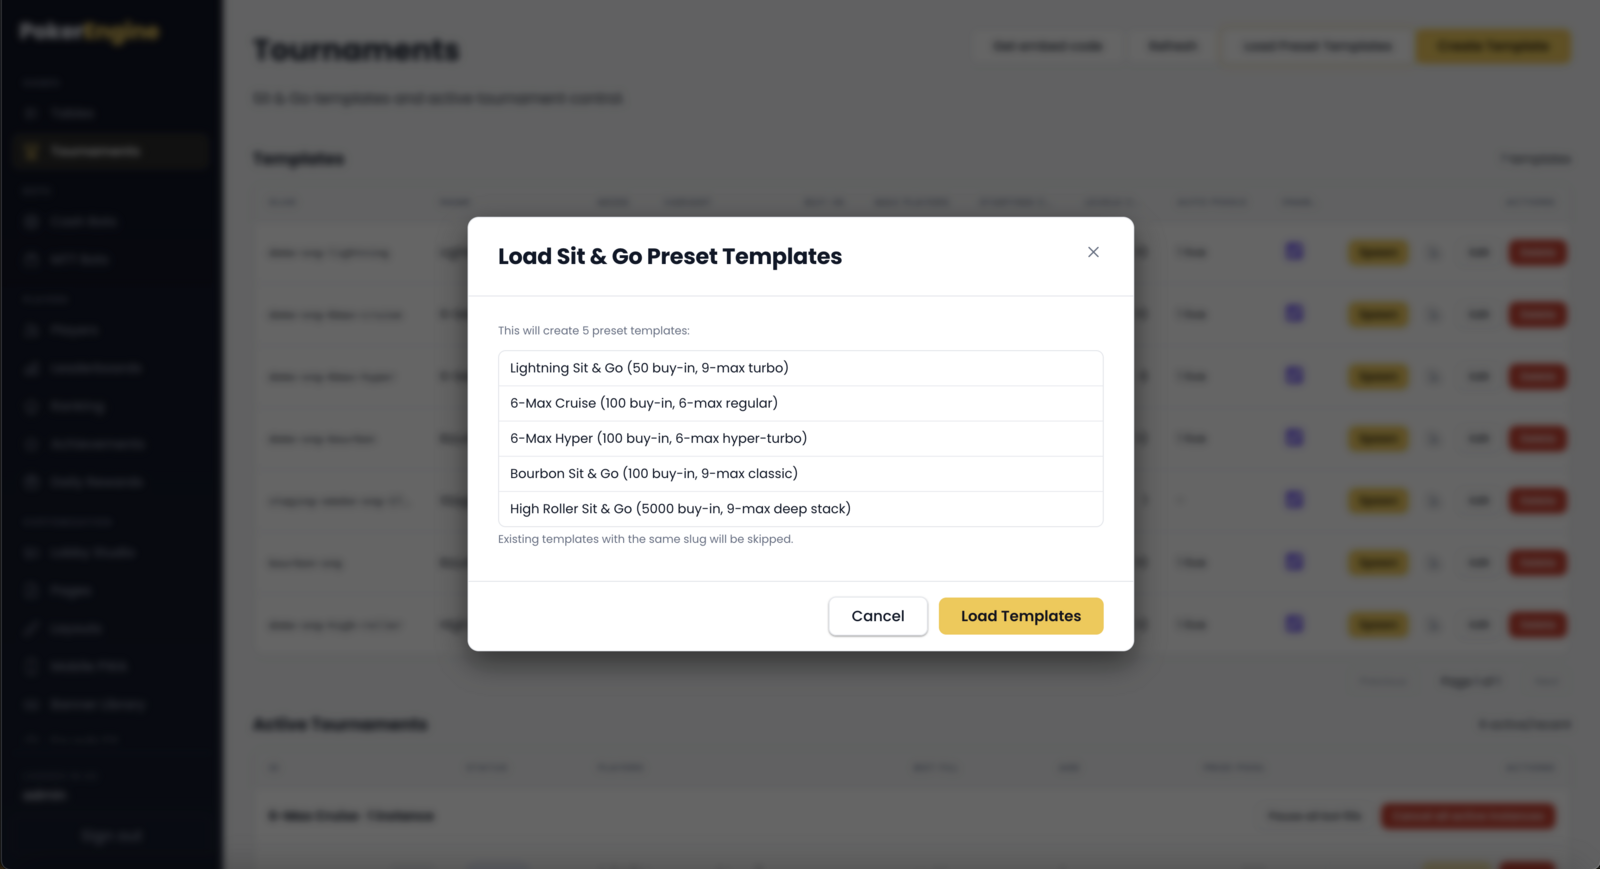
Don’t want to build templates from scratch? Click Load Preset Templates to install a set of professionally-tuned blueprints (5 Sit & Go, 5 Spin & Go, and 2 MTT including a “Sunday Major” and a “Speed Stack”). It’s safe to run more than once — templates that already exist are skipped, never duplicated.
Good to know
If you restart or update your server while tournaments are live, non-resumable tournaments are cancelled and everyone is refunded. Plan deploys for quiet periods, or let events finish first.
- MTTs handle a thin field automatically. If not enough players register by the end of late registration, the tournament either force-starts (if at least two players are in) or cancels and refunds — you never get a stuck, empty MTT.
- Spin & Go specifics. Always 3-max; the multiplier tiers are locked to the standard set (you tune the odds), and the consolation payout can’t exceed its prize pool.
- Deleting a template is a soft-disable. Existing instances keep running; the template simply stops spawning new ones and disappears from the active list.
You do not need embedding to use PokerEngine: your platform already runs as a complete, standalone site with its own lobby, pages and menus. Embedding is only for when you also want to surface a live tournament lobby on a separate website you own — for example your marketing site or an affiliate landing page. If that’s your case, each format provides an optional embed snippet (see Lobby Studio). Otherwise you can ignore it entirely.
Cash Bots
The Cash Bots section (under Bots) manages the AI players that keep your tables alive. This is one of PokerEngine’s most valuable features: with a pool of bots, your lobby is never empty, so the very first real player who arrives always finds a game to join.
These “cash” bots can play both cash tables and tournaments (you choose per bot). If you want bots that only play tournaments, there’s a separate MTT Bots section.
What the page shows
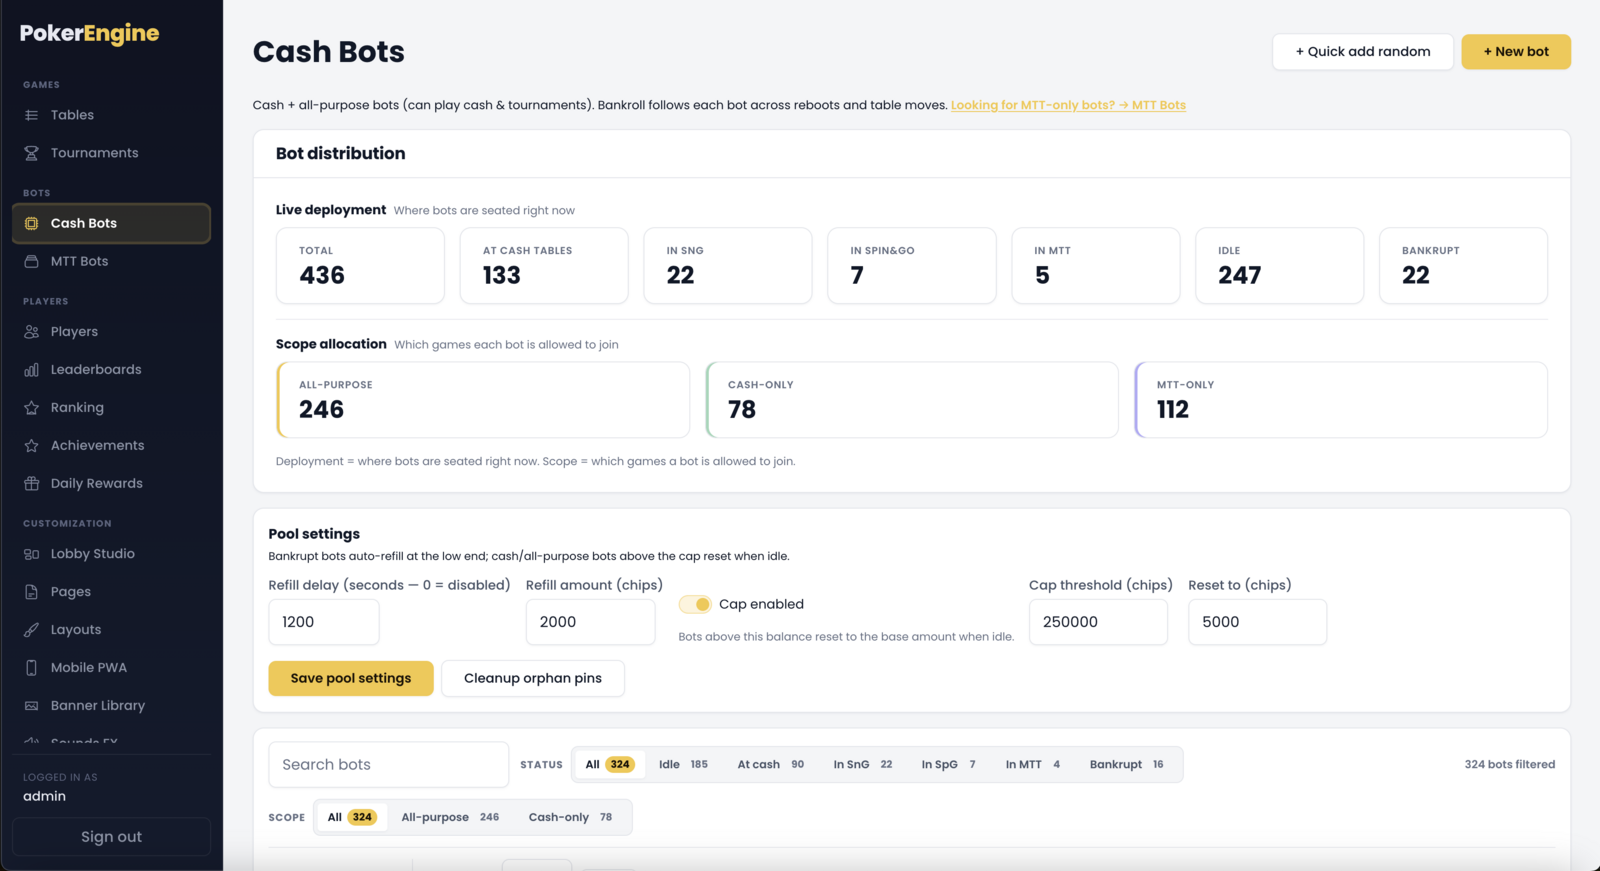
- Distribution stats — a quick read on your pool along two different axes:
- Where bots are right now — at cash tables, in Sit & Go / Spin & Go / MTT, idle, or bankrupt.
- What each bot is allowed to play — all‑purpose, cash‑only, or tournament‑only.
- Pool settings — the automatic bankroll safety valves (see Keeping the pool healthy).
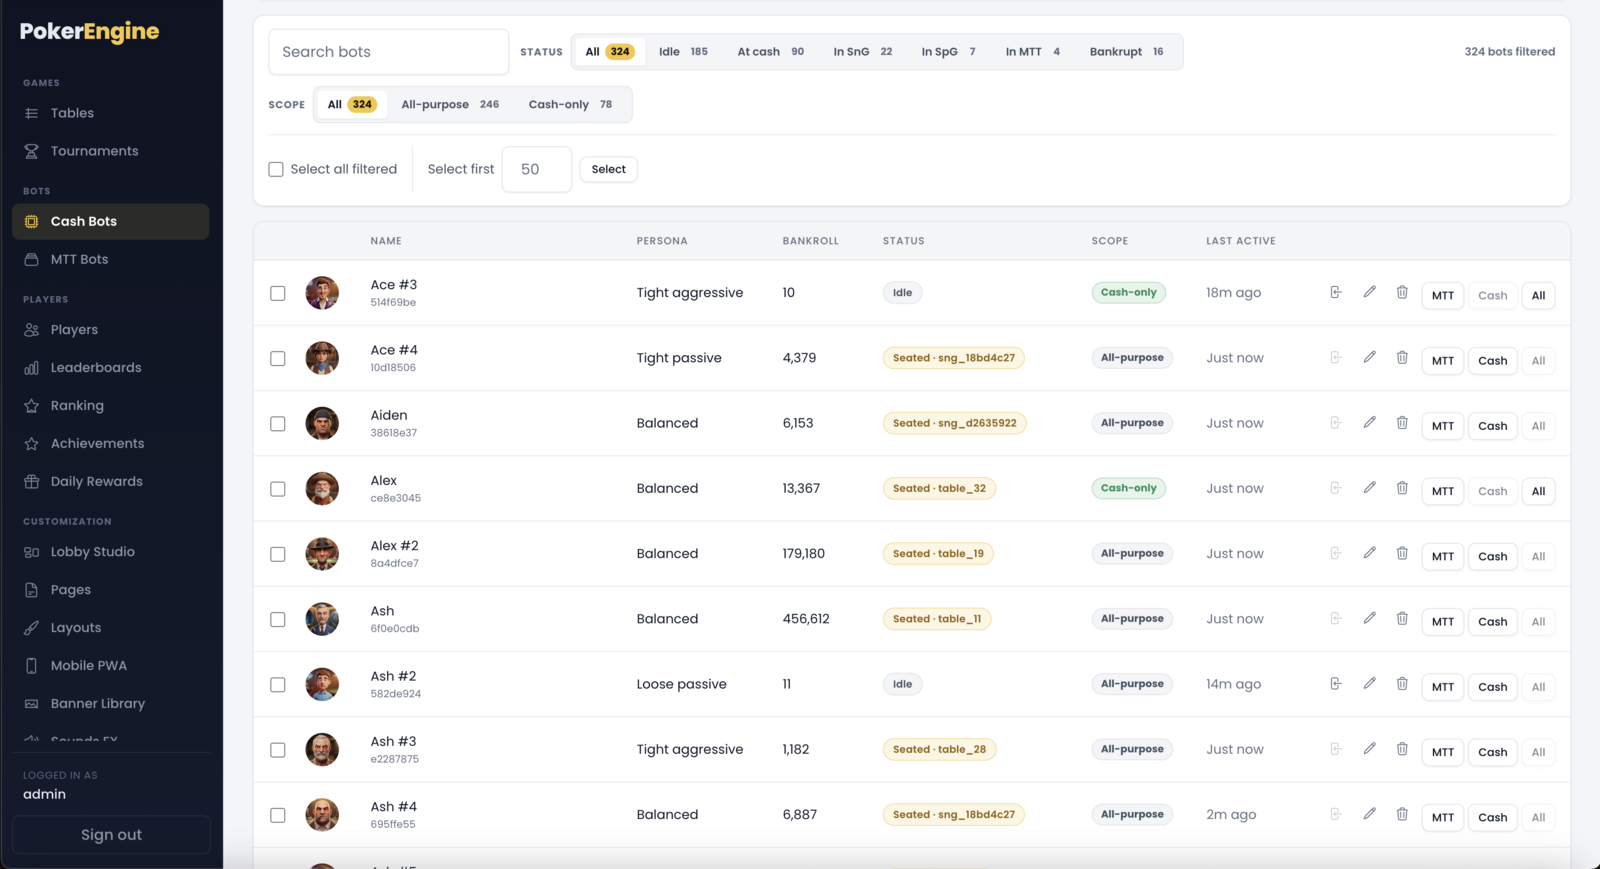
- Filters & search — narrow the roster by status, by allowed games, or by name.
- The roster — every bot with its avatar, name, persona, bankroll, current status (e.g. “Seated · table_3”, Idle, Bankrupt, or an online/offline schedule chip), and its allowed‑games scope.
Adding bots
Two ways, top‑right:
- Quick add random — the fastest way to fill a lobby. Choose a number (up to 50) and PokerEngine creates that many bots with random names, avatars and play styles, each starting with 1,000 chips and always online. Perfect for launch day.
- New bot — create one bot with full control over every detail (below).
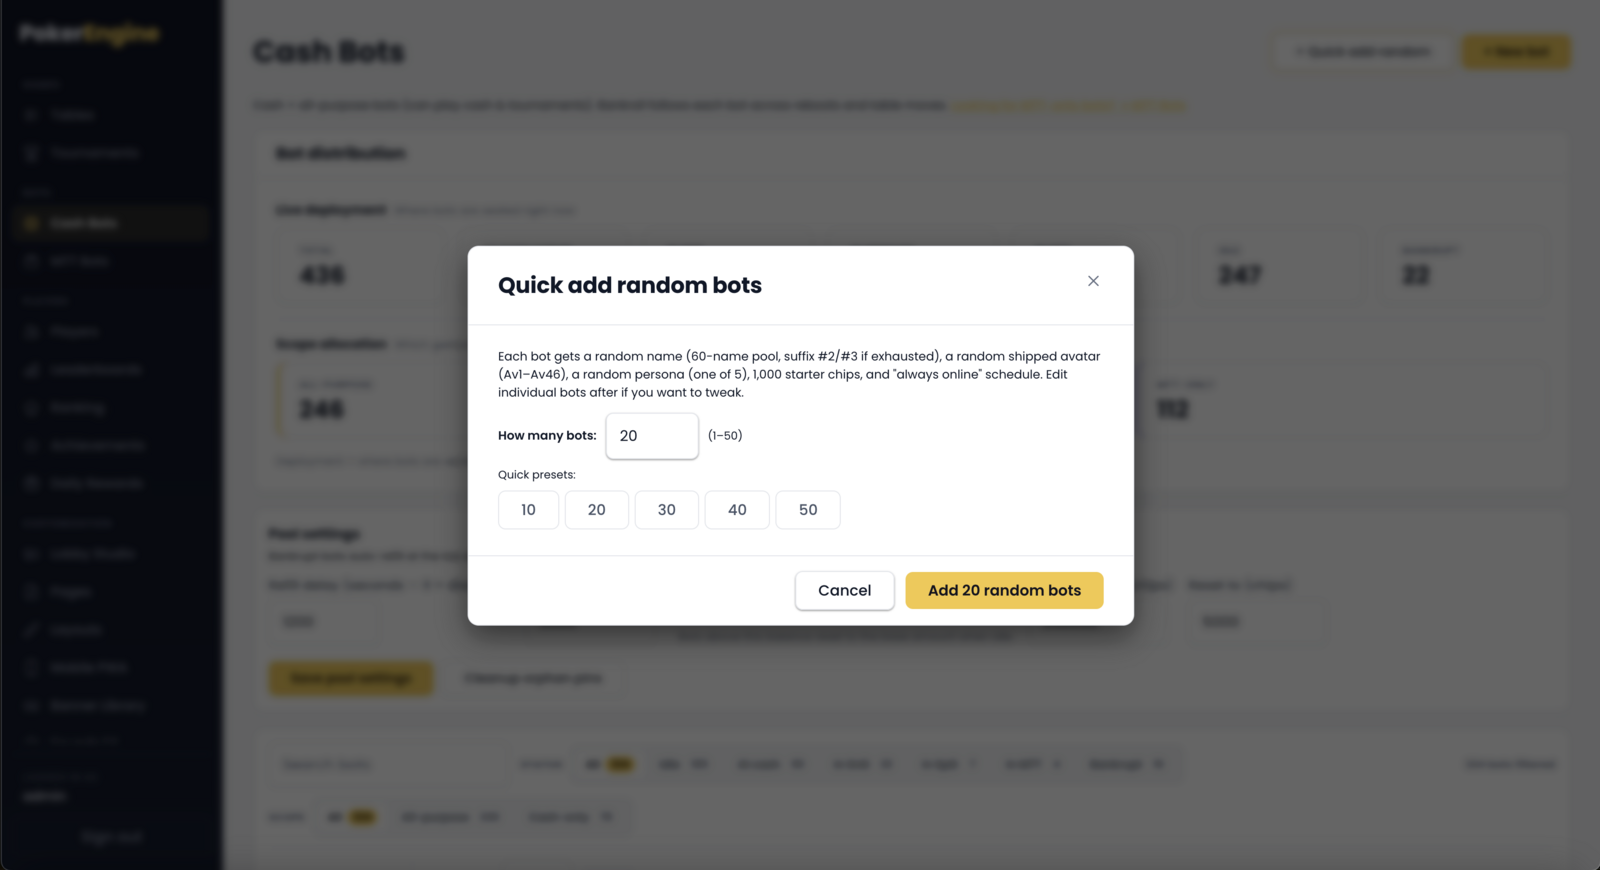
A bot’s settings
- Name — unique display name.
- Persona (play style) — how the bot plays: tight‑passive, tight‑aggressive, loose‑passive, loose‑aggressive, balanced, or random (a style is picked each time it sits down). This shapes how the bot bets and bluffs.
- Bankroll — its chip stack. This is persistent: it follows the bot across server restarts and table moves, going up and down as the bot plays.
- Avatar — pick from 46 built‑in portraits or upload your own image (up to 1 MB).
- Allowed games (scope) — which games this bot may join: everything, cash tables only, or a specific tournament format only. You can change this per bot or in bulk from the roster.
- Schedule — when the bot is online (see below).
- Pin to a table (optional) — lock a bot to one specific table so it only ever plays there.
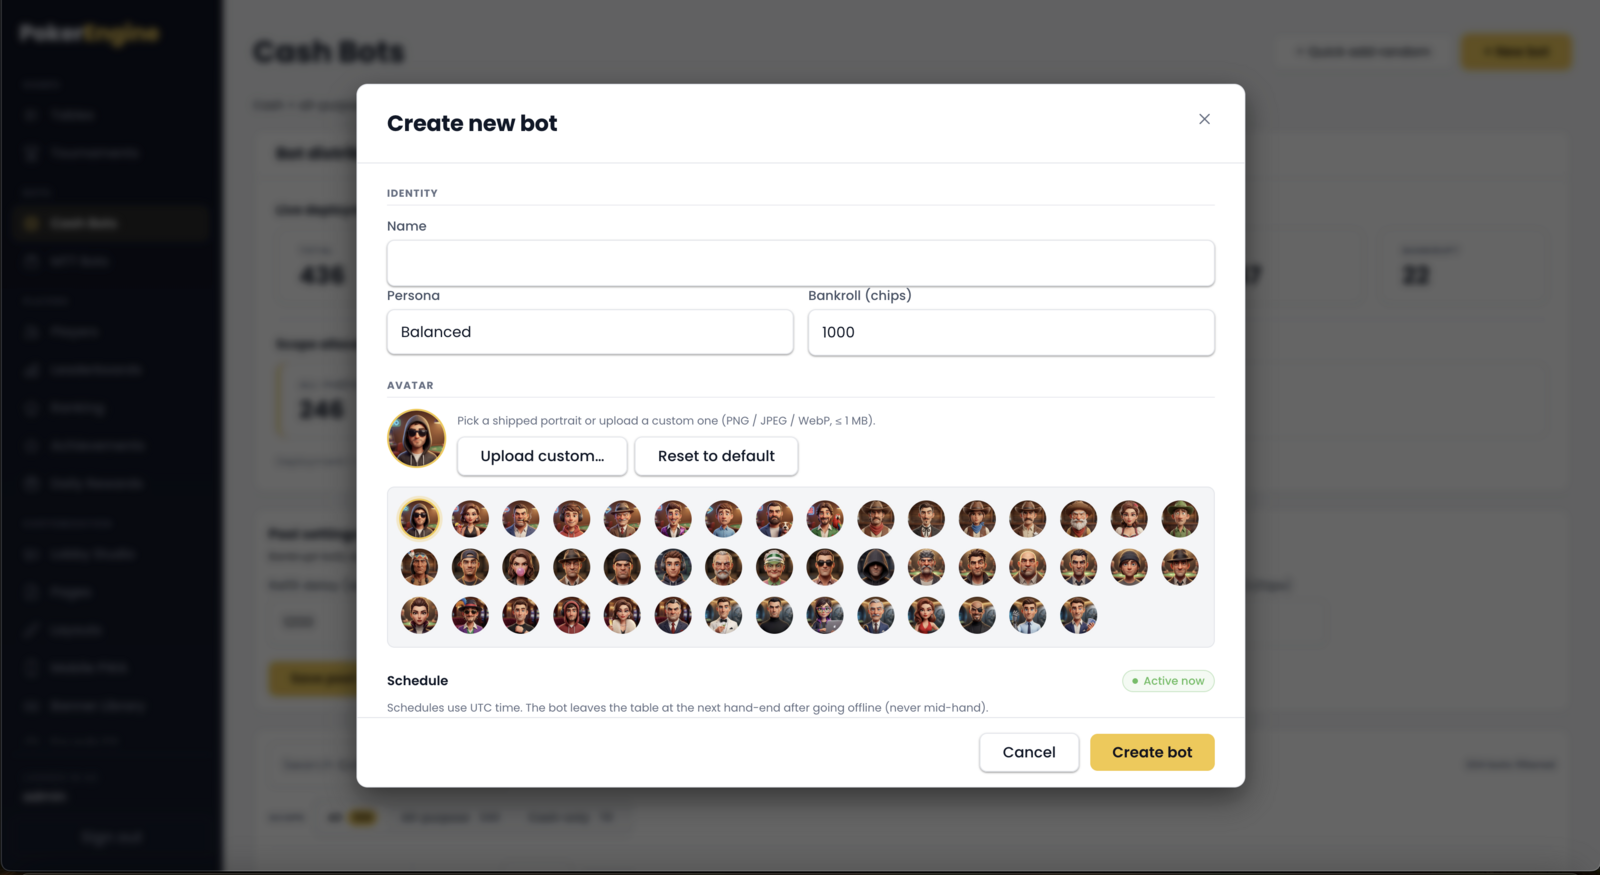
Bot schedules (making the lobby feel human)
Instead of every bot being online 24/7, you can give bots realistic online/offline hours so your traffic ebbs and flows like a real room. In the schedule editor:
- Presets — one click for Always online, Weekday 9–5, Evenings 18–23, Weekend warrior, or Custom.
- Custom weekly pattern — set specific time ranges per day. Handy generators fill a natural‑looking pattern for you (heavy grinder, casual evenings, night owl, random sprinkle, pro schedule).
- Vacation mode — force a bot offline until a chosen date.
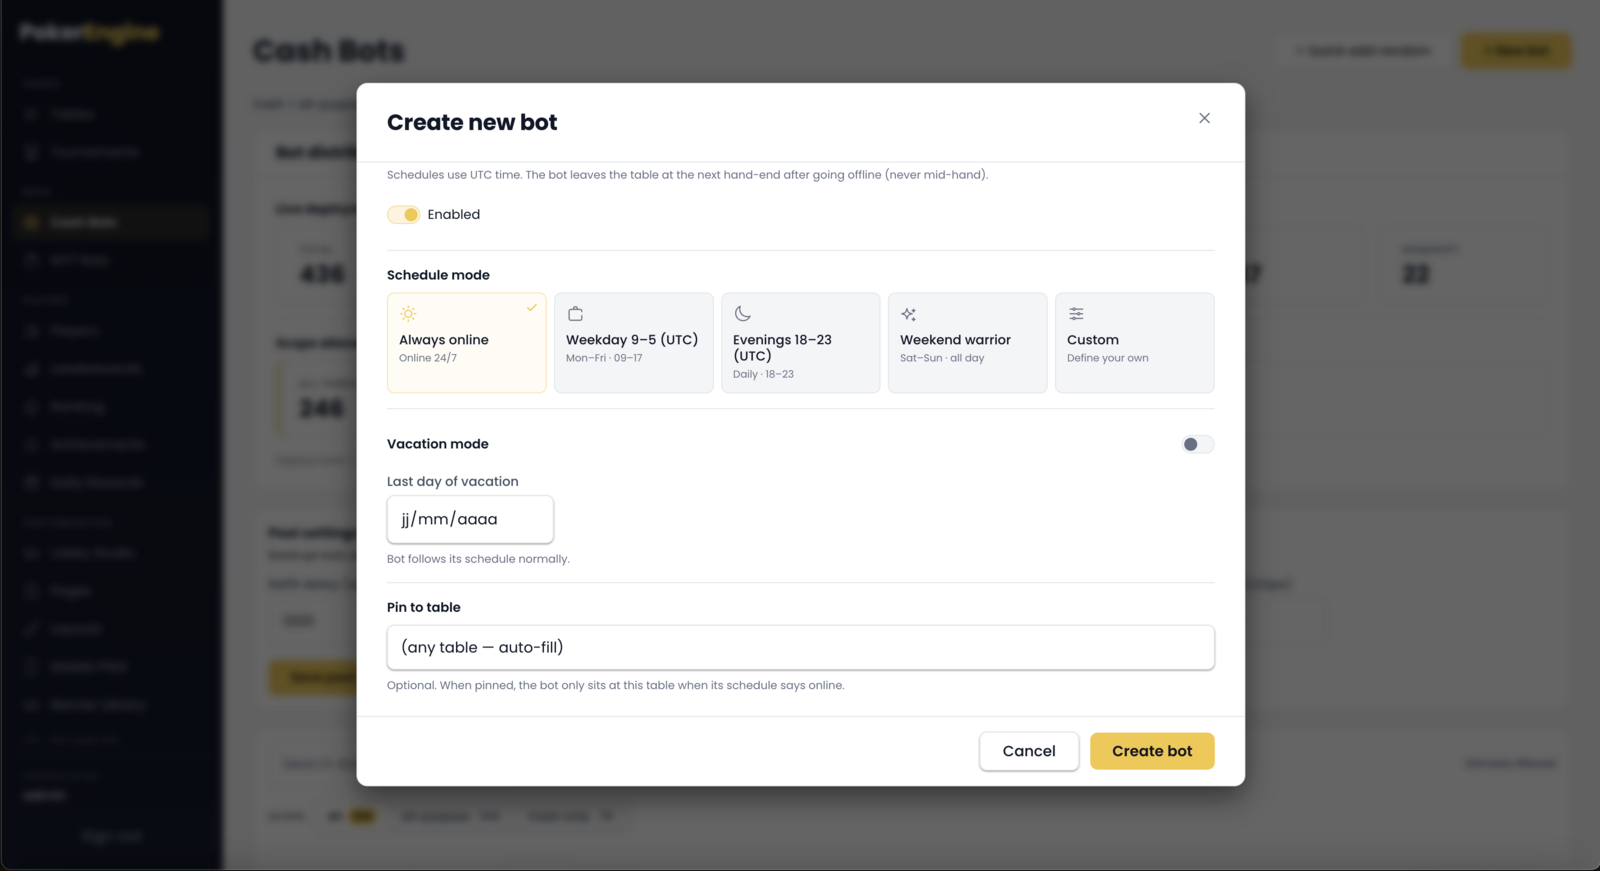
All schedule times are in UTC, and a bot going offline never interrupts a hand — it leaves at the end of the current hand, never mid‑play.
Keeping the pool healthy
Because bankrolls drift as bots win and lose, two automatic safety valves (in Pool settings) keep your pool in good shape:
- Bankruptcy auto‑refill — when a bot goes broke, it’s automatically topped back up after a short delay (default: to 1,000 chips, 60 seconds later) so it can rejoin games. Set the delay to 0 to disable.
- High‑bankroll cap‑reset (optional, off by default) — if a lucky bot grows too rich, reset idle over‑rich bots back to a base amount so they keep fitting your lower‑stake tables. You choose the threshold and the reset amount.
How bots seat themselves and move around
You don’t micromanage seating — the scheduler does it, following a few smart rules:
- Bots fill your tables automatically based on each table’s initial bots setting (from the Tables section) and each bot’s schedule and allowed games.
- One seat is always kept free on a bots‑only table, so a real player can always sit down.
- Bots migrate to tables that fit their stack. Each table can define a minimum chip band (from the Tables section); bots that fall below a table’s floor drift to a better‑matched table at the next hand‑end. A built‑in “settle” delay stops bots from hopping around too often.
- Pinned bots stay put at their assigned table regardless of stack size.
Manual controls
- Seat at table — drop an idle bot into a specific table yourself (a one‑hand override even if it’s off‑schedule).
- Set scope (per bot or in bulk) — quickly switch bots between cash, tournaments, or all.
- Avatar upload / reset, Edit, Delete.
- Cleanup orphan pins — if you delete or rename a table, bots pinned to it become “orphaned” and won’t seat anywhere; this button frees them.
How this connects to the Tables section
Two per‑table settings drive bot behavior:
- Initial bots (per table) — how many bots seat there when the server starts. Changing this requires a restart (bots are seeded at startup).
- Bot chip band (per table, min/max) — which bots fit that table by stack size. Changes here apply live — the scheduler re‑sorts bots on the fly, no restart needed.
Good to know
- Right‑size your pool. You need enough bots to cover all your tables’ initial‑bot counts plus schedule gaps, but not so many that they crowd out real players — the reserved free seat helps, but a lean, well‑scheduled pool feels most natural.
- A bot can’t be deleted while it’s seated — remove it from its table first. Its chip history is kept for auditing.
- Most changes are live. Names, avatars, scope, schedules, pins and all pool settings apply immediately; only a table’s initial bots count needs a restart.
MTT Bots
The MTT Bots section (under Bots) manages the AI players dedicated to tournaments. It works exactly like Cash Bots — same pool, same bot settings, same schedule editor — but it focuses on the bots that fill your tournaments, and it lists a leaner view (the full pool overview, filters and distribution stats live on the Cash Bots page).
It’s one shared bot pool. Everything about a single bot — name, play style (persona), avatar, bankroll and schedule — is identical to Cash Bots. This page is just the tournament‑focused view of that pool. Below is what’s specific to tournament bots.
Who shows up here
This page lists two kinds of bots:
- MTT‑only bots — bots dedicated to tournaments. They carry an MTT only badge in the roster.
- All‑purpose bots — bots allowed to play everything (they also appear on the Cash Bots page; it’s one shared pool).
A bot’s allowed games (scope) decides where it can play. You set it when you create a bot, or with the quick scope buttons on each row.
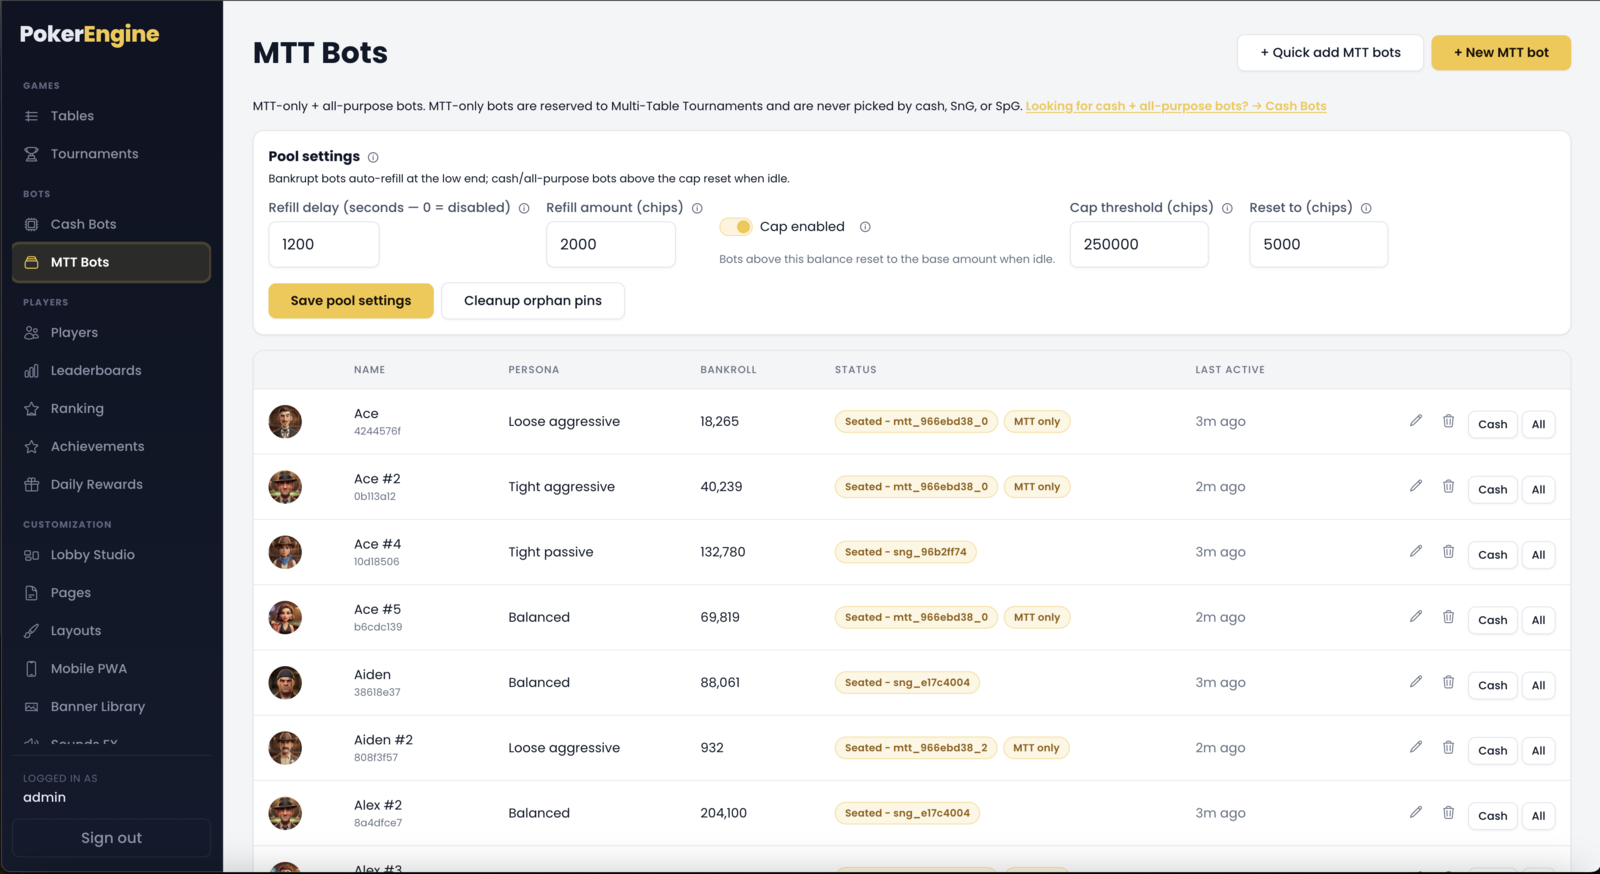
Adding tournament bots
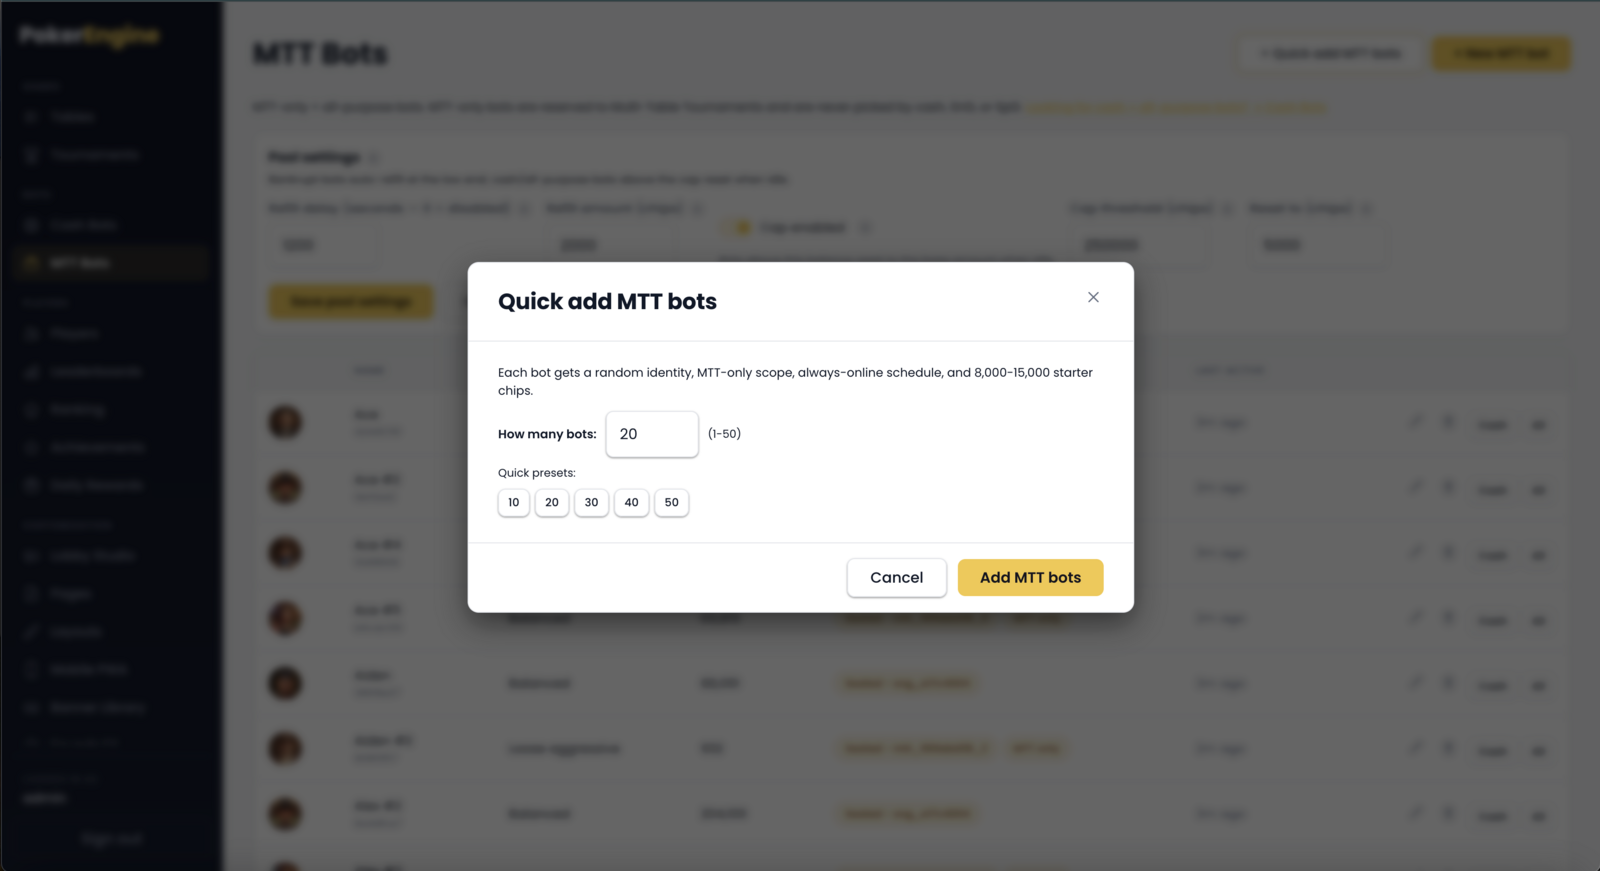
- New MTT bot — opens the same create form as Cash Bots, but pre‑set for tournaments (scope = tournaments, a higher starting bankroll suited to buy‑ins).
- Quick add MTT bots — instantly create a batch of tournament‑ready bots with random identities, always online, and a generous starting bankroll (8,000–15,000 chips).
Everything else about a bot — name, persona, avatar, bankroll and schedule — is identical to Cash Bots.
The one rule to remember: MTT‑only vs all‑purpose
This is the key thing to get right:
- MTT‑only bots play only multi‑table tournaments (MTTs). They will not fill Sit & Go or Spin & Go games.
- Sit & Go and Spin & Go are filled by all‑purpose bots.
So if you run Sit & Go or Spin & Go tournaments, make sure you have enough all‑purpose bots in your pool — MTT‑only bots won’t touch them. If in doubt, all‑purpose bots are the flexible choice: they cover cash tables, MTTs, Sit & Go and Spin & Go alike.
MTT‑only bots are reserved to multi‑table tournaments. If your Sit & Go / Spin & Go games sit empty, it’s almost always because the pool is short on all‑purpose bots — add a few and they’ll fill again.
Where tournament bot behaviour is actually configured
It’s worth being clear about the division of labour:
- This page decides who exists — the roster of tournament bots, their scope, bankroll and schedule.
- The tournament template decides how bots fill each tournament — how many bots join, how fast they arrive (instant or a natural drip), and the maximum number of bots per tournament. Those controls live in the Tournaments section, on each template.
In short: build your bot pool here, then tune each tournament’s bot fill on its template.
Good to know
- A bot needs enough chips to enter. A bot only joins a tournament if its bankroll covers the buy‑in, so keep tournament bots funded for the buy‑ins you run (quick‑add gives them a comfortable starting bankroll).
- Scope doesn’t force a seat. Being listed here means a bot is eligible for tournaments — it actually joins only when a tournament is filling and the template’s settings allow it.
- Shared pool health. The same bankruptcy auto‑refill and high‑bankroll reset from Cash Bots’ pool settings apply to tournament bots too.
- Want the live “in tournament” count? The full breakdown of where bots are seated (including how many are in MTTs) is on the Cash Bots distribution card.
Players
The Players section (under Players) is your searchable directory of everyone on the platform — real players and bots — all in one database view. It’s where you look someone up, check their activity, and keep an eye on who’s online.
This page is mainly for viewing and finding players. Actions that change a player’s access (suspending or banning) live in the separate Moderation section, and bots are managed on the Cash Bots / MTT Bots pages.
The player list
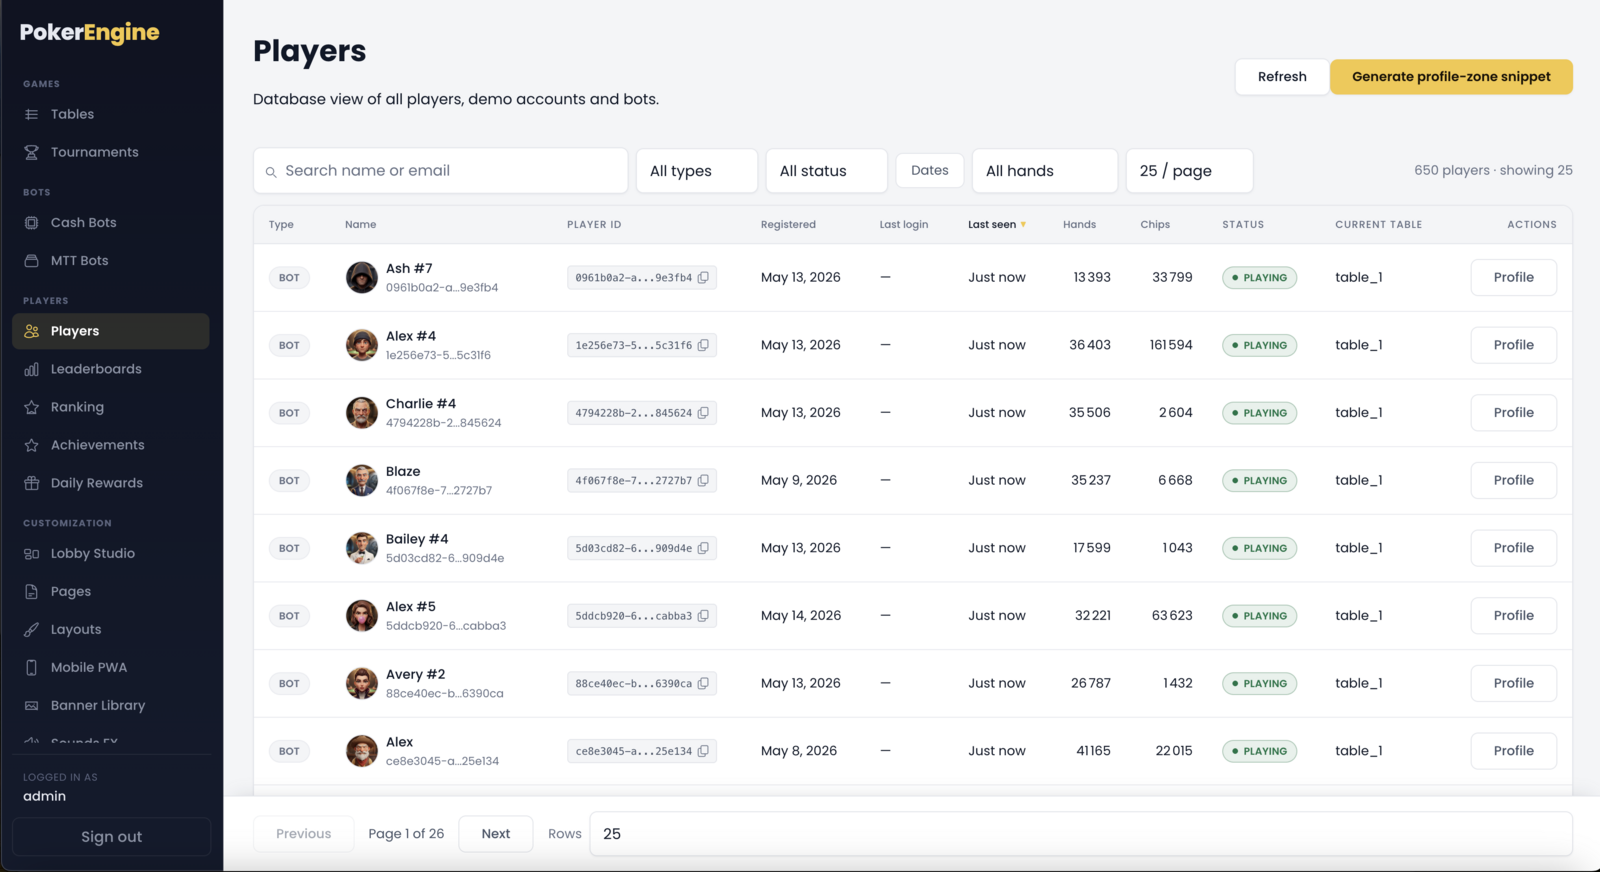
Each row shows a player at a glance:
| Column | What it shows |
|---|---|
| Type | A badge marking the account as a Player (a real registered user) or a Bot. |
| Name | Avatar + display name, with the player’s email underneath (for real accounts) and a Verified / Unverified badge for email-based accounts. |
| Player ID | A short, copyable ID (click to copy the full value). |
| Registered | When the account was created. |
| Last login / Last seen | Recency of activity. |
| Hands | How many hands the player has played. |
| Chips | Their current balance (hover to see wallet vs. chips currently on a table). |
| Status | Live presence: Playing, Online, Idle, or Offline. |
| Current table | The table they’re seated at, if any. |
| Actions | See What you can do on a player below. |
The list refreshes on its own every 30 seconds, so status and chips stay current.
Finding players
- Search — type a name, email, or exact player ID.
- Type filter — All / Players / Bots.
- Status filter — All / Online / Playing / Idle / Offline.
- Dates — filter by registered or last seen date ranges.
- Hands filter — All / 0 / 1–10 / 10–100 / 100+.
- Sorting — click a column header to sort (Type, Name, Registered, Last login/seen, Hands, Chips).
- Pagination — choose 25 / 50 / 100 per page; a counter shows e.g. “584 players · showing 25”.
What you can do on a player
- Profile — opens that player’s public profile page (their stats, achievements and history) in a new tab, exactly as other players see it.
- Verify email — for an email-based account whose email is still unverified, one click marks it verified (handy if a confirmation email was missed).
- Copy player ID — copies the full ID to your clipboard.
Suspending or banning a player, and reviewing reports or IP activity, are done in the Security sections (Moderation, Player Reports, IP Monitoring). The Players page is your directory and observation deck.
Optional: the profile-zone embed
At the top you’ll find Generate profile-zone snippet. This is entirely optional and unrelated to running your platform — PokerEngine already shows player profiles inside your own site. The snippet is only for when you also want to display the signed-in visitor’s own profile on a separate external website you own (for example a marketing or community site). You paste one small HTML snippet there once; anonymous visitors see a “Sign in” prompt, and it can deep-link to a specific profile. If you don’t run an external site, you can ignore this button entirely.
Good to know
- Bots appear here too for a complete database view, but you manage them (personas, bankroll, avatars, schedules) on the Bots pages — here they’re view-only.
- Player types are detected automatically — you don’t tag them; the platform classifies each account as player, demo, or bot.
- Newly active players show up immediately — someone seated at a table appears in the list even before the next refresh.
Leaderboards
The Leaderboards section (under Players) lets you run competitive rankings that reward your best players and keep them coming back. You can run as many leaderboards as you like, each ranking players by a chosen metric over a chosen period, with chip prizes for the top places.
This is different from the Ranking section (a single Bronze-to-Master skill-tier system) and from Daily Rewards (a login-streak calendar). Leaderboards are time-boxed competitions with prizes.
What the page shows
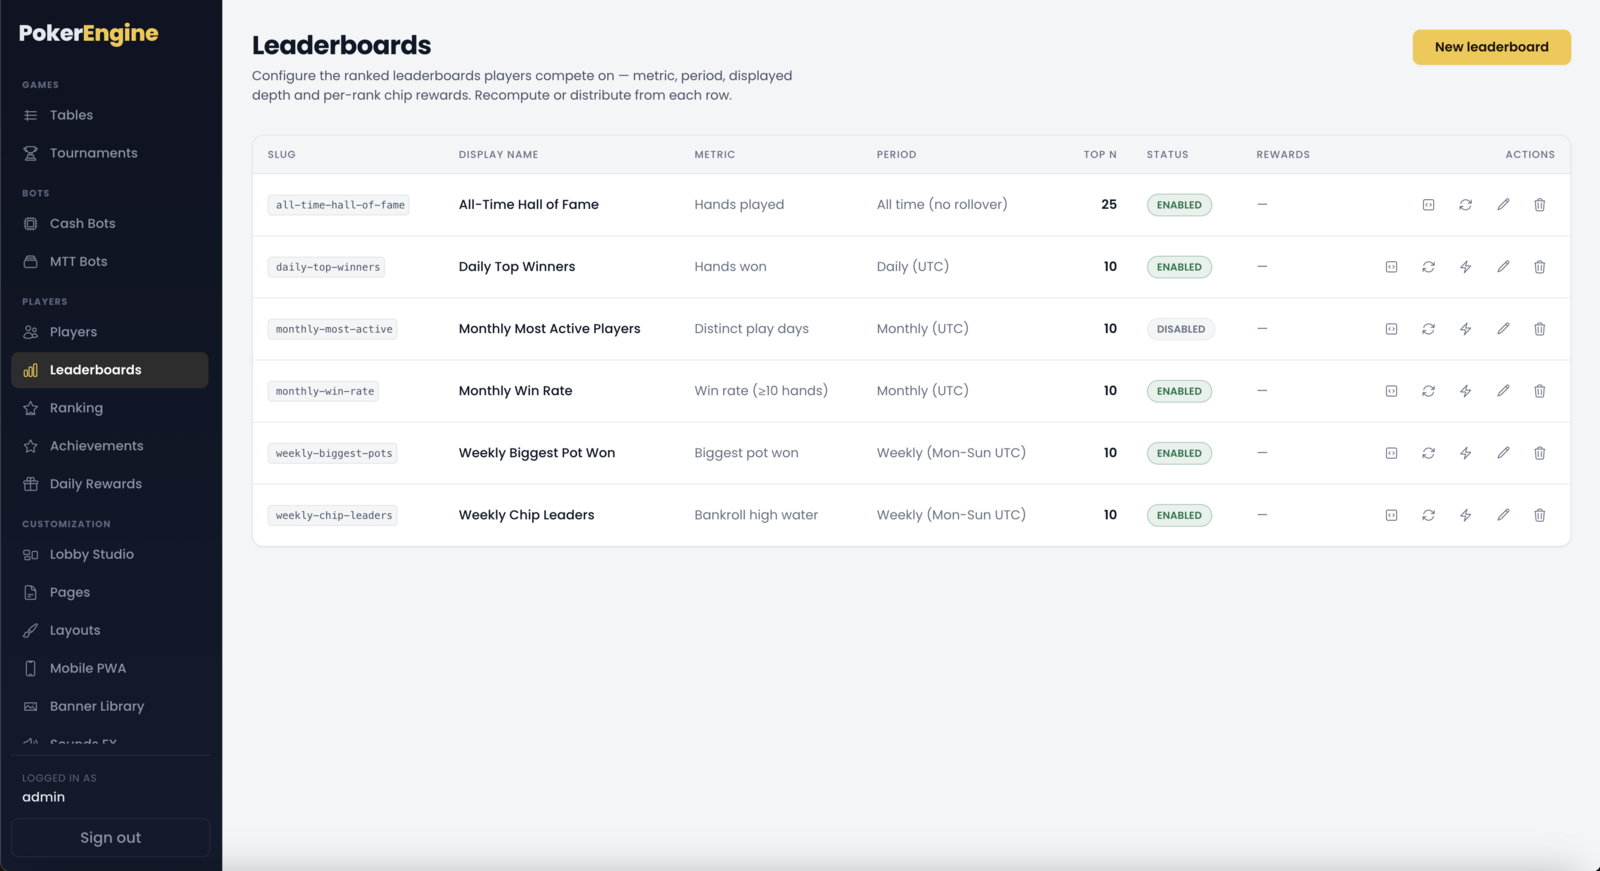
A table of your leaderboards, each row showing its slug, display name, the metric it ranks, its period, how many places it shows (Top N), whether it’s enabled, and a short rewards summary. PokerEngine ships with 6 ready-made leaderboards on first launch (daily top winners, weekly chip leaders, biggest pot, monthly win rate, most active, and an all-time hall of fame) — you can edit or delete them freely.
Creating a leaderboard
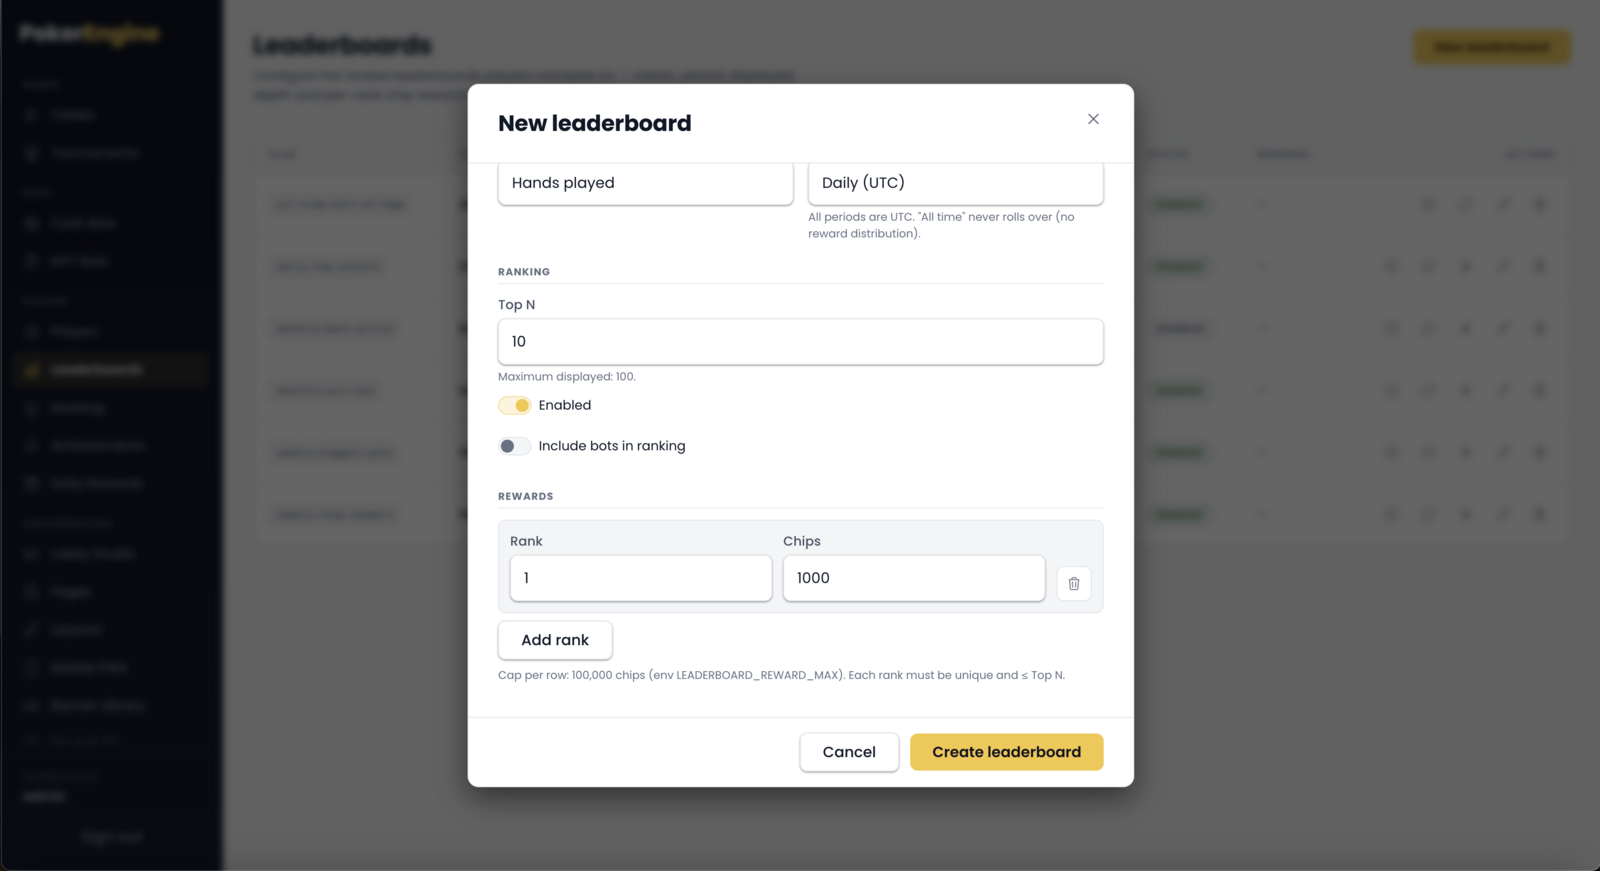
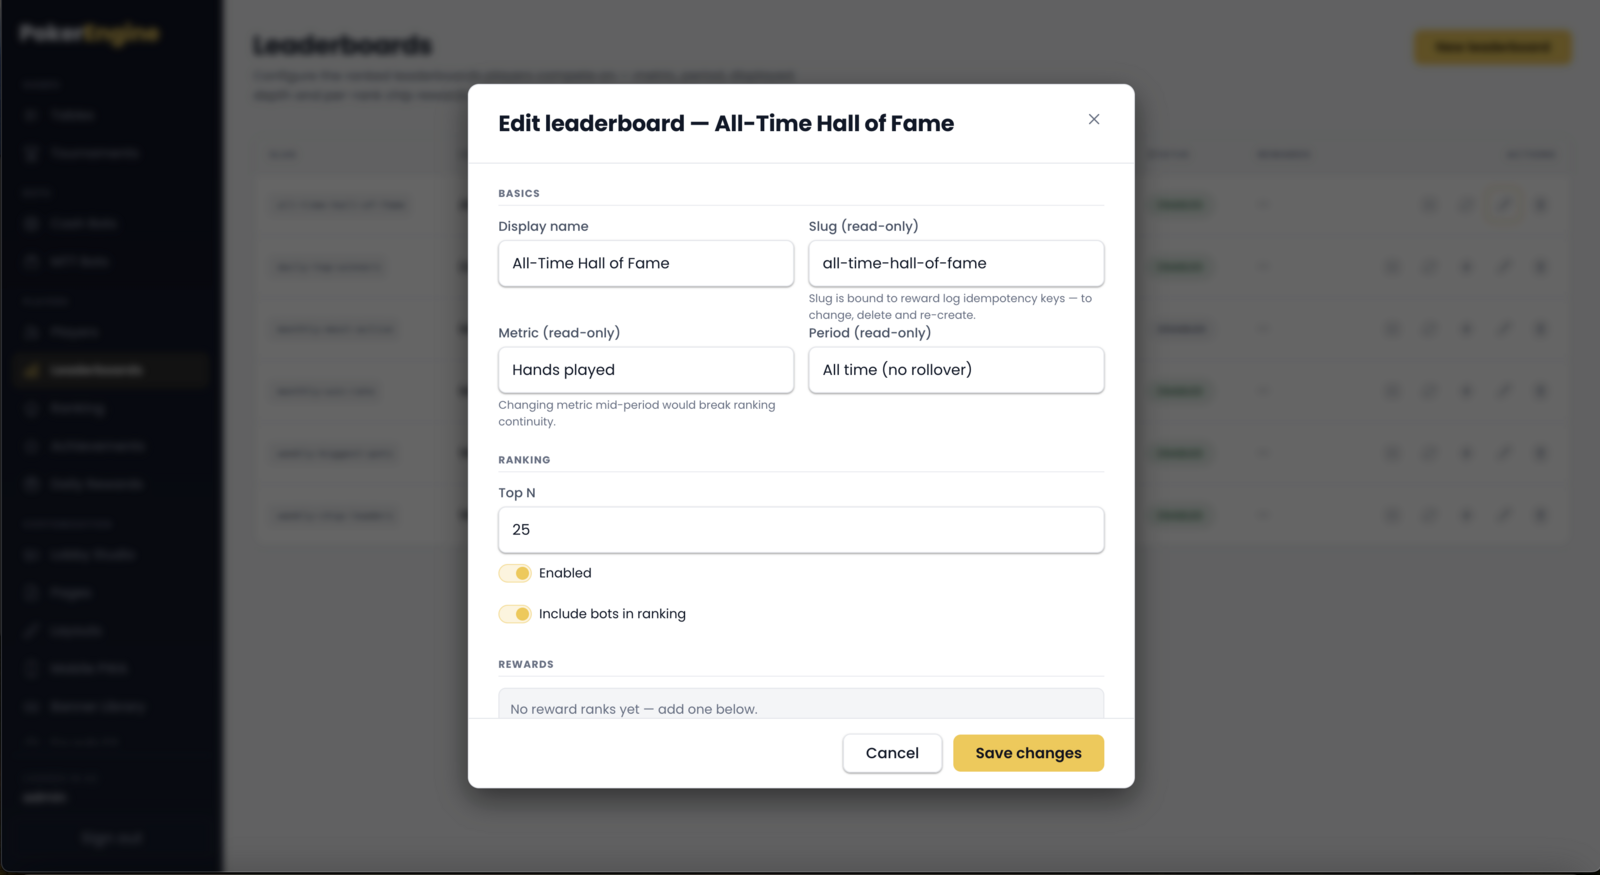
Click New leaderboard and set:
- Display name — the title players see.
- Slug — a short unique ID used in the address/embed. Permanent once created.
- Metric — what players are ranked by. Choose one:
- Hands played — total hands.
- Hands won — hands taken down.
- Win rate — % of hands won (only counts players with at least 10 hands, so it’s fair).
- Bankroll high-water — the highest balance reached during the period.
- Biggest pot won — the single largest pot.
- Distinct play days — how many different days the player was active (rewards consistency).
- Total chips won (lifetime) — cumulative winnings.
- Period — the competition window (all in UTC):
- Daily — resets at UTC midnight.
- Weekly — Monday to Sunday (UTC).
- Monthly — calendar month (UTC).
- All-time — never resets; a prestige “Hall of Fame” board (no prizes — see below).
- Top N — how many places are shown and ranked (1–100).
- Rewards — the chip prize for each rank. Add a row per paid place (e.g. 1st = 1,000, 2nd = 500…). Leave it empty for a ranking-only board with no prizes.
- Include bots — off by default, so bots don’t clutter your boards or win prizes. You can turn it on, but it’s usually best left off.
- Enabled — turn the board on or off without deleting it.
Managing a leaderboard
Each row gives you:
- Recompute — force an immediate fresh calculation of the standings (they’re otherwise cached briefly for speed).
- Distribute rewards — manually pay out the prizes for the last closed period (safe to click — already-paid periods are skipped).
- Edit — change the name, Top N, rewards, enabled state or bot inclusion. (The slug, metric and period are locked after creation — to change those, delete and re-create the board.)
- Delete — removes the board and its reward history (irreversible).
How prizes are paid out (automatically and safely)
You don’t have to babysit payouts. When a period closes, PokerEngine works out the final standings and credits the chip prizes to the winners on its own. It’s designed to be reliable:
- Payouts happen shortly after a period ends (triggered by ongoing play), and if no games are running you can always click Distribute yourself.
- If your server was offline when a period ended, it catches up automatically the next time it starts — no missed prizes.
- Prizes are never paid twice, even across restarts — every payout is recorded and locked.
- All-time boards never pay prizes (they never “close”); use them purely for prestige.
Good to know
- Everything runs on UTC. Daily/weekly/monthly boundaries are UTC midnight, Monday, and the 1st — worth telling players if your audience is in another timezone.
- Bots are excluded by default, so leaderboards reflect real competition.
- How players see it. Leaderboards appear inside your platform (a full page and a compact widget). Optionally, if you also run a separate external website, each board has an embed snippet you can paste there — but you don’t need it to use leaderboards inside PokerEngine.
- Related but separate: the Ranking section is a persistent skill-tier badge system, and Daily Rewards is a login-streak calendar. A player can earn from all three independently.
Ranking
The Ranking section (under Players) is your platform’s skill-tier ladder — a single, always-on rating that follows each player and shows how good they are, from Bronze up to Master. It’s the badge players wear with pride.
Don’t confuse it with Leaderboards (many time-boxed competitions with chip prizes) or Achievements (one-time unlocks). Ranking is one continuous skill rank that rises and falls with how a player performs.
How ranking works
Ranking is skill-based, not a simple count of wins. When a player finishes a tournament, PokerEngine compares them against everyone else in that event and adjusts their rating — beating stronger fields moves you up faster. Over time this settles each player into a tier that reflects their real ability.
Key things to know about how a rank is earned:
- Tournaments drive ranking. A player’s rank changes when an MTT or Sit & Go finishes. Cash-game hands do not affect rank. (So a site that only runs cash tables will keep everyone unranked — that’s expected.)
- New players start “Unranked”, then show as “Provisional” for their first few rated tournaments while the system learns their level, before settling into a firm tier.
The tiers
Six tiers, each with three divisions (III → II → I as you climb):
Bronze → Silver → Gold → Platinum → Diamond → Master
The tier names, boundaries and colors are fixed — you don’t need to configure them. What you can customize is the badge artwork for each tier (below).
Settings
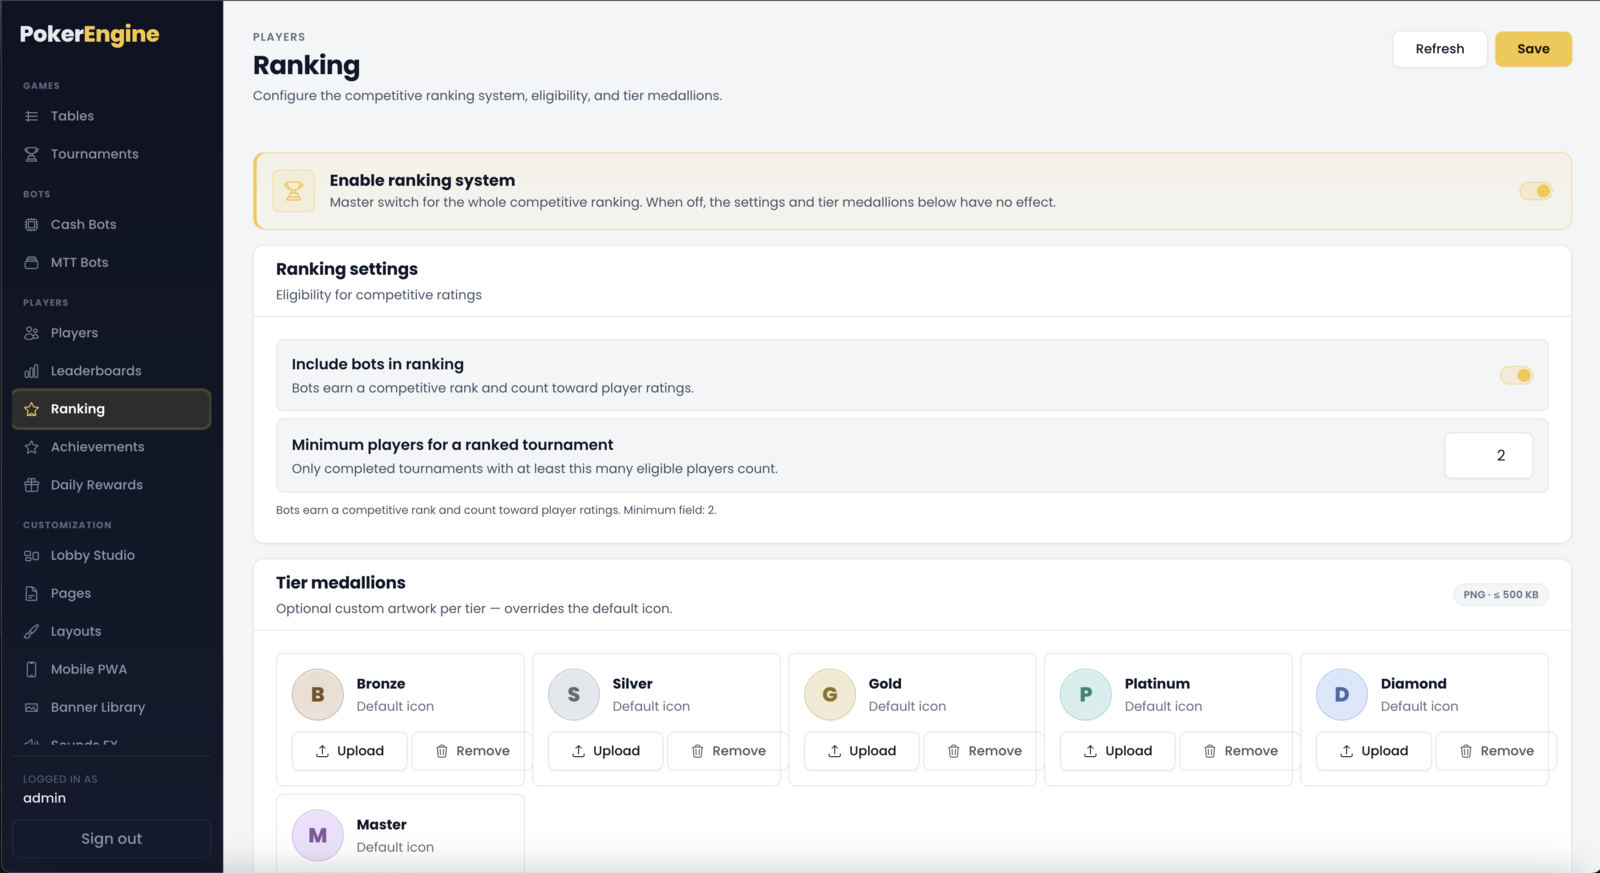
Ranking is refreshingly simple to run — just three controls:
- Enable ranking system — the master switch. Turn it off and ranks stop updating and badges hide. Turning it off is non-destructive: everyone’s rating is kept and comes right back when you re-enable it.
- Include bots — off by default, so ranks reflect real players only. If you turn it on, bots earn ranks and also count as opponents in the rating math.
- Minimum field — the smallest number of players a tournament needs for it to count toward ranking (default 4). If a finished tournament has fewer players than this, none of its players are rated. Raise it to keep ranks meaningful on a busy site; lower it (down to 2) to let even small tournaments count on a newer site.
Click Save to apply.
Tier medallions (custom badges)
Each tier shows a medallion in the player’s nav bar and on their profile. Out of the box these are clean built-in designs, but you can upload your own artwork per tier to match your brand:
- One PNG per tier, up to 500 KB, between 1 and 1024 pixels.
- Upload to set a custom badge, Remove to fall back to the built-in design.
No image files are required — if you upload nothing, players still see polished default medallions.
Where players see their rank
The tier medallion appears in the top navigation (a compact chip with the tier name), on the player’s profile, and in the “My Rank” widget. Any custom badges you upload replace the defaults everywhere automatically.
Good to know
- Expect empty ranks on a fresh install — players need to finish a few tournaments before tiers appear. This is normal.
- The minimum-field gate is all-or-nothing per tournament: below the threshold, the whole event is skipped for ranking, not just the extra players.
- The ladder is fixed; only the badge images are editable. This keeps ranking fair and consistent across every PokerEngine site.
Achievements
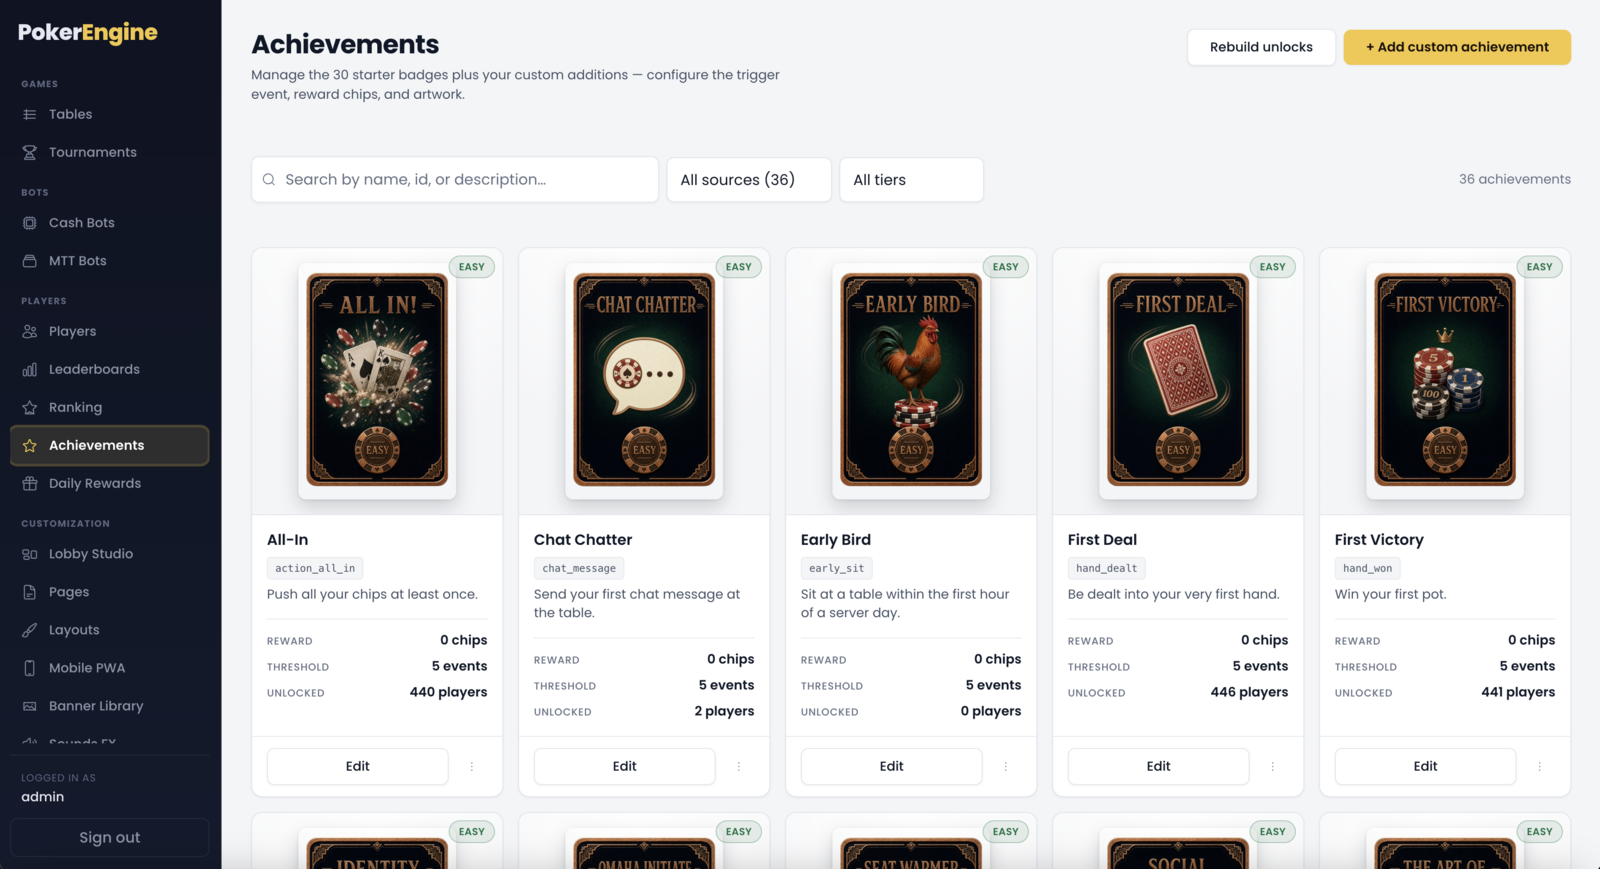
The Achievements section (under Players) is your catalog of unlockable badges — the little rewards players earn for hitting milestones like winning their first hand, landing four of a kind, or taking down a tournament. Achievements are a powerful, low-effort way to keep players engaged and coming back.
PokerEngine ships with a ready-made library of achievements across four difficulty tiers — installed automatically the first time you launch your platform, artwork included. You don’t have to create anything to get started; you can simply edit these, add your own, or leave them as they are.
Achievements are one-time, permanent badges (once earned, kept forever). That’s different from Ranking (an evolving skill tier) and Leaderboards (time-boxed competitions that reset and pay prizes).
What the page shows
A gallery of achievement cards. Each card shows its artwork, name, difficulty tier, the event that unlocks it, its description, the chip reward on unlock, and how many players have earned it. You can search and filter by source (built-in vs. your custom ones) and by tier.
The four tiers — Easy, Medium, Hard, Rare — are color-coded and set the badge’s prestige.
Adding a custom achievement
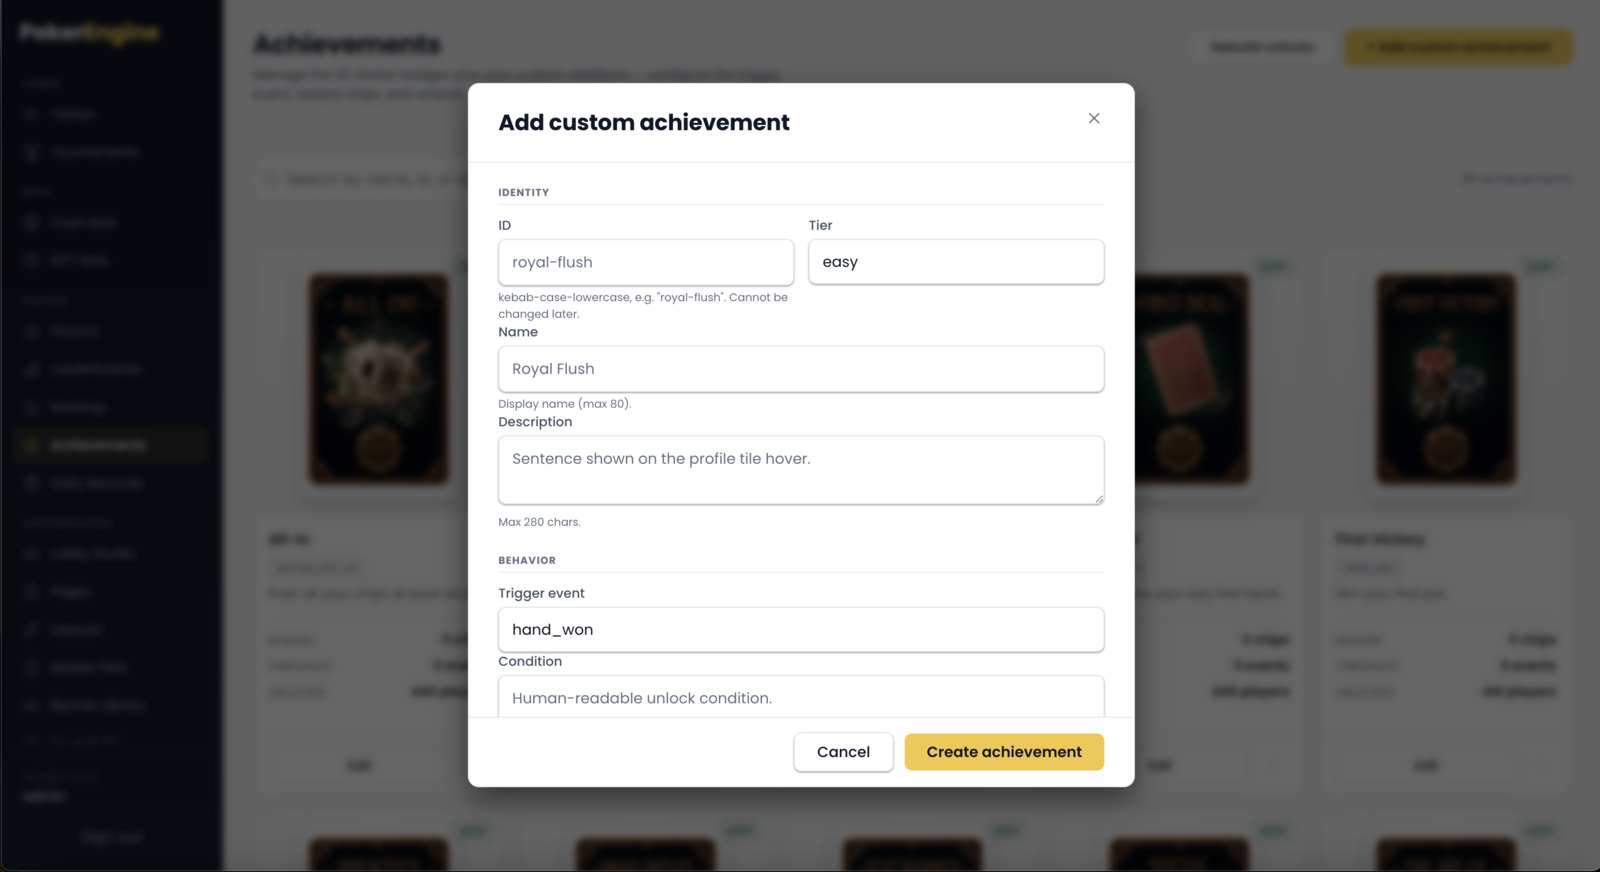
Click + Add custom achievement and fill in:
- ID — a short unique identifier (permanent once created).
- Name and Description — what players see.
- Tier — Easy / Medium / Hard / Rare.
- Trigger event — the in-game event that counts toward this achievement (see below).
- Unlock threshold — how many times the event must happen before it unlocks (e.g. “win 10 hands” = trigger hand won, threshold 10).
- Reward chips — chips granted the moment it unlocks (set 0 for a badge with no chip reward).
After creating it, use the card’s ⋯ menu to upload the badge artwork.
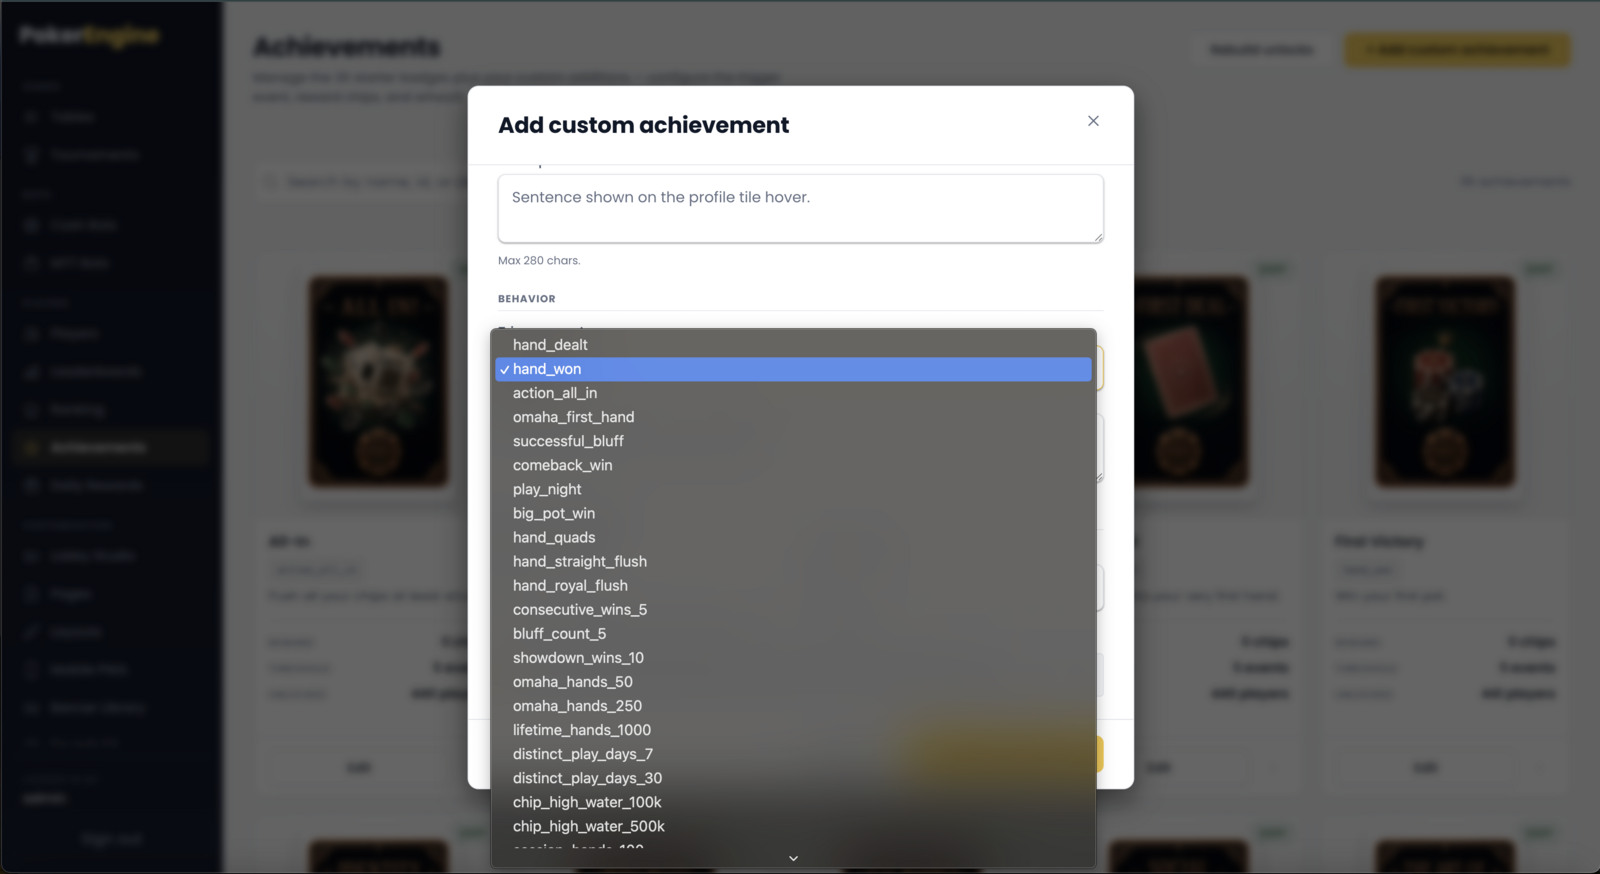
What can trigger an achievement
Custom achievements use PokerEngine’s built-in set of trigger events (you pick one from a list — there’s no coding involved). They cover a wide range of play, for example:
- Per-hand moments — playing a hand, winning a hand, going all-in, winning a big pot (10×+ the big blind), landing quads, a straight flush or a royal flush, pulling off a bluff, or a comeback from a tiny stack.
- Milestones over time — total hands played, win streaks, showdown wins, Omaha hands, or number of distinct days played.
- Chip milestones — reaching a high-water balance.
- Tournament results — first tournament win, finishing in the money, winning an MTT or a Spin & Go, or being a tournament veteran.
- Activity — sending a chat message, changing a name, sitting at a table, or visiting several different tables.
You set the threshold for each, so the same trigger can power an easy “win 1 hand” badge or a hard “win 1,000 hands” one.
Badge artwork
Each achievement can have its own PNG badge:
- PNG only, up to 500 KB.
- Portrait shape (a 2:3 ratio, e.g. 400×600), between 200×300 and 1200×1800 pixels.
Built-in achievements already have artwork; you can upload your own to override it, and revert to the original at any time.
Managing achievements
- Edit — adjust a built-in or custom achievement. (On built-in ones, the ID, name and tier are fixed; you can still tune the trigger, threshold, reward and artwork.)
- Upload / revert artwork — from the card’s ⋯ menu.
- Delete — only your custom achievements can be deleted (built-ins are permanent). Deleting a custom achievement also removes it from every player who had earned it, so use it with care.
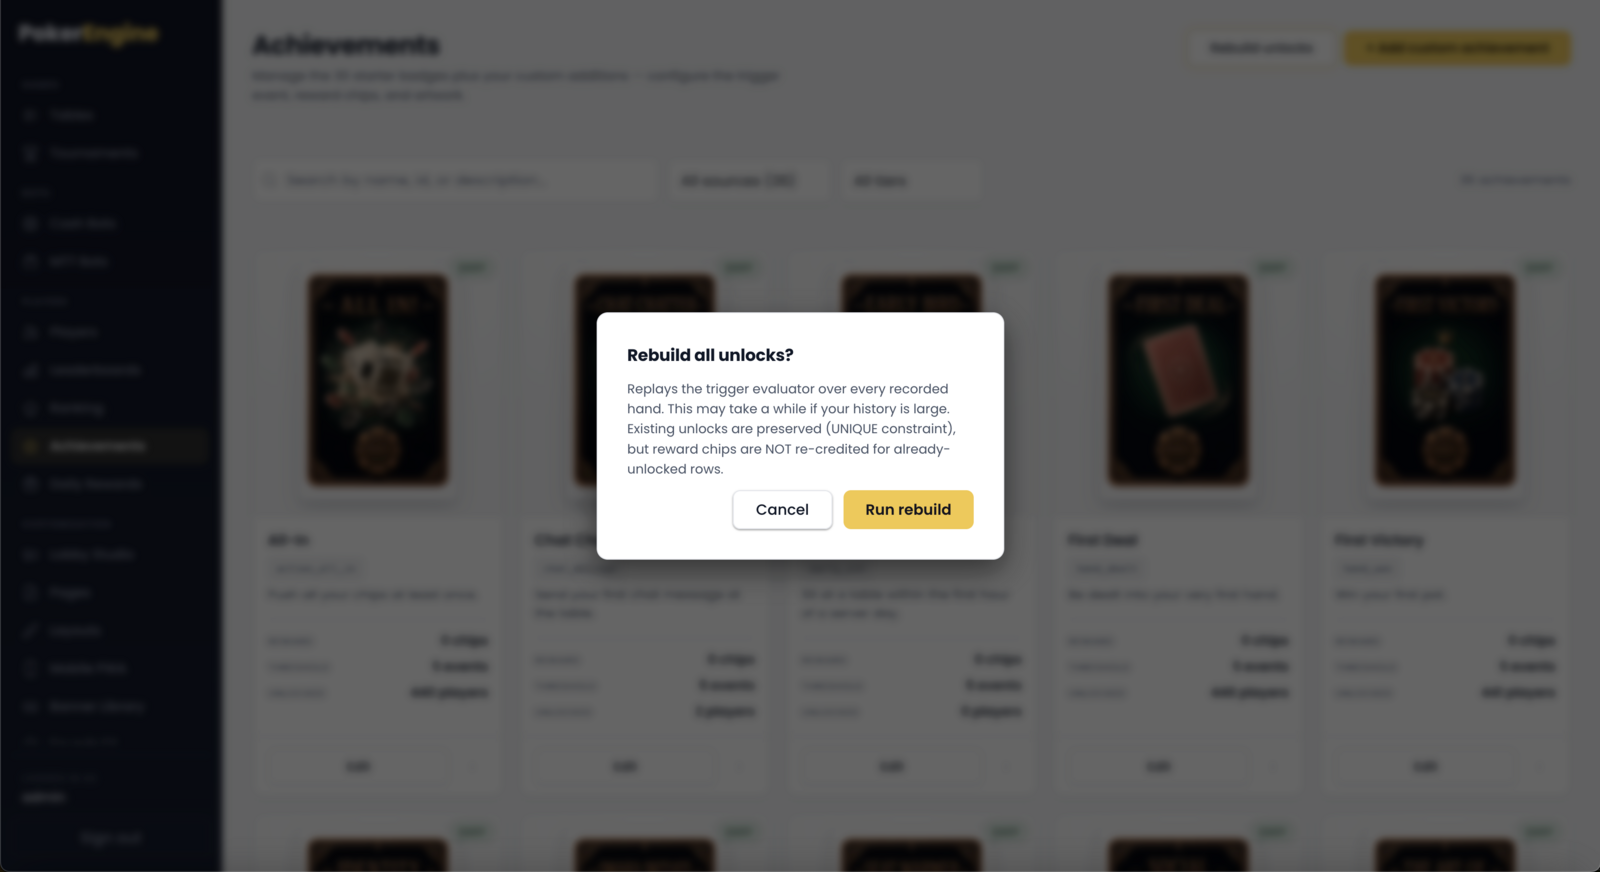
- Rebuild unlocks — replays your recorded hand history and awards any achievements players now qualify for. Handy after you add or change an achievement so existing players get credit retroactively. It never double-awards a badge; note that it backfills play-based achievements (not chat/name/table-sit ones) and does not re-pay chip rewards for badges already earned. It can take a while on a large history, so run it during a quiet period.
How players experience achievements
When a player unlocks one, they get a celebratory pop-up (with an optional sound), and it appears in their “My Achievements” area on their profile. You can fine-tune the pop-up, sound and an optional table-chat announcement in Settings.
Good to know
- Built-in achievements can’t be deleted — if you want to retire one, you can repoint or neutralize it by editing, but the catalog entry stays.
- Changing an achievement’s trigger resets progress toward it (players who already unlocked it keep the badge; others start over on the new condition).
- There’s no per-achievement on/off switch — custom achievements as a whole are controlled by a single setting (in Settings), while built-ins are always available.
- Unlocks are permanent and counted once — the system never awards the same badge twice, even if you rebuild.
Daily Rewards
The Daily Rewards section (under Players) is a login-streak system that gives players a reason to come back every day. Each day they log in, they can claim a chip reward; the longer their streak, the bigger the milestone payouts. It’s one of the simplest, most effective retention tools you have — and it works out of the box.
Unlike Achievements (one-time badges) or Leaderboards (competitions with resets and prizes), Daily Rewards is a self-service daily “faucet”: the player claims it, once per day, and the streak is the hook.
How it works
- A player can claim once per day. Claiming on consecutive days grows their streak.
- The reward cycle runs over a set number of days (30 by default). Most days pay a normal reward; special milestone days pay a bigger, fixed bonus — building anticipation toward the big final-day jackpot.
- When the cycle ends it simply repeats, so the streak (and the milestones) keep going indefinitely.
The reward calendar
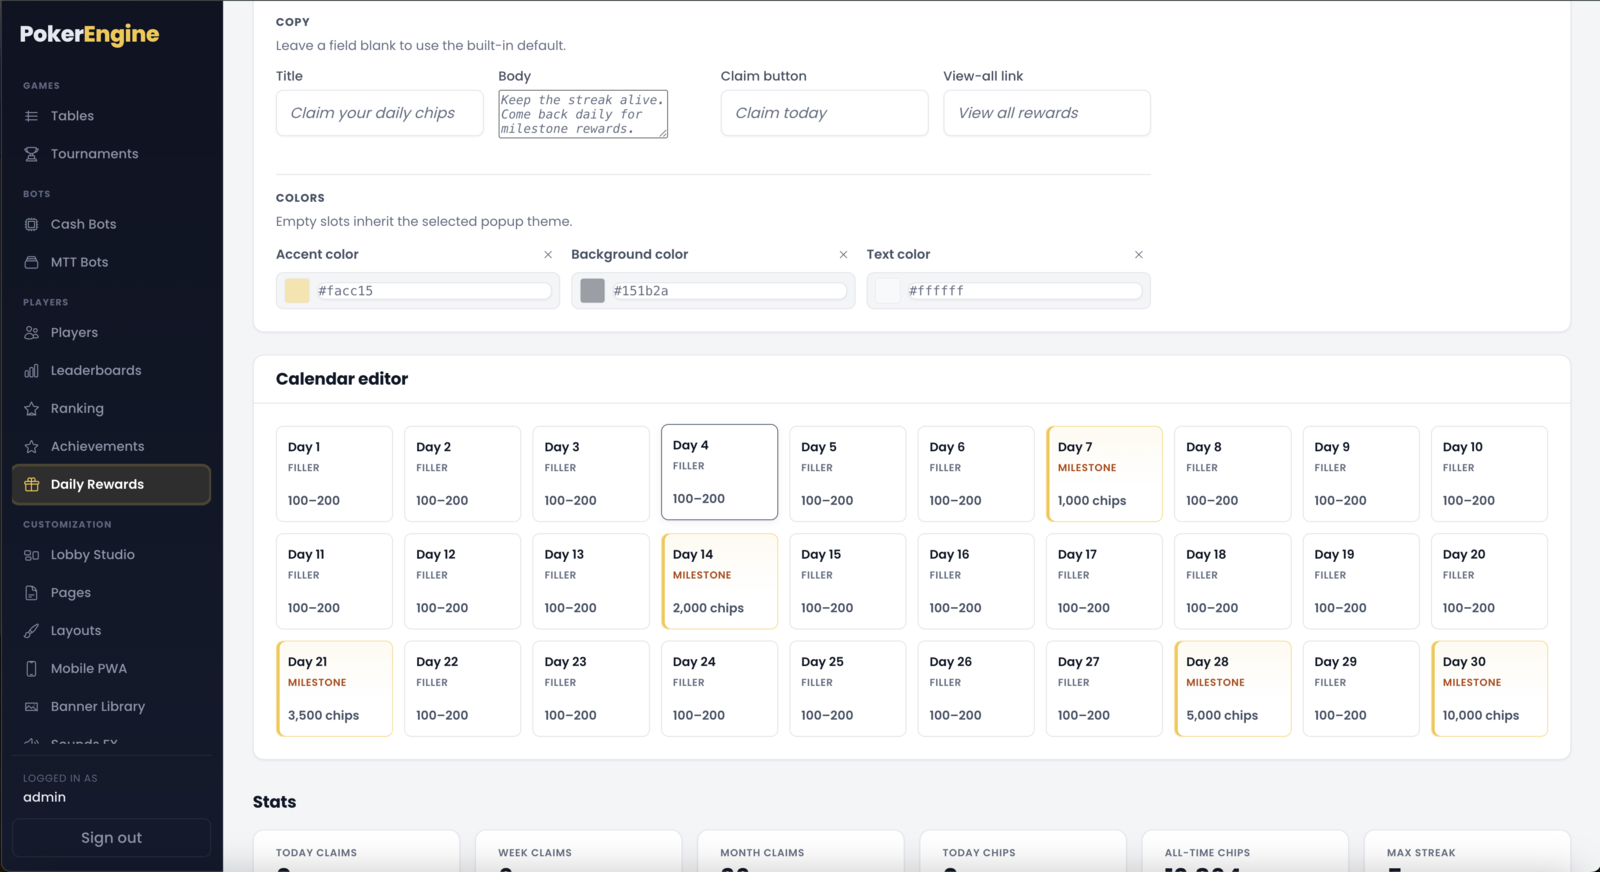
Rewards come in two kinds, shown on the calendar editor (one cell per day):
- Normal days pay a random amount within a range you set (e.g. 100–500 chips) — a little surprise each day.
- Milestone days pay a fixed bonus you choose.
Out of the box, the calendar comes pre-filled with sensible milestones:
| Day | Reward |
|---|---|
| 7 | 1,000 |
| 14 | 2,000 |
| 21 | 3,500 |
| 28 | 5,000 |
| 30 | 10,000 (jackpot) |
To change a day, click its cell and pick Normal (random range) or Milestone (a fixed amount). Everything you edit here is saved when you click Save.
Settings
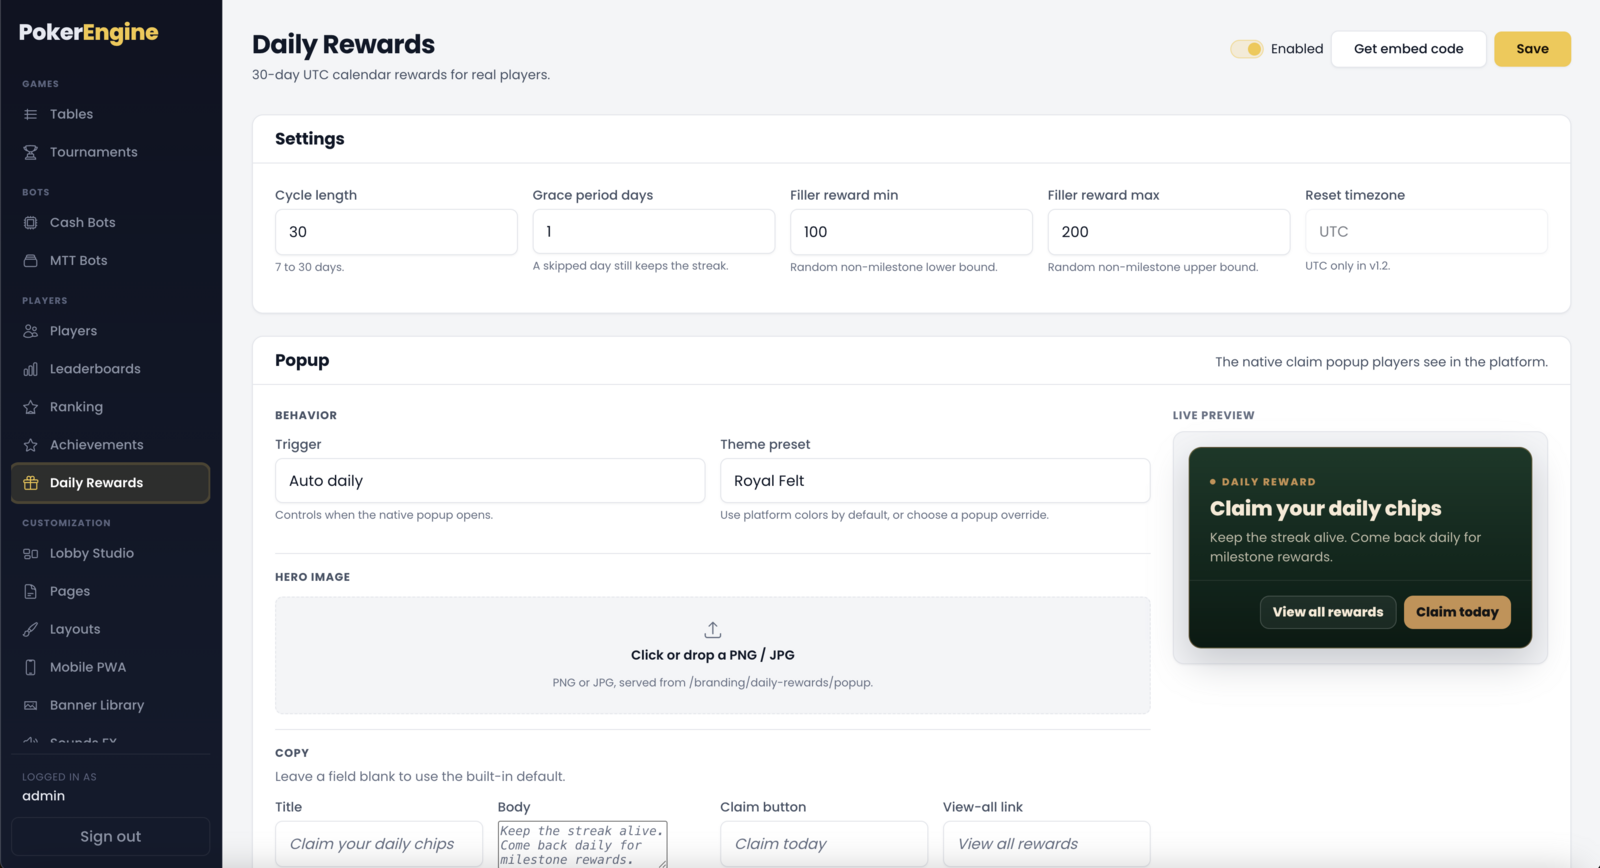
- Enabled — turn the whole system on or off.
- Cycle length — how many days in one cycle before it repeats (7–30).
- Grace period — how many missed days are forgiven before the streak resets to day 1. With the default of 1, a player who misses a single day keeps their streak; miss two in a row and it resets. You can set it to 0 (strict) up to 2 (generous).
- Reward range — the minimum and maximum chips for normal (non-milestone) days.
- Reset time — the daily reset runs on UTC time.
The claim popup
Players claim their reward through a popup in your lobby, and you can make it your own in the Popup card (with a live preview):
- When it appears — automatically once a day, on every entry, only when clicked, or off.
- Look — pick a theme, upload a hero banner image, and set the title, body text, button labels and accent/background/text colors. Leave any field blank to inherit your platform’s style.
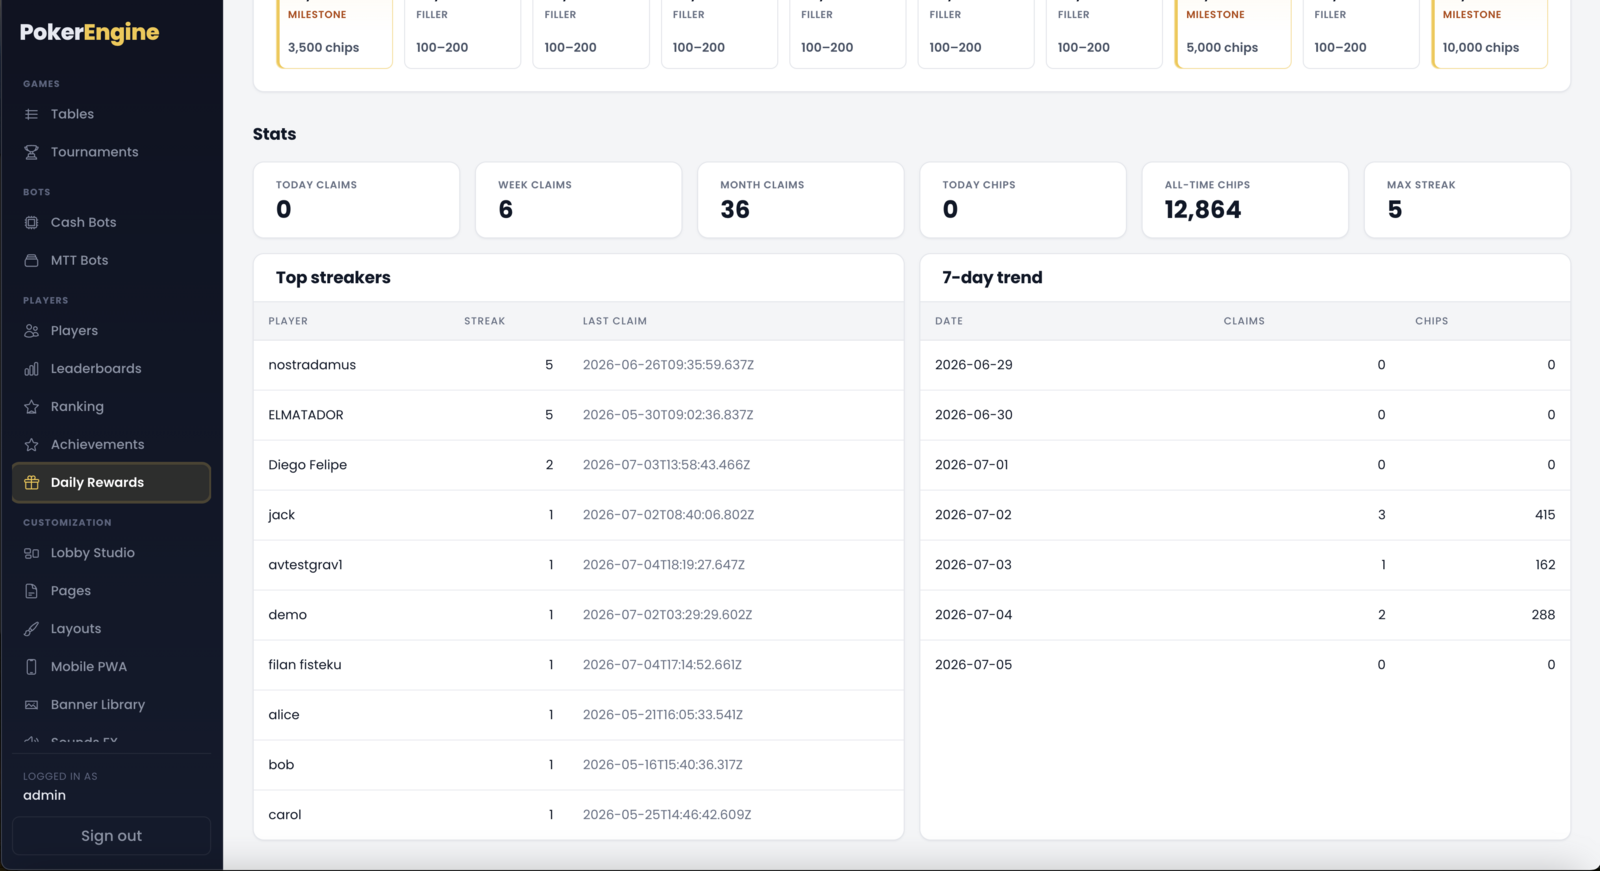
Stats
At the bottom you’ll find live stats — total claims, active streaks, your top streakers, and a 7-day trend — so you can see the feature working. Stats cover real players only and refresh automatically.
Good to know
- Ready to use. The calendar, milestones and popup ship pre-configured — players can start claiming from day one with no setup from you.
- Everything runs on UTC. The daily reset is UTC midnight, not each player’s local midnight — worth telling players in other timezones.
- Normal days are randomized within your range, so two players can get different amounts the same day. Only milestone days are fixed.
- Players can’t claim twice in a day — it’s guarded against double-clicks and refreshes.
- The streak and cycle never end — they keep climbing and repeating, so milestones recur every cycle.
- Optional embed. As with other features, if you also run a separate external site you can paste a claim widget there — but it’s not needed to use Daily Rewards inside PokerEngine.
Lobby Studio
The Lobby Studio section (under Customization) is where you build your lobby — the home screen players land on, where they see your available tables and jump into a game. It’s the front door of your platform, and it’s the first thing to set up, because your branding and your themes are applied to it.
Good news: PokerEngine ships with a ready-to-use lobby (“Main Lobby”) the first time you launch, so you already have a working front door out of the box. Lobby Studio is where you make it yours — and, if you want, add more.
A lobby’s custom theme is scoped to that one lobby (stored in its own
data/lobbies/<slug>.json). It layers up as: Template (the base) →
Brand colors (primary/secondary) → up to 16 per-element colors (the
Advanced palette) → hide toggles. Editing one lobby never changes the global
platform shell (header, navigation, footer, login — those live in the Layouts
section) nor any other lobby. Run several lobbies and you get several independent themes —
which is exactly what powers white-label and affiliate front-ends.
What a lobby is
A lobby shows your live tables (and routes players into games) with your name, tagline, colors and style around them. You can run one lobby, or several — each with its own branding and its own set of tables — which is how you power white-label or affiliate front-ends from a single platform.
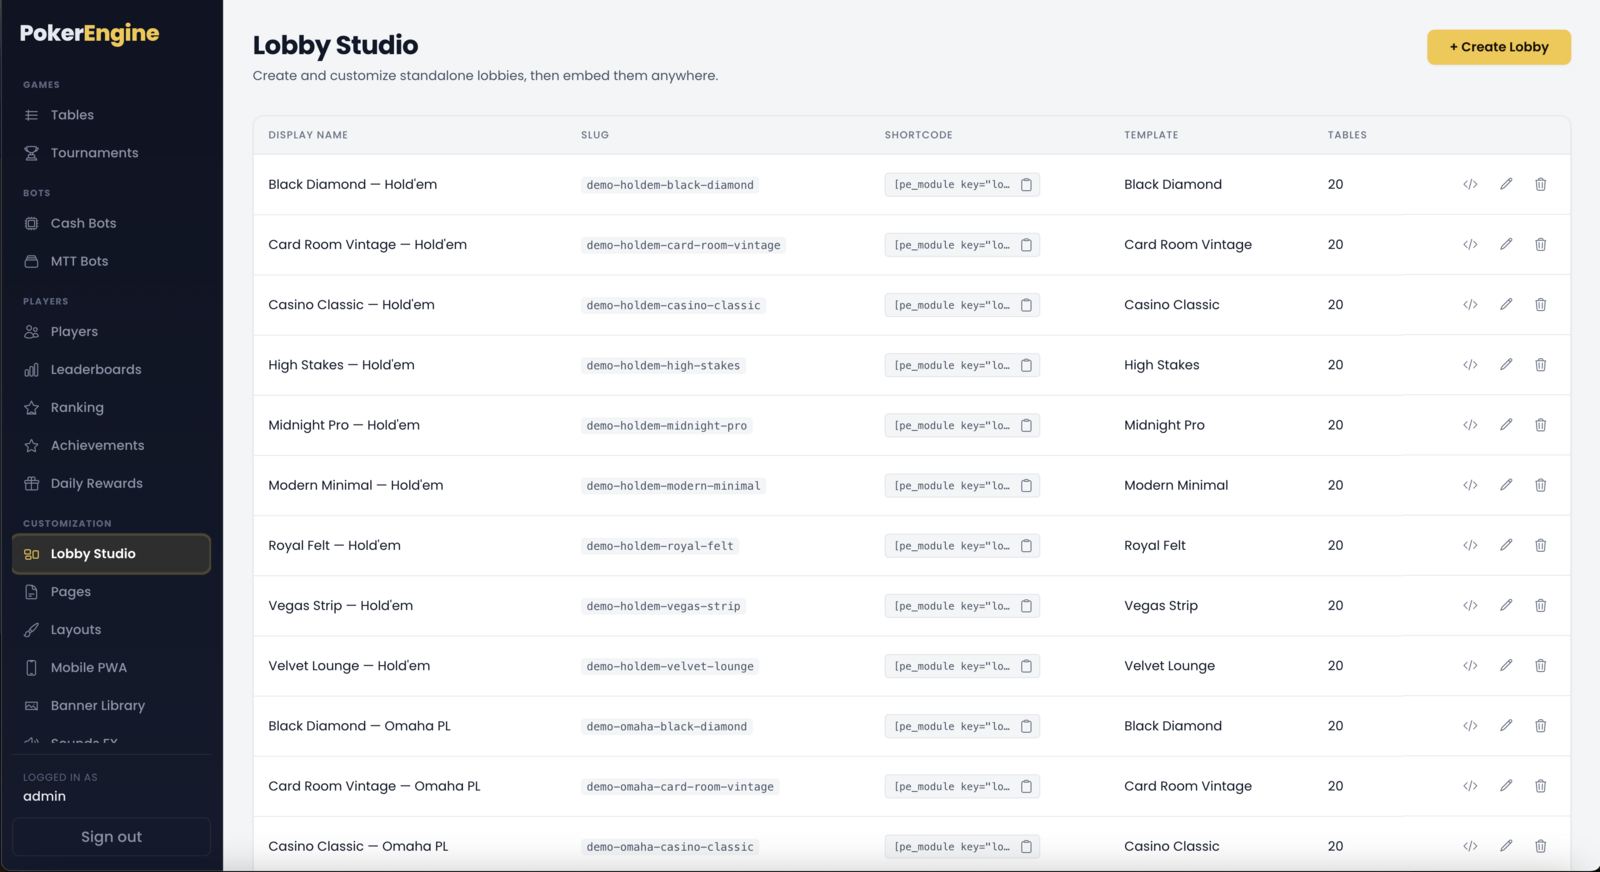
Each lobby in the list shows its display name, its immutable slug
(/lobby/<slug>), a copyable shortcode
([pe_module key="lobby" slug="…"]), its template, and how many
tables it shows. Row actions let you Get embed code, Edit, or
Delete — except your last lobby, which can’t be deleted.
Multiple lobbies (white-label & affiliates)
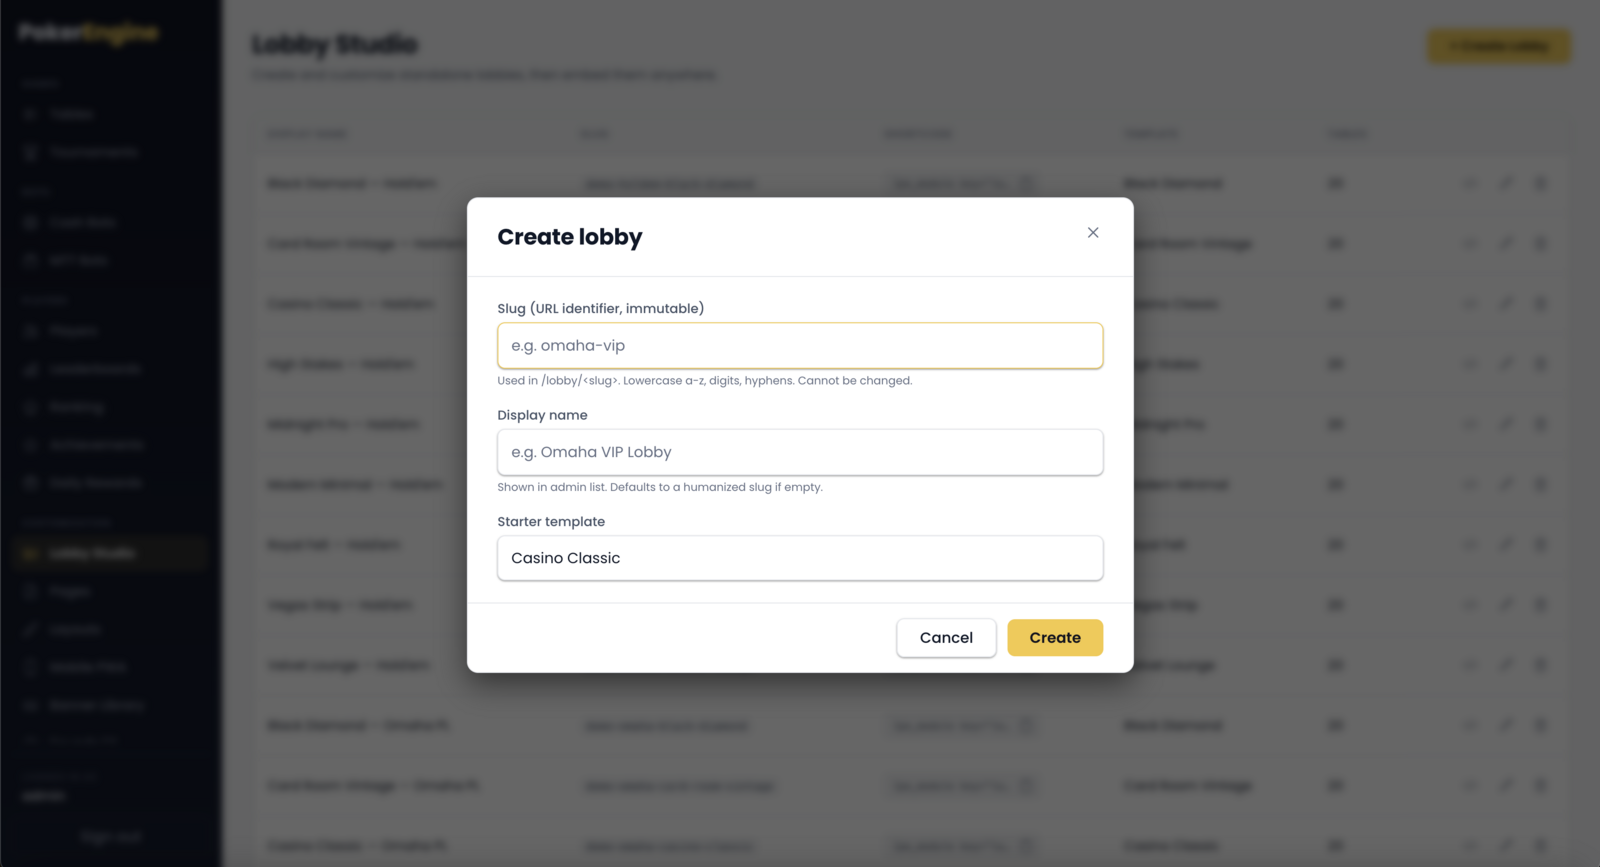
Click + Create Lobby to add another, with its own slug (the URL identifier, immutable), a display name, and a starter template (one of nine designs, changeable later). Because each lobby has independent branding and its own table selection, you can run several distinctly-branded front doors from one PokerEngine install — for example a partner-branded Omaha lobby and your own flagship Hold’em lobby — each shown on a different site.
Configuring your lobby
Open a lobby to edit it. On the left is the form, on the right a live preview that updates as you type. The key settings:
- Identity — the display name, your site name (required — shown in the hero, footer and as the table watermark fallback), a tagline, and an optional footer line.
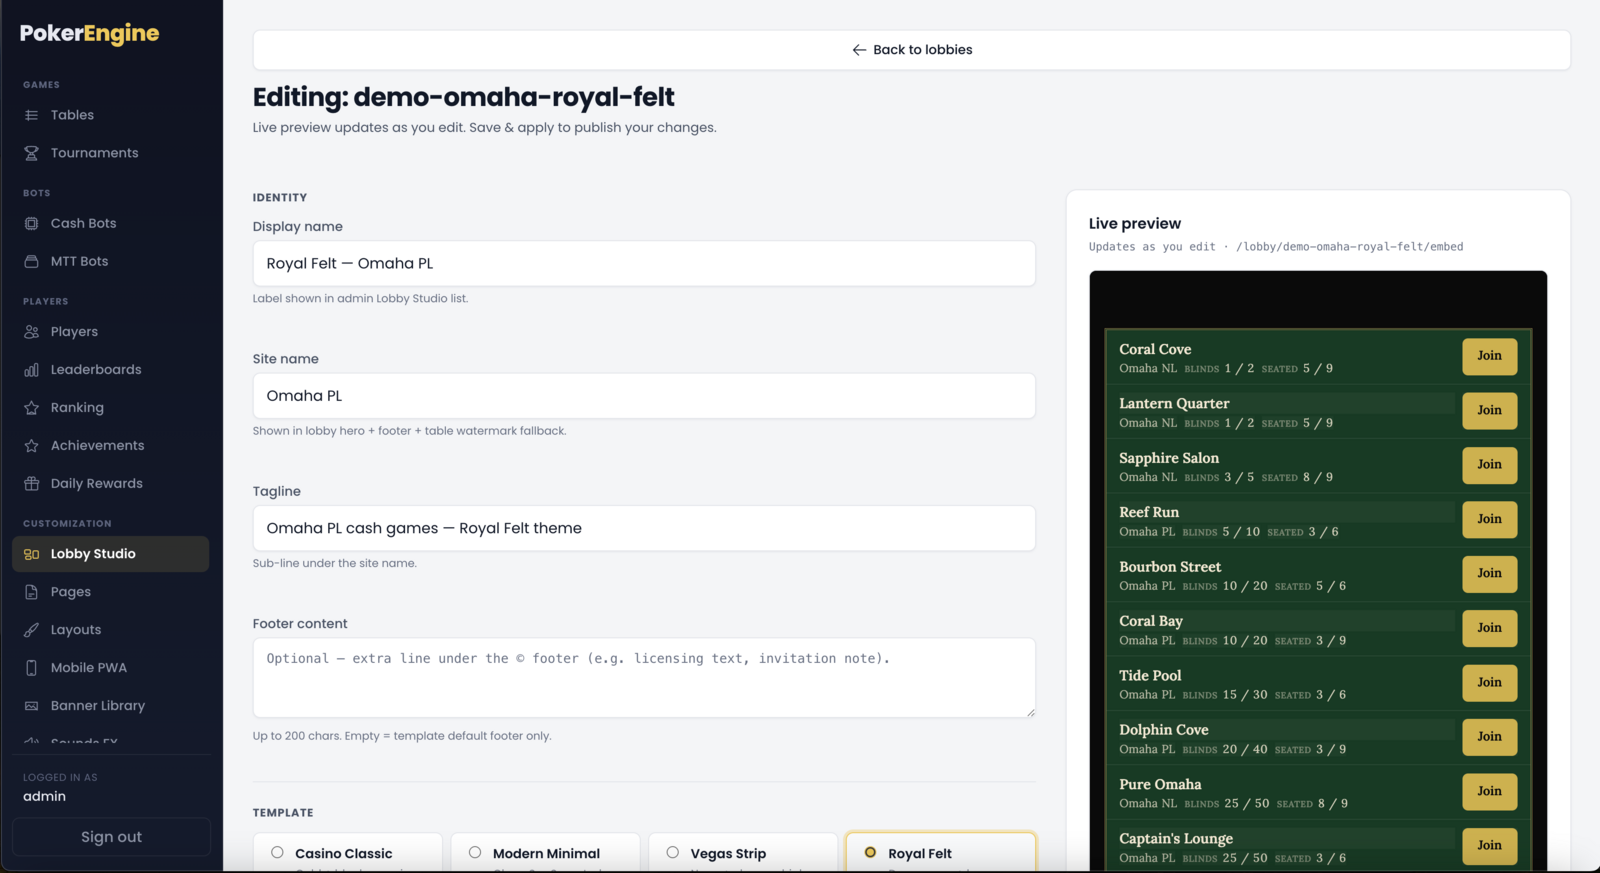
- Template — the starting visual style (the theme’s base). Choose from nine designs: Casino Classic, Modern Minimal, Vegas Strip, Royal Felt, Card Room Vintage, Midnight Pro, High Stakes, Velvet Lounge, Black Diamond. Changing the template reloads the preview; your custom overrides persist on top.
- Brand colors — your primary (CTA buttons/accents) and secondary (headings/accents) colors, layered over the template.
- View mode — show tables as a Cards grid or a compact List.
- Layout toggles — show or hide the hero header, the live-stats pill (“X tables · Y seated”), the footer, the “Open Tables” heading, and a transparent background for embeds. (The global header/navigation/login are set in Layouts, not here.)
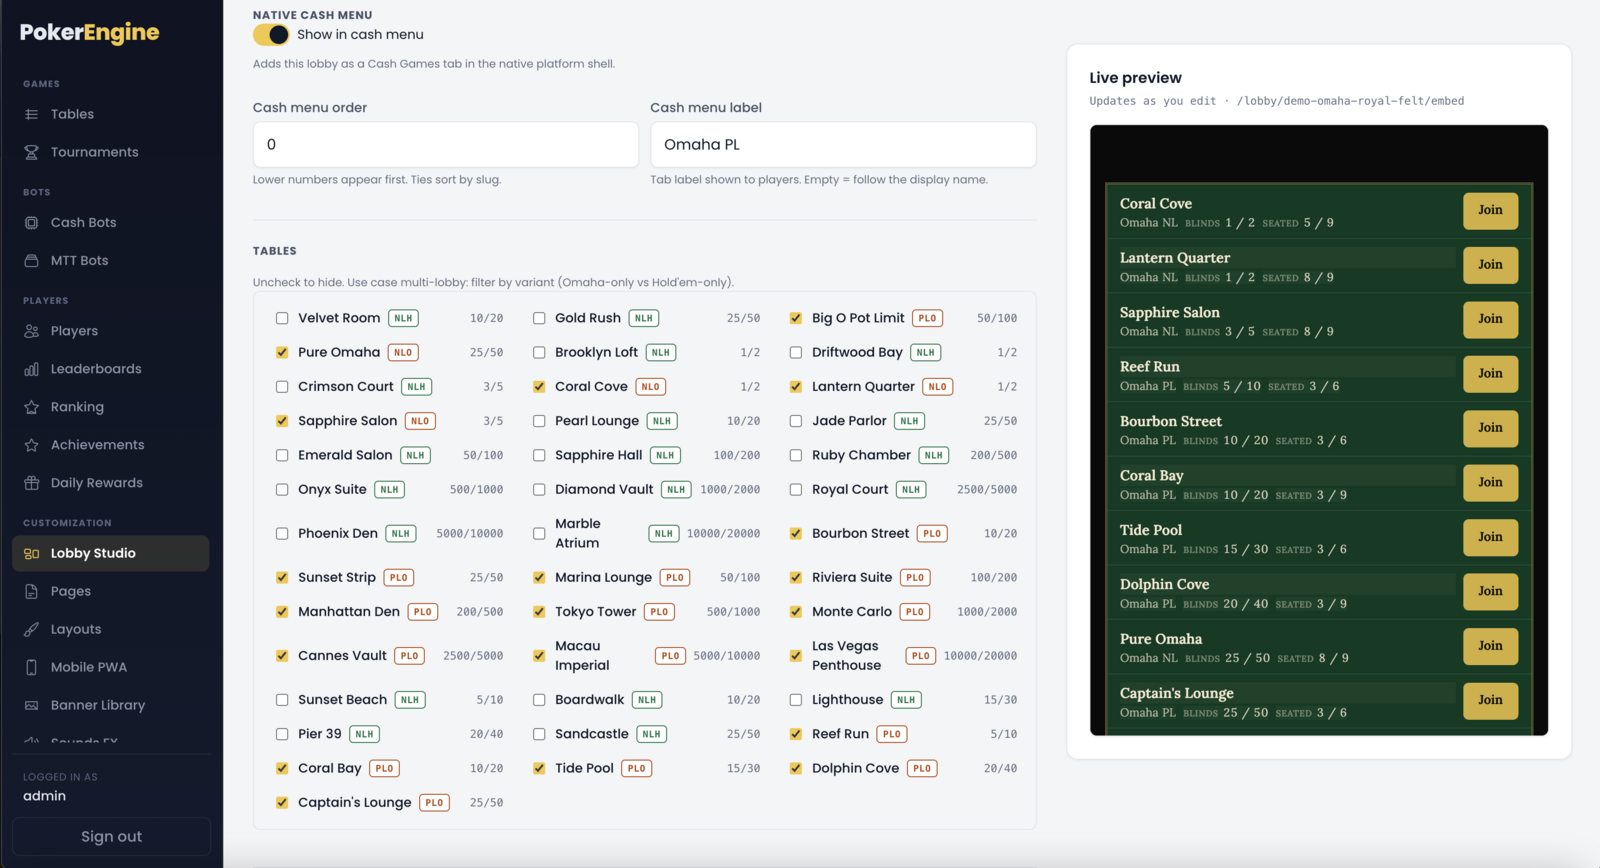
- Native cash menu — optionally add this lobby as a Cash Games tab in the native platform shell, with an order (0–999) and a custom label. This is the one place a lobby plugs into the shell navigation.
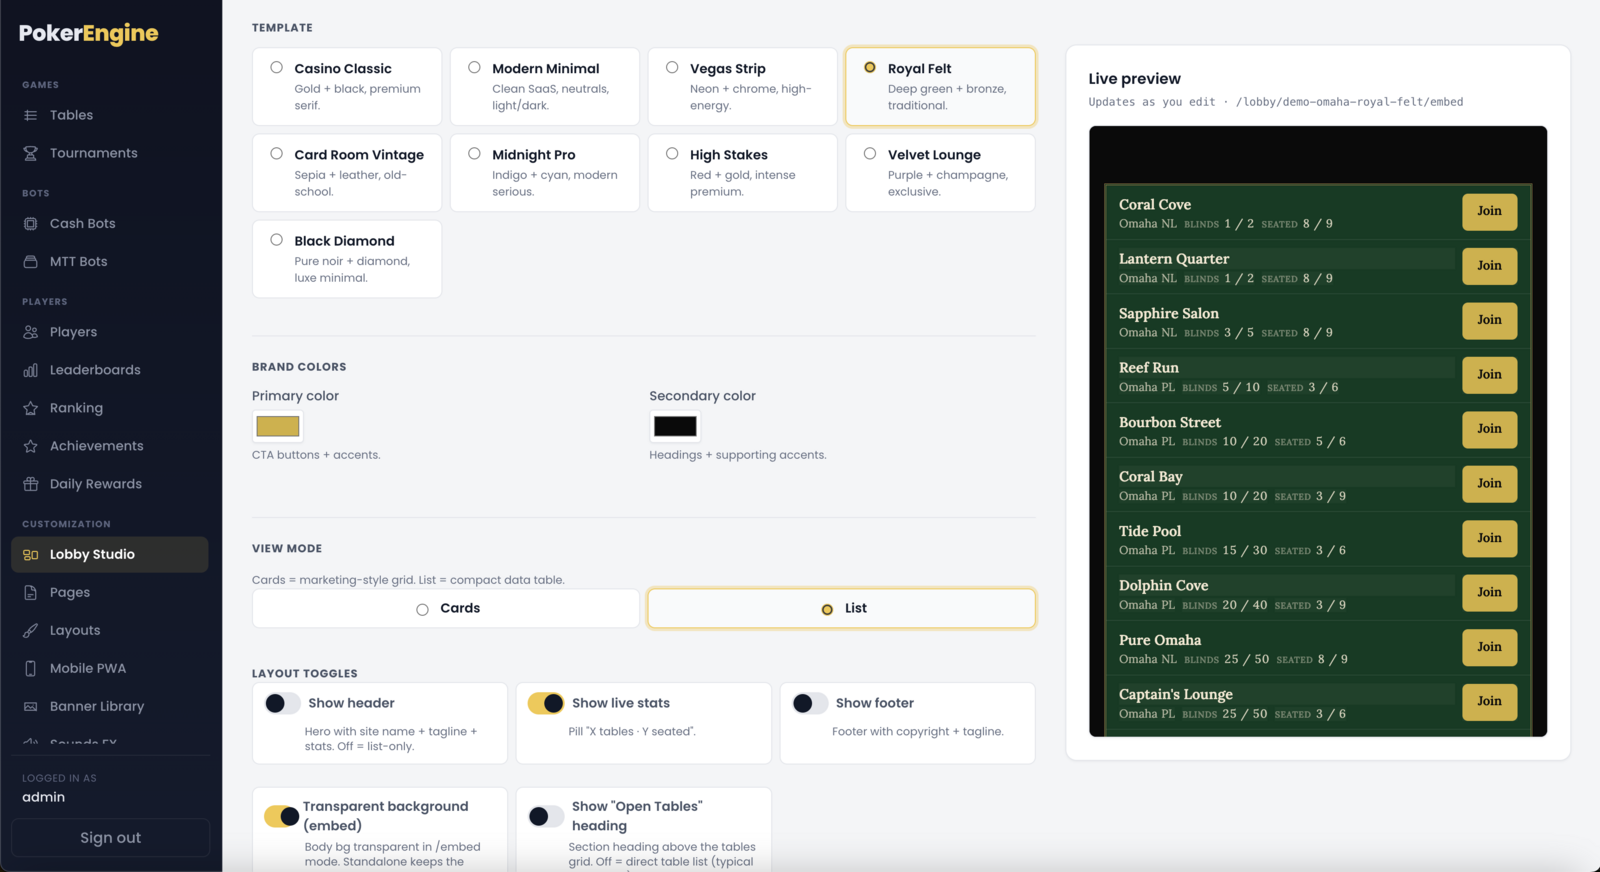
Click Save & apply and your changes are live on the next page load — no restart. Use Get embed code for the embed snippet, or Open full page to review the standalone lobby (with your current unsaved edits) in a new tab.
Which tables to show
By default the lobby shows all your tables automatically. Or curate it: tick only the tables you want (for example an Omaha-only lobby or a high-stakes lobby). Each table shows its variant badge (NLH / PLO) and its blinds. Tables themselves are created in the Tables section — here you just choose which ones appear.
Advanced look
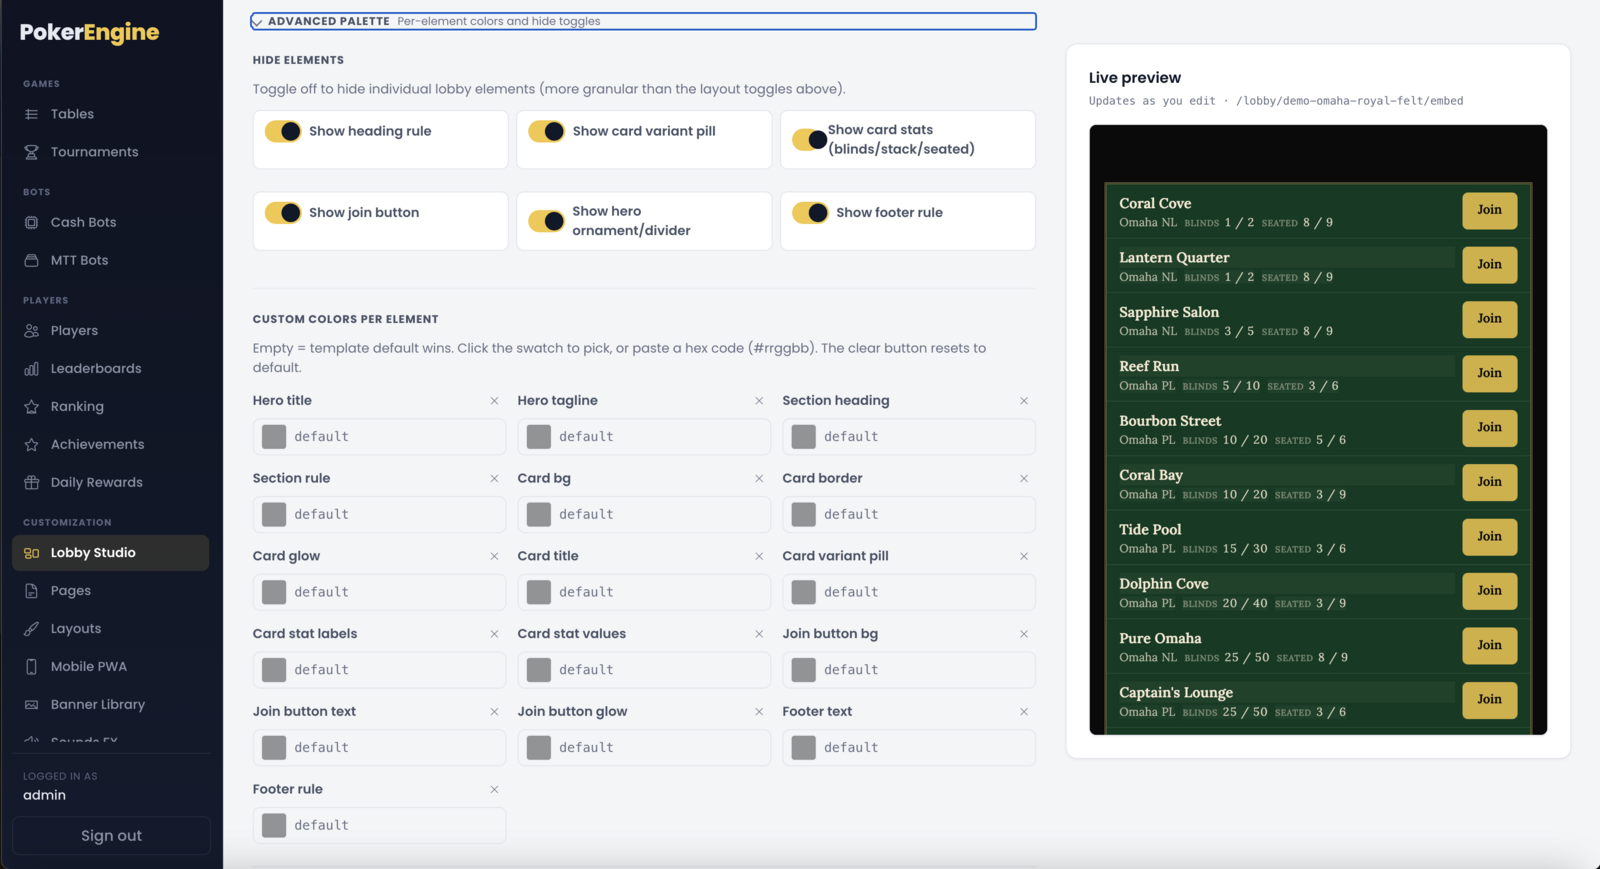
Beyond the template and brand colors, an optional collapsible Advanced palette gives fine-grained control — all still scoped to this one lobby:
- Hide elements — seven finer toggles: the heading rule, the card variant pill, the card stats (blinds/stack/seated), the join button, the hero ornament/divider, and the footer rule.
- Custom colors per element — sixteen per-element color slots: hero title, hero tagline, section heading, section rule, card background, card border, card glow, card title, card variant pill, card stat labels, card stat values, join button background, join button text, join button glow, footer text, footer rule. Leave a slot empty to keep the template’s default for that element; set a hex to override just that piece.
Where players reach your lobby
Your default lobby is served at your site’s main address (e.g. yoursite.com/lobby), and each
additional lobby has its own address (/lobby/<name>). You can also place a lobby
inside any of your CMS pages: in the page builder (the Pages section) the lobby
is available as a module you drop into a page, or you can paste its shortcode
(shown next to it in the list). Either way, you can build a fully custom landing page with your lobby embedded in
it, surrounded by your own content.
Optional: embedding a lobby on an external site
Each lobby has a Get embed code button. As with the rest of PokerEngine, this is
optional — your native lobby works perfectly on its own. Embedding is only for when you
also want to place a lobby inside a separate website you own (a marketing or affiliate
site). For security, each lobby has an allowed origins list that controls exactly which external
sites are permitted to embed it — leave it empty to block embedding entirely, or list the
specific sites that may (it drives the frame-ancestors security header).
Good to know
- Set up your lobby first. Because themes and branding (in the Layouts section) are applied to your lobby, the lobby needs to exist first — which it does by default, so you can start customizing right away.
- Live seat counts update on their own. The tables and “seated” numbers refresh in real time as players come and go.
- All tables by default, or curate. An empty table selection means “show everything,” so new tables you create appear automatically unless you’ve chosen a specific set.
- You always have at least one lobby. The last remaining lobby can’t be deleted, so your front door never disappears.
Pages
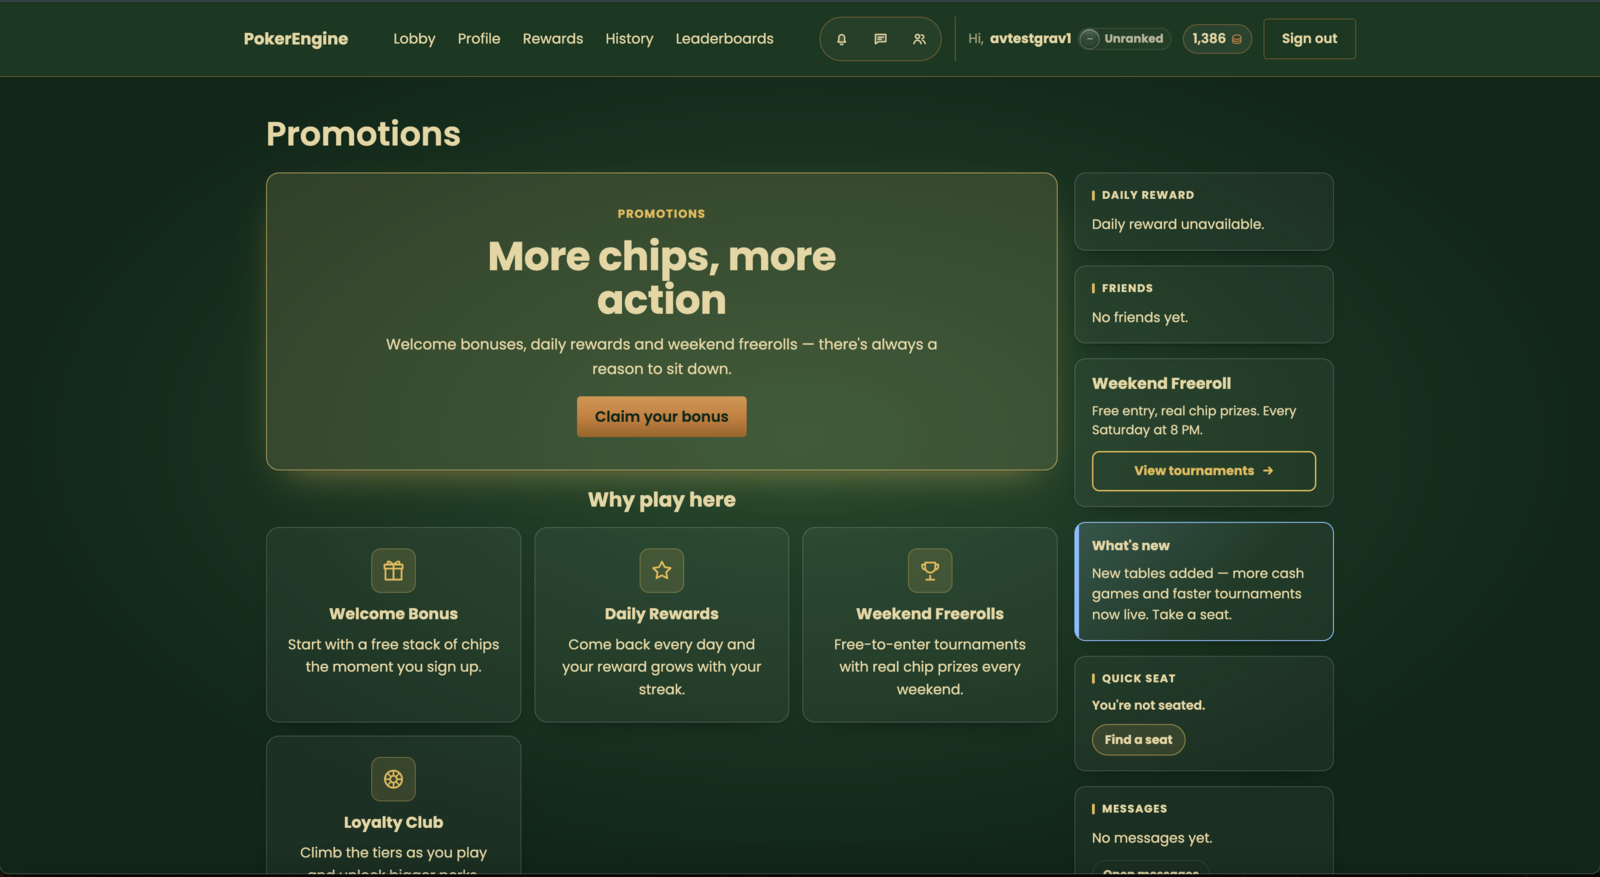
The Pages section (under Customization) is what makes PokerEngine feel like a full CMS — think WordPress, but built for a poker platform. You compose pages out of ready-made blocks, drop in live platform modules (like your lobby or a leaderboard), add sidebar widgets, and publish — all visually, with no coding.
Your platform already ships with a set of working pages (Lobby, Leaderboards, Profile, History, Rewards, and tournament pages), so you have a complete site on day one. From there you can edit them, or build brand-new pages of your own — an About page, House Rules, a Promotions landing page, a VIP page, anything.
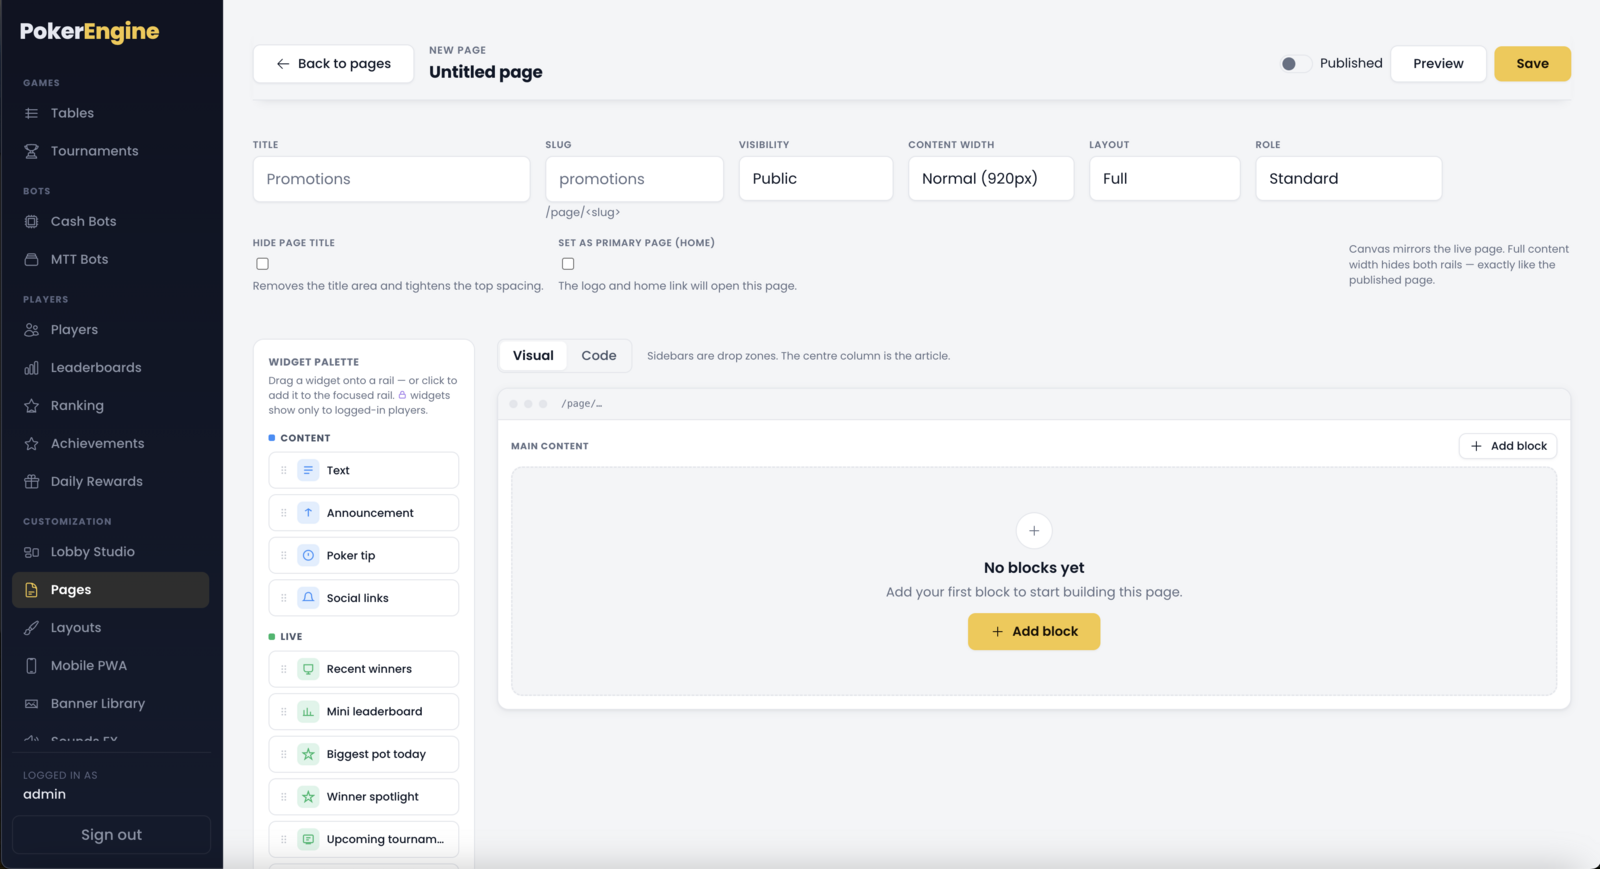
Page settings
When you create or edit a page, you set:
- Title and Slug — the slug is the page’s address,
/page/<slug>. - Visibility — Public (anyone) or Members (only logged-in players; visitors get a sign-in prompt).
- Content width — narrow, normal, wide, or full-width.
- Layout — a single column, or add a left, right, or both sidebars for widgets.
- Hide page title and Set as home page — make any page your platform’s landing page.
The visual builder
Editing a page opens a two-pane builder: a palette of blocks on the left, and a live canvas in the middle that shows your page exactly as players will see it (sidebars included). Add blocks with + Add block, drag and drop to reorder them, and click any block to edit its content. There’s also a Visual ⇄ Code switch for those who want to see the underlying structure.
Everything you build is safe by design — there’s no raw-HTML field to break your site or create a security hole; rich text is sanitized automatically. You get the flexibility of a page builder without the risk.
Content blocks
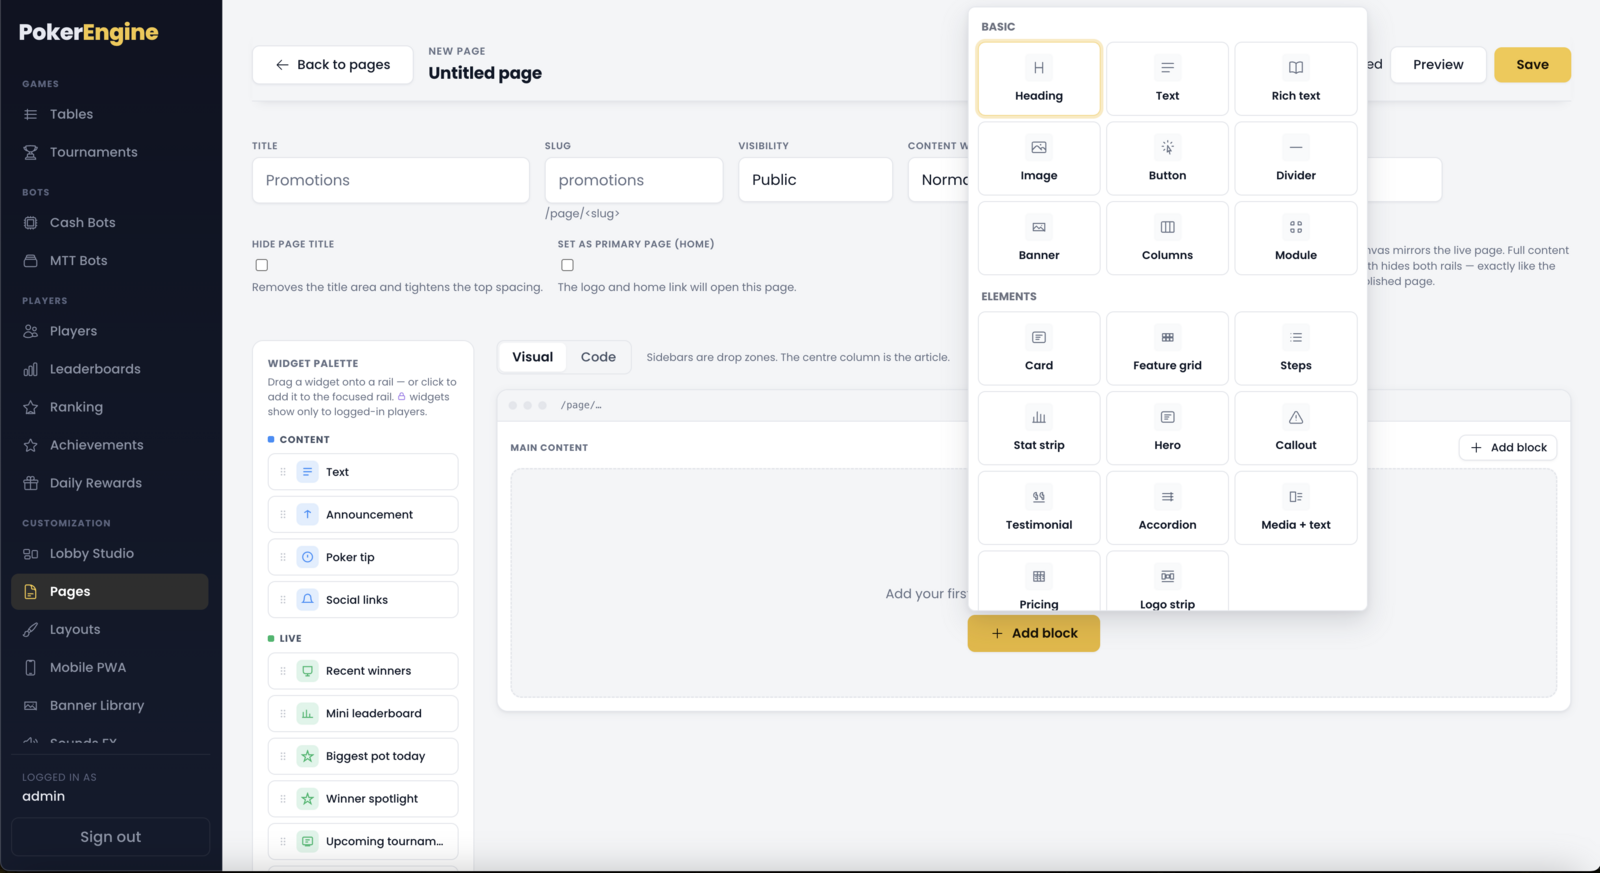
The building blocks for your page’s main column:
- Basics — heading, text, rich text (bold/italic/lists/links), image, button, divider, and columns (split content into 2–3 columns).
- Landing-page elements — polished marketing blocks: hero, feature grid, steps, stat strip, card, callout, testimonial, accordion/FAQ, media + text, pricing table, and logo strip. These let you build a professional marketing or info page without a designer.
- Banner — drop in an image from your Banner Library.
Platform modules — put live features inside a page
This is the powerful part: you can embed the platform’s live features directly into any page as a module block. Available modules:
- Lobby — your live tables (pick which lobby); you can render it edge-to-edge to build a fully custom landing page around your games.
- Leaderboards — a live leaderboard (pick which one).
- Tournaments — a live tournament lobby (choose MTT, Sit & Go or Spin & Go, and which templates to show).
- Profile, History, Rewards — the player’s own profile, hand history and daily rewards.
Each module drops into the page like any other block (with an optional header). A module can be placed once per page. (The player-specific modules show for logged-in players.)
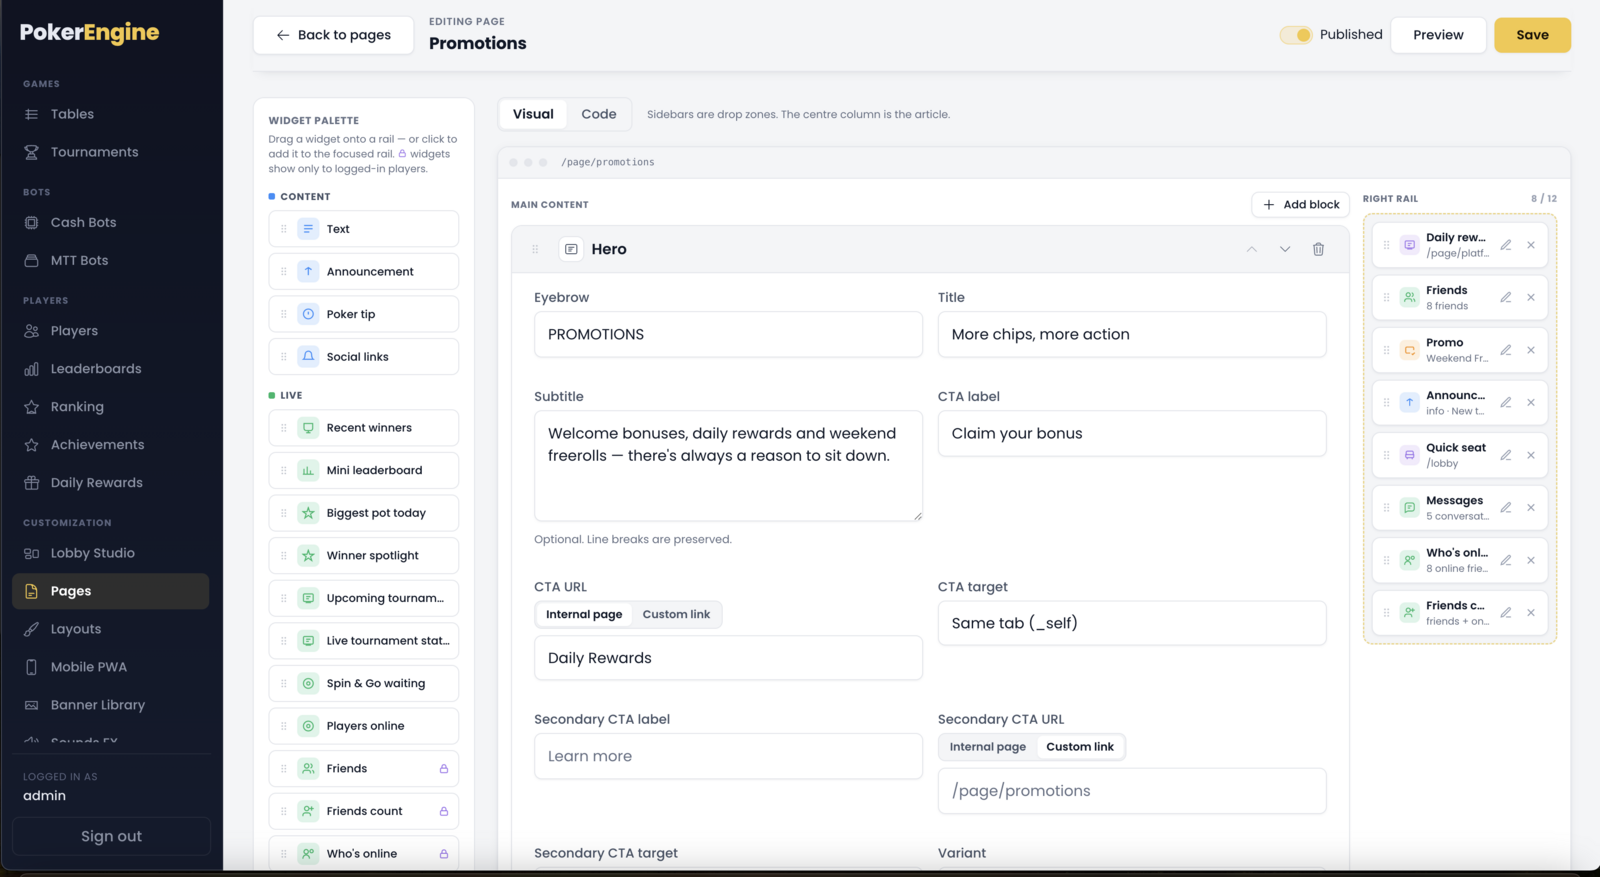
Sidebar widgets
If your page has a sidebar, you can fill it with widgets — small, live components. There are two dozen to choose from, grouped by purpose:
- Content — a text box, an announcement, a rotating poker tip, or social links.
- Live — recent winners, a mini leaderboard, biggest pot today, upcoming/live tournaments, online-player count, and more — all updating in real time.
- Player (for logged-in players) — my stats, my rank, my achievements, a daily-reward claim, and quick-seat.
- Promo — a promo box, an image, a call-to-action button, or an ad slot — handy for cross-promotion or monetization.
System pages vs. your own pages
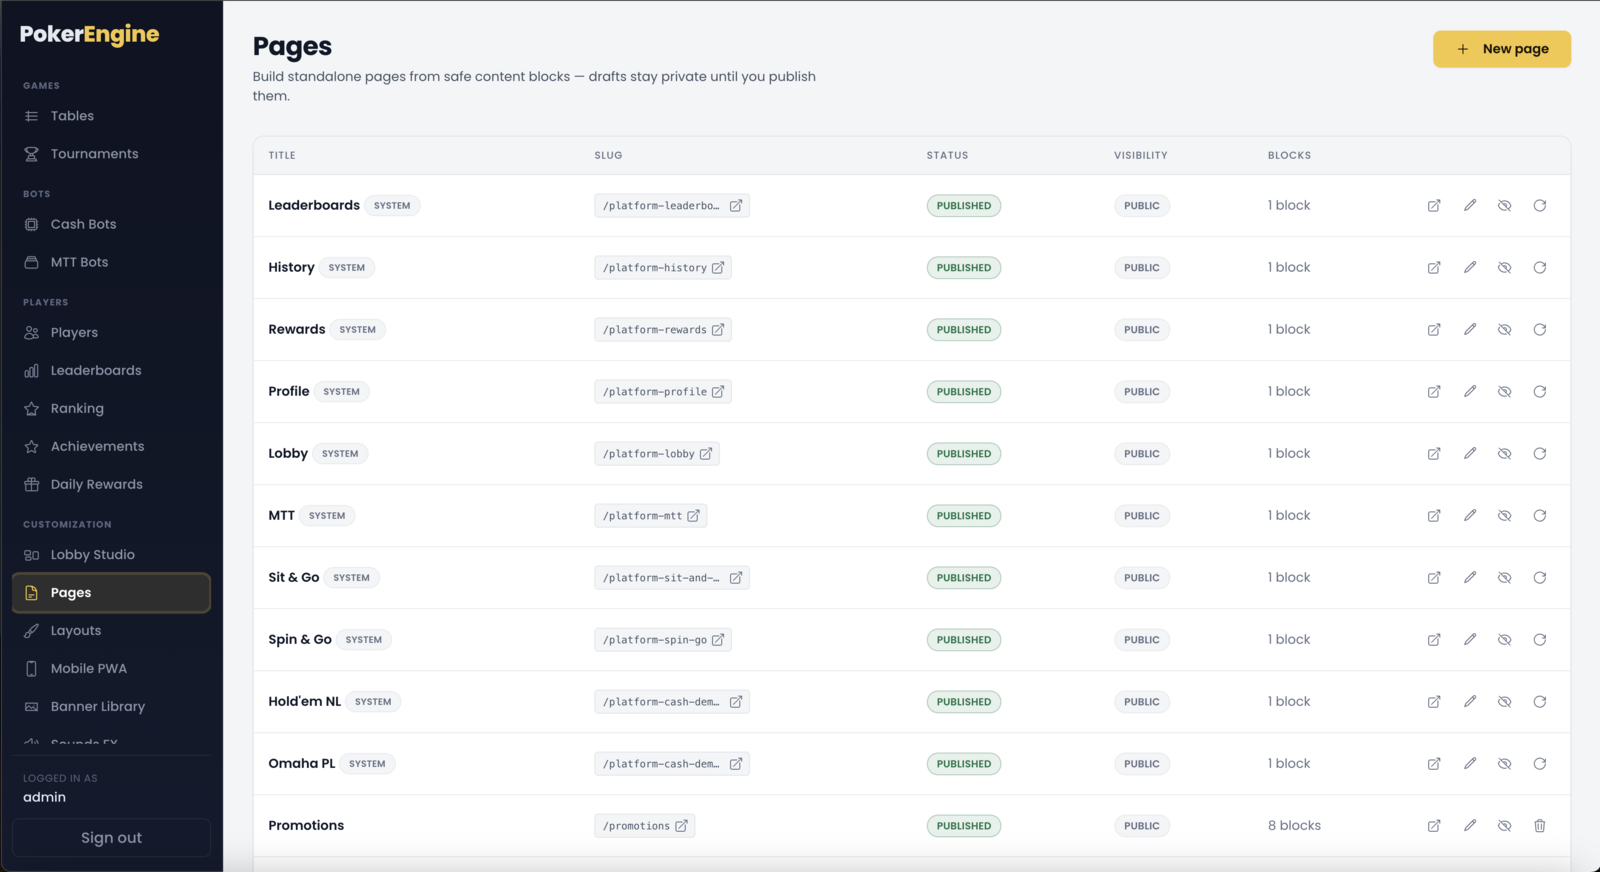
- System pages (the built-in Lobby, Profile, Leaderboards, etc.) can be freely edited and even reset to their default if you want to start over — but they can’t be deleted, since the platform relies on them. If you remove a required piece (like the lobby from the Lobby page), it’s restored automatically on save.
- Your custom pages start as drafts, and you can delete them anytime.
Publishing and adding a page to your menu
Building a page is two steps:
- Build and publish the page here. A page stays a private draft until you flip it to Published; only published pages are live at
/page/<slug>. - Add it to a menu in Layouts → Navigation (published pages appear in the “Add page” picker).
That separation — author content in Pages, wire it into your menus in Layouts — is exactly how a CMS works, and it’s what lets you shape your platform however you like.
Remember step 2: a freshly published page is live at its URL but won’t appear in any menu until you add it in Layouts → Navigation.
Good to know
- Ready to use. Your core pages are seeded on first launch, so nothing is required to get a working site — Pages is there to customize and extend.
- Publishing doesn’t auto-add to a menu. Remember step 2: add the page to your navigation.
- A few slugs are reserved (like
admin,login,lobby) since the platform uses them — the builder will let you know if you pick one. - Members-only pages automatically show a sign-in prompt to visitors who aren’t logged in.
Layouts
The Layouts section (under Customization) is your white-label control center — the place where PokerEngine stops looking like “PokerEngine” and starts looking like your brand. This is the heart of the CMS: themes, logo and fonts, a fully custom login page, your own navigation menus and footer, promo banners, and your social/SEO preview.
Everything here applies live — save a change and it shows on the next page load, no server restart needed. And it all ships ready to use: sensible defaults are set out of the box, so Layouts is purely about making the platform yours, never about getting it to work. It’s organized into six tabs.
Themes
Sets your platform’s overall look. Pick from 9 built-in themes, each a polished color scheme: Casino Classic, Modern Minimal, Vegas Strip, Royal Felt, Card Room Vintage, Midnight Pro, High Stakes, Velvet Lounge and Black Diamond. Click Apply on a theme tile to make it active (you can Preview first in a new tab).
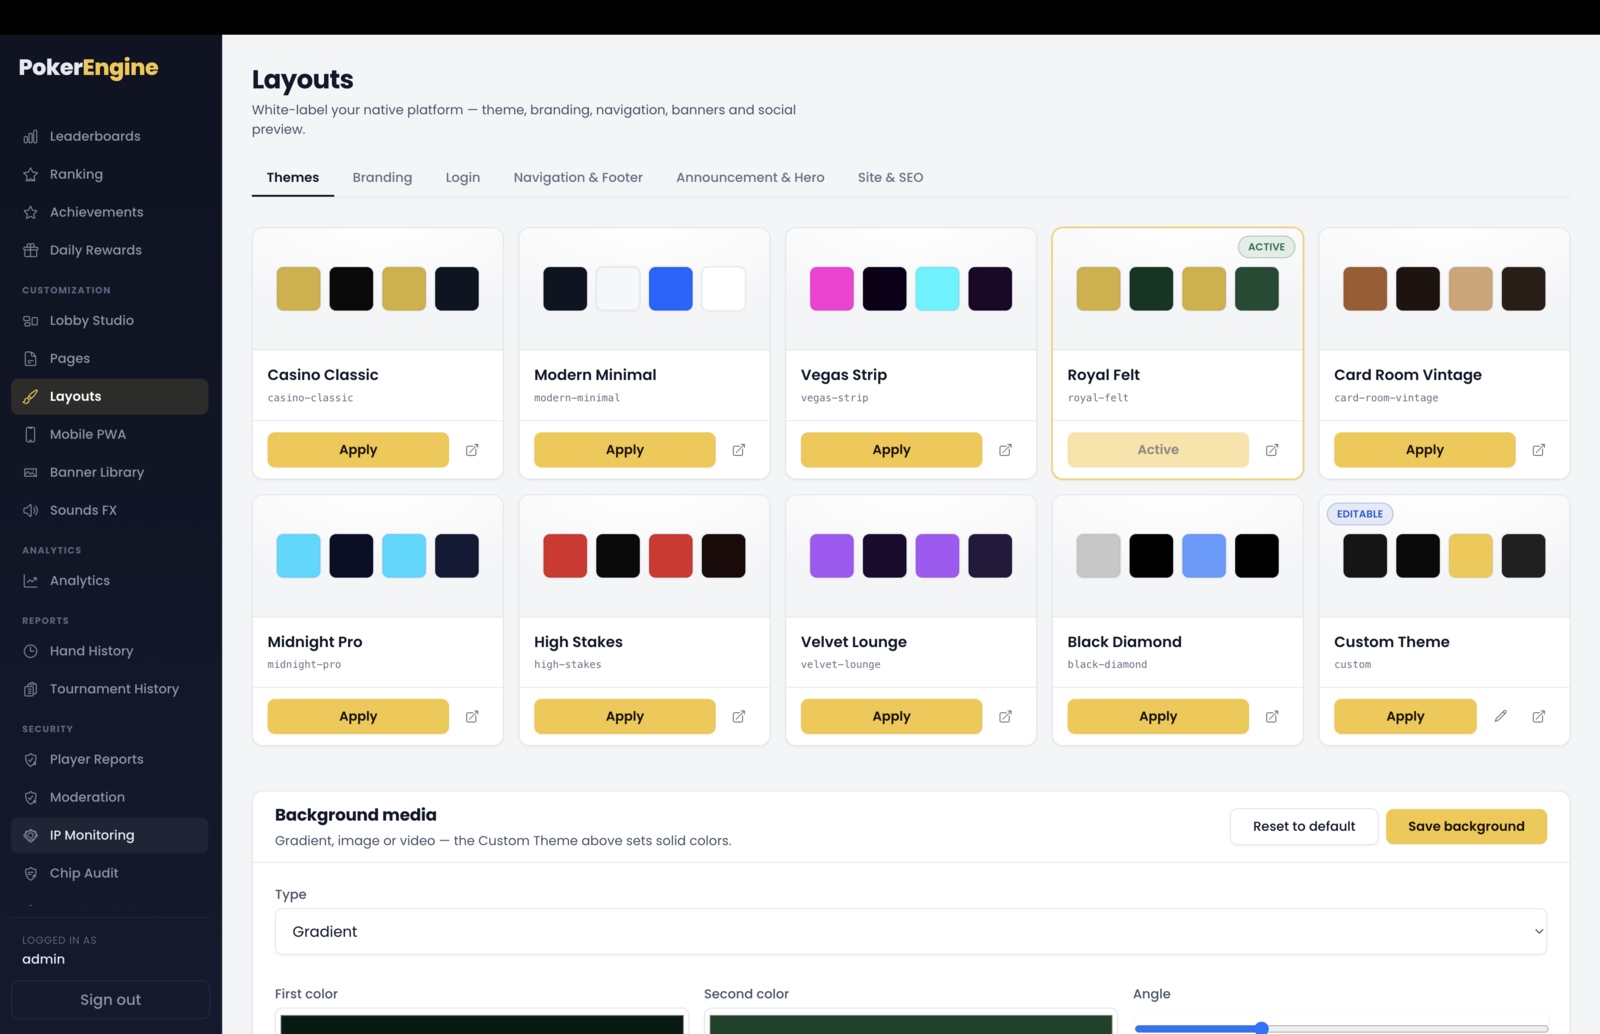
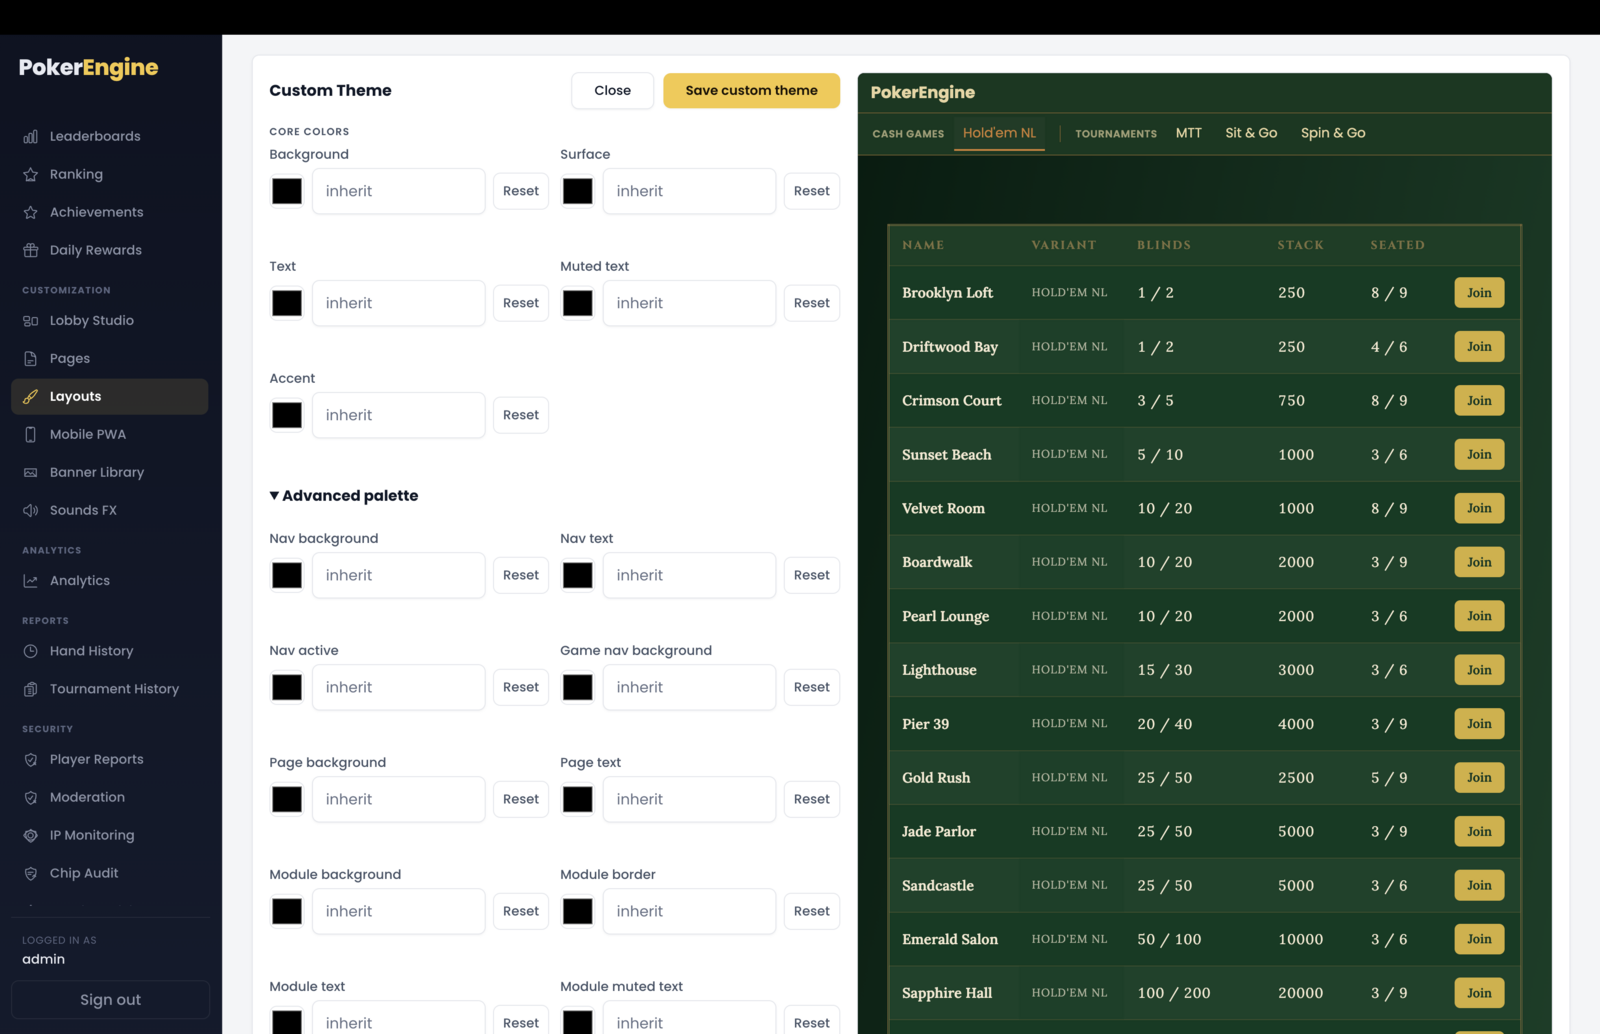
Prefer full control? The Custom Theme tile opens a visual editor where you set your own core colors (background, surface, text, muted text, accent) and fine-tune the advanced palette for individual elements (navigation, game navigation, page, and modules), with a big live preview as you go. You can even hide certain elements you don’t want.
Below the gallery, the Background panel sets the platform backdrop — a solid color, a gradient, an uploaded image, or a looping video — with an optional darkening overlay to keep text readable. (Background media applies when you’re using the Custom Theme.)
Applying a theme updates your primary lobby (the one you created in Lobby Studio). If you haven’t set up a lobby yet, do that first.
Branding
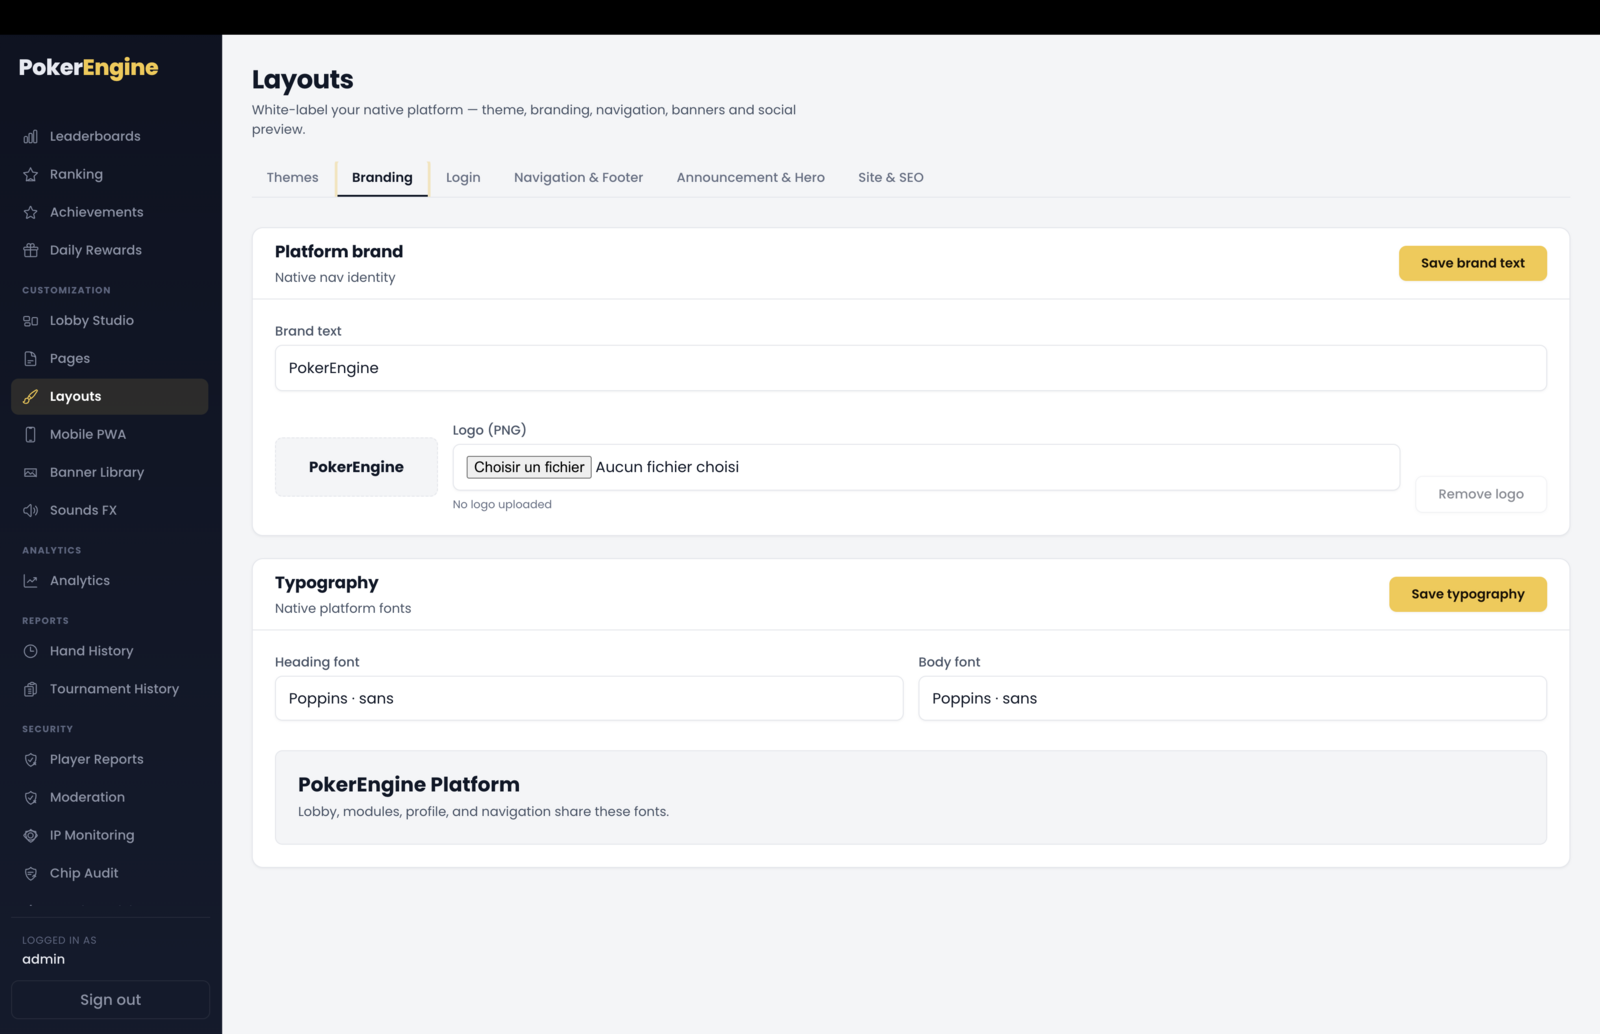
Your platform identity in the top bar:
- Brand text — the wordmark shown when you don’t use a logo image.
- Logo — upload your logo (PNG, up to 500 KB). Remove it anytime to fall back to the brand text.
- Typography — choose the heading and body fonts from a curated set (Poppins, Inter, Montserrat, Roboto, Lora, Playfair Display, Merriweather), with a live preview.
(The favicon lives in the Site & SEO tab.)
Login
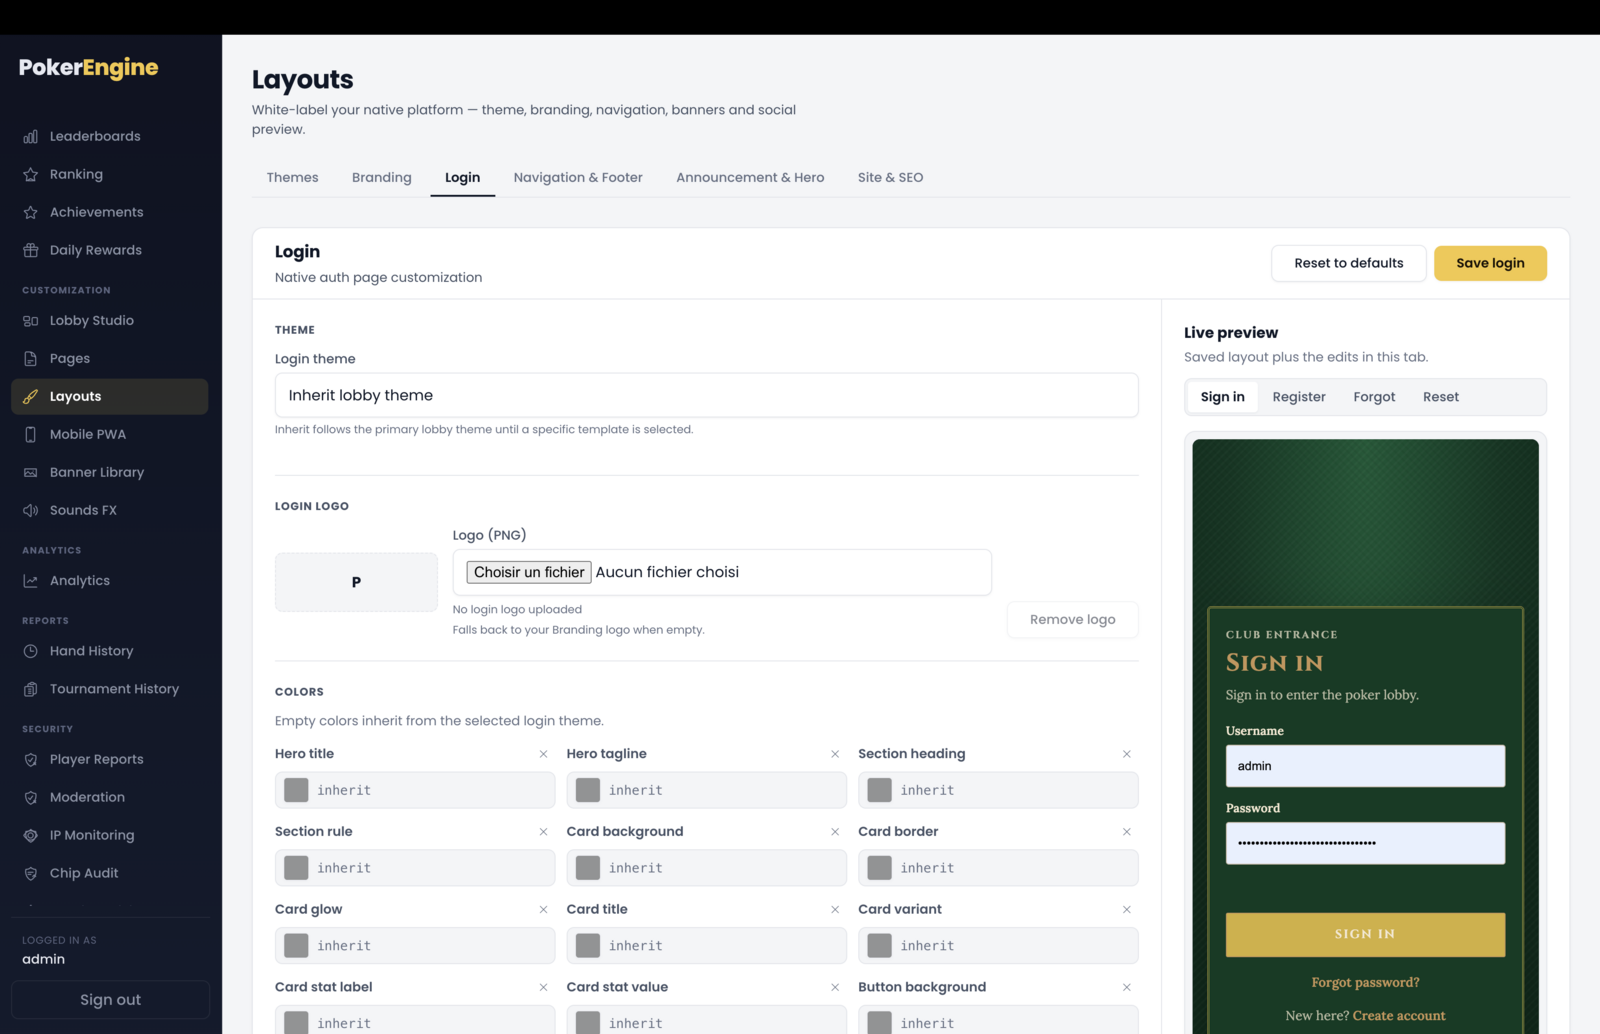
Fully customize the page players see when they sign in or register — often the very first impression of your brand. With a live preview (sign-in, register, forgot-password and reset views), you can set:
- A theme for the auth page (or inherit your lobby theme) and a dedicated login logo.
- Colors for every element (titles, cards, buttons, footer…).
- Show/hide page elements (marketing panel, ornaments, footer note, and more).
- All the text — every headline, label, button and link can be reworded to match your voice, in your language.
A Reset to defaults button restores everything if you want to start over.
Navigation & Footer — build your own menus
This is the CMS centerpiece: you decide what’s in your menus.
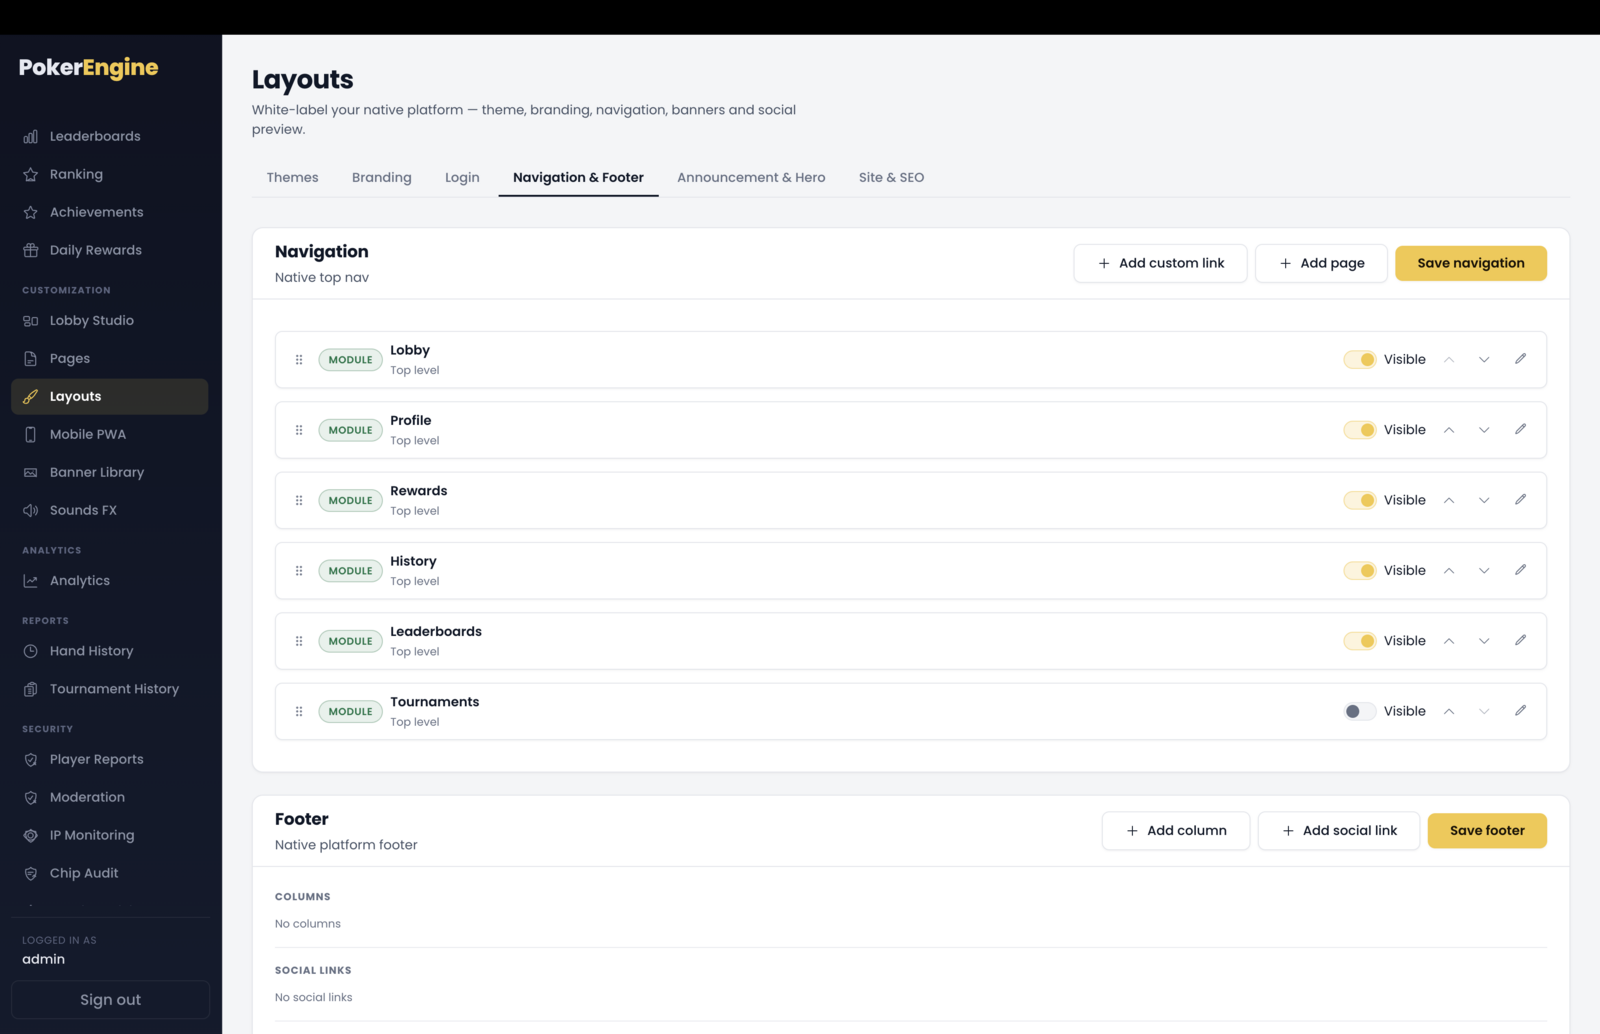
The navigation builder
Build your top navigation from three kinds of items:
- Module — a built-in platform area (Lobby, Profile, History, Rewards, Leaderboards, Tournaments).
- Page — a CMS page you created in the Pages section (only published pages appear in the picker).
- Link — any custom URL, opening in the same tab or a new one.
You add items with Add page / Add custom link, then reorder them (drag-and-drop or up/down), rename them, show/hide them with a toggle, and even nest items into dropdown menus (up to 8 sub-items under a parent). It works exactly like building a menu in a website CMS — no code.
The footer builder
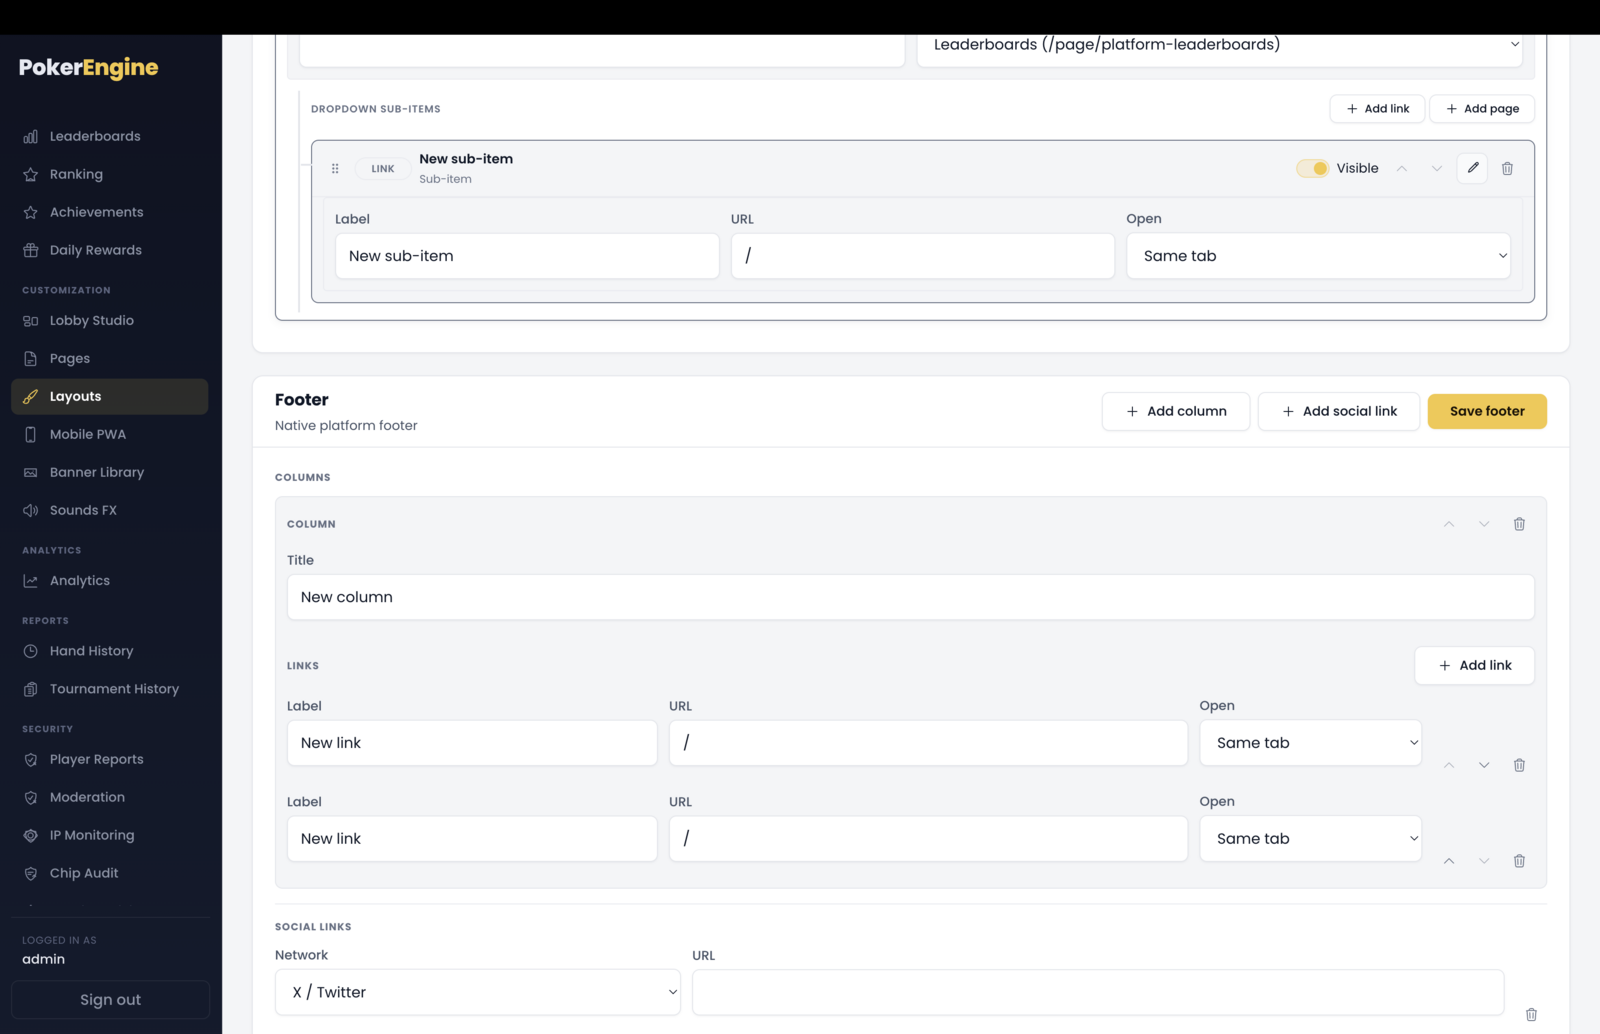
Below the nav, build your footer: add up to four columns of titled links, a row of
social icons (X/Twitter, Facebook, Instagram, YouTube, TikTok, Discord, Telegram, Twitch,
LinkedIn), and a copyright line (you can use {siteName} and {year}
placeholders).
You create and publish a page in the Pages section, then add it to your navigation here. The “Add page” button stays disabled until you have at least one published page. This Pages-authors-content, Layouts-wires-it-together split is exactly what makes PokerEngine feel like a CMS.
Announcement & Hero
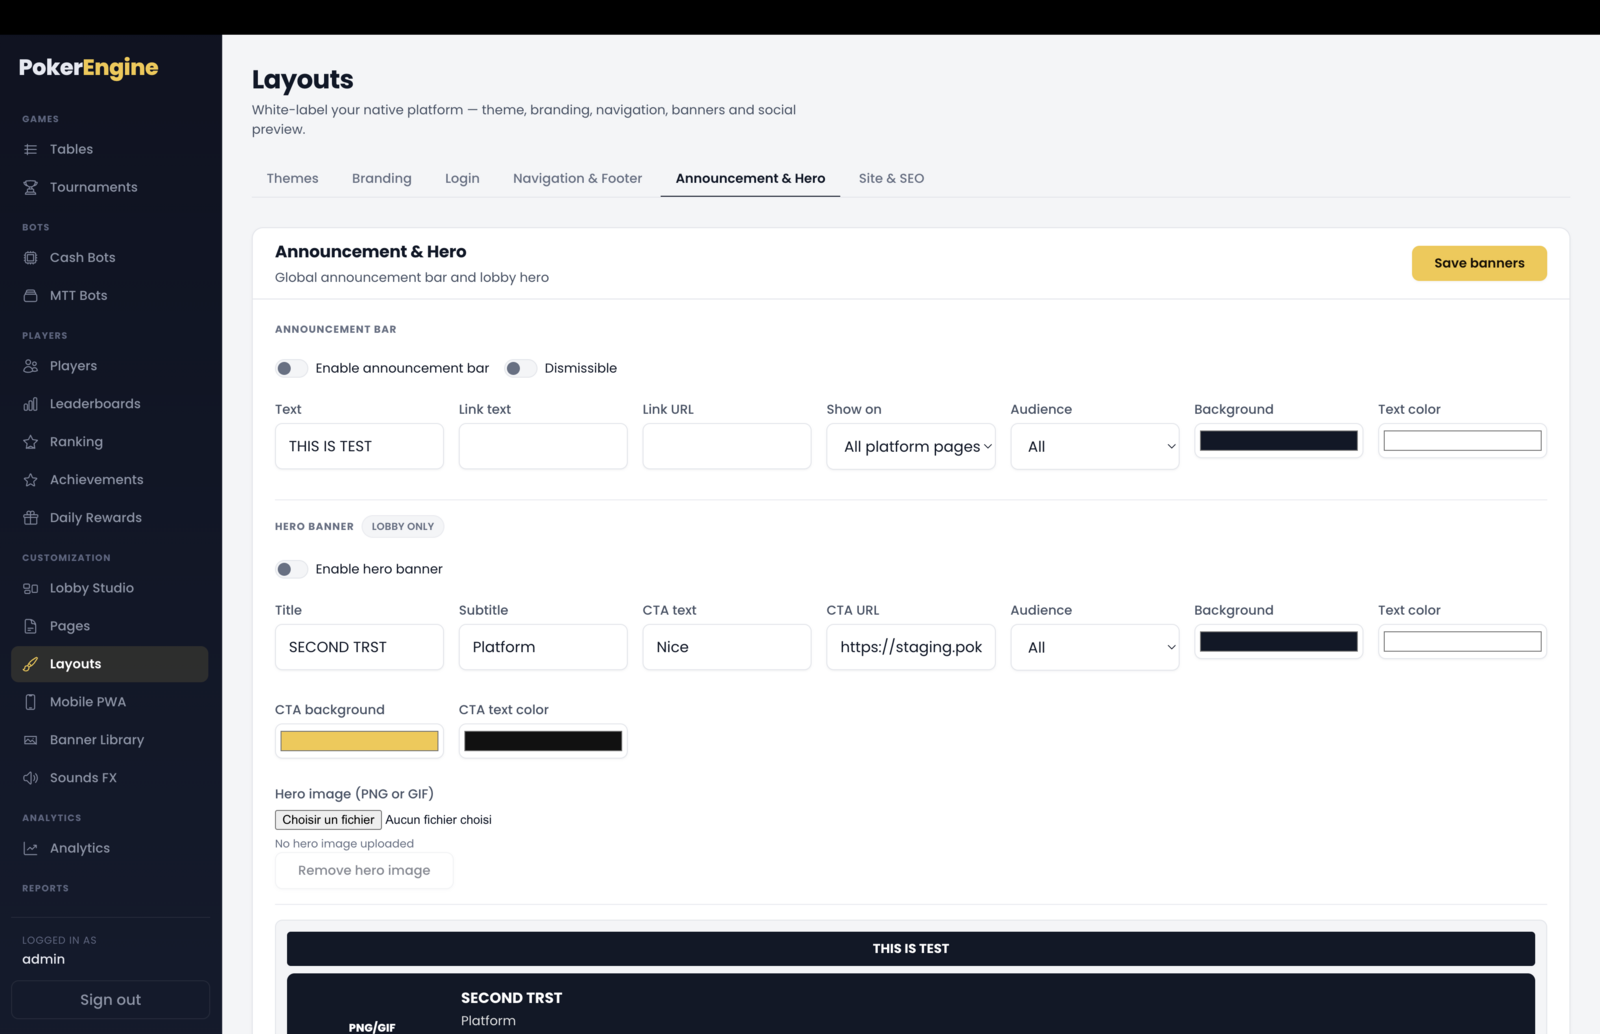
Two optional promo blocks, with a combined live preview:
- Announcement bar — a slim message strip across the top (optionally dismissible), with an optional link. Choose where it shows (all pages or lobby only) and who sees it (everyone, guests only, or logged-in players only).
- Hero banner — a bold headline block on your lobby with a title, subtitle, image, and a call-to-action button, with full color control.
Both are off by default — turn them on when you have something to promote.
Site & SEO
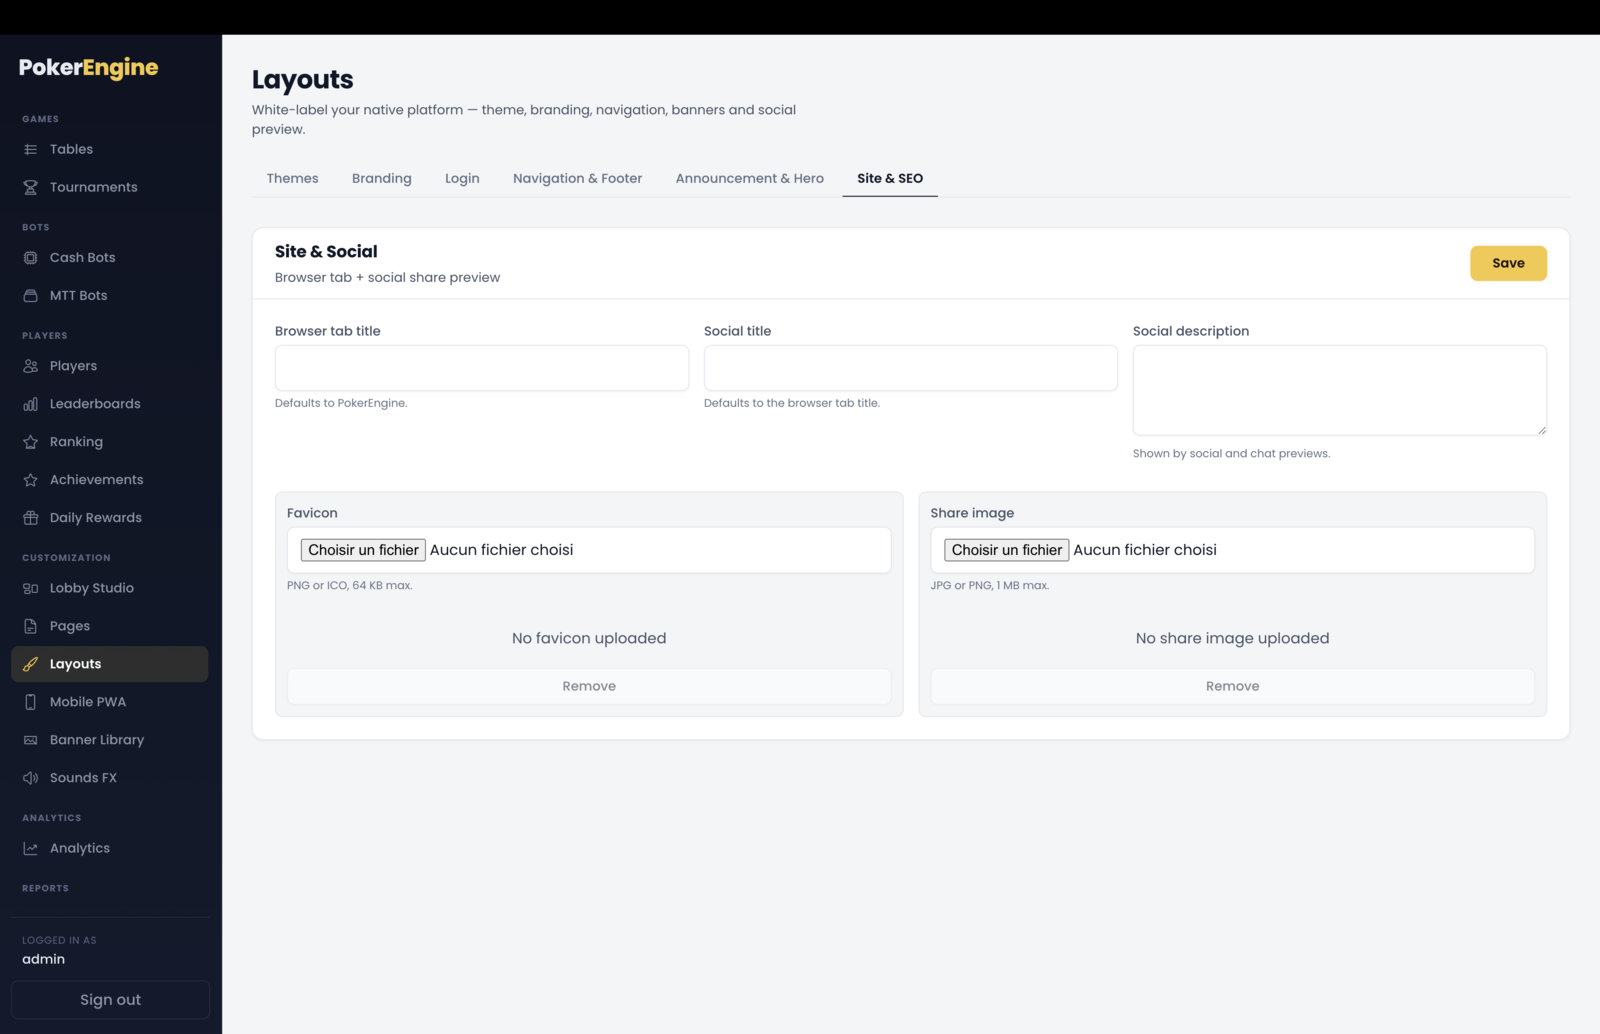
Controls how your platform looks in the browser and when shared:
- Browser tab title — the text in the browser tab (defaults to your brand).
- Social title & description — how a link to your site looks when shared on social media or chat.
- Share image — the preview image shown with that share.
- Favicon — the little icon in the browser tab.
Good to know
- Themes connect to your lobby. Applying a theme updates your primary lobby (created in Lobby Studio), so set up a lobby first if you haven’t.
- Pages → Menus is a two-step flow. Publish a page in Pages, then add it to your navigation here — the “Add page” button is disabled until you have at least one published page.
- Set your brand once and let it cascade. The login logo falls back to your branding logo, and the browser tab / social titles fall back to your brand text — so you can fill in the essentials and let the rest inherit.
- It all works standalone. Everything Layouts styles is your own native platform. (If you also run a separate external site, optional embed snippets exist — but you never need them to use PokerEngine.)
Banner Library
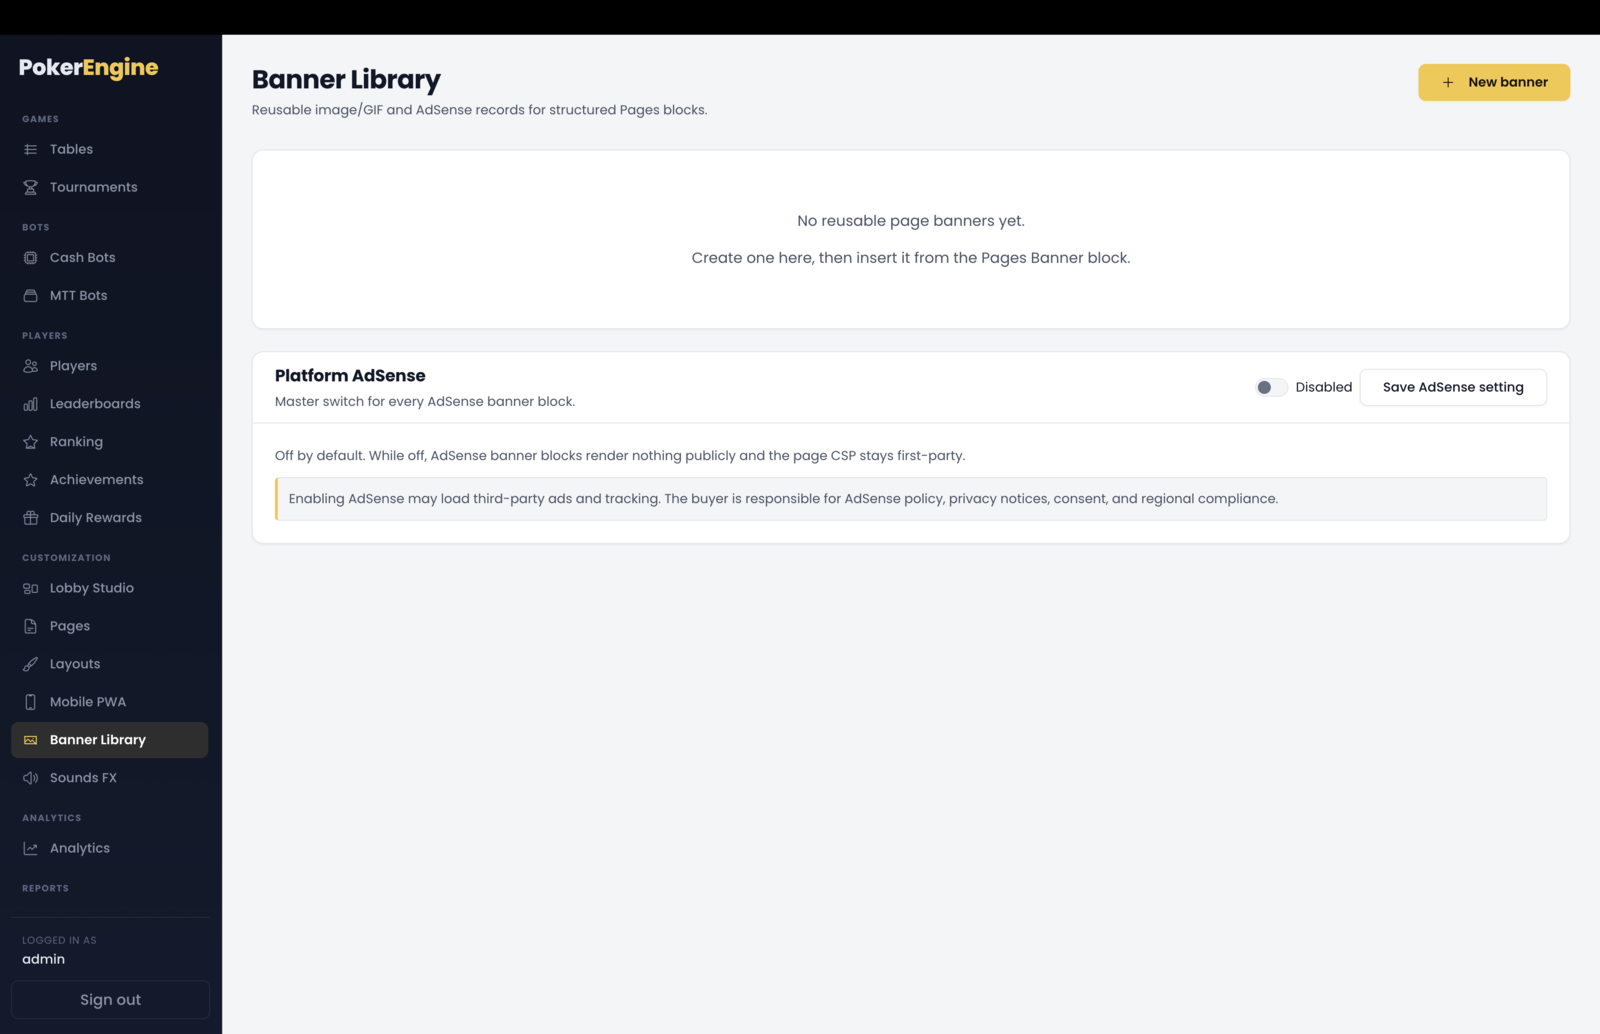
The Banner Library section (under Customization) is a reusable library of banners. You create a banner once here, then drop it into as many pages and widgets as you like — a clean way to manage promo creatives in one place. Change the banner here and it updates everywhere it’s used.
The library starts empty; you add banners as you need them.
This is separate from the announcement bar and hero banner in Layouts — those are one-off blocks. The Banner Library is for reusable creatives you place inside pages.
Two kinds of banner
- Image banner — an uploaded image (PNG or GIF), optionally clickable through to a link. This is the everyday banner for promos, artwork, and calls-to-action. No third-party setup needed.
- AdSense banner — a Google AdSense ad slot, for monetizing your platform with ads. This is optional and off by default (see below).
Creating an image banner
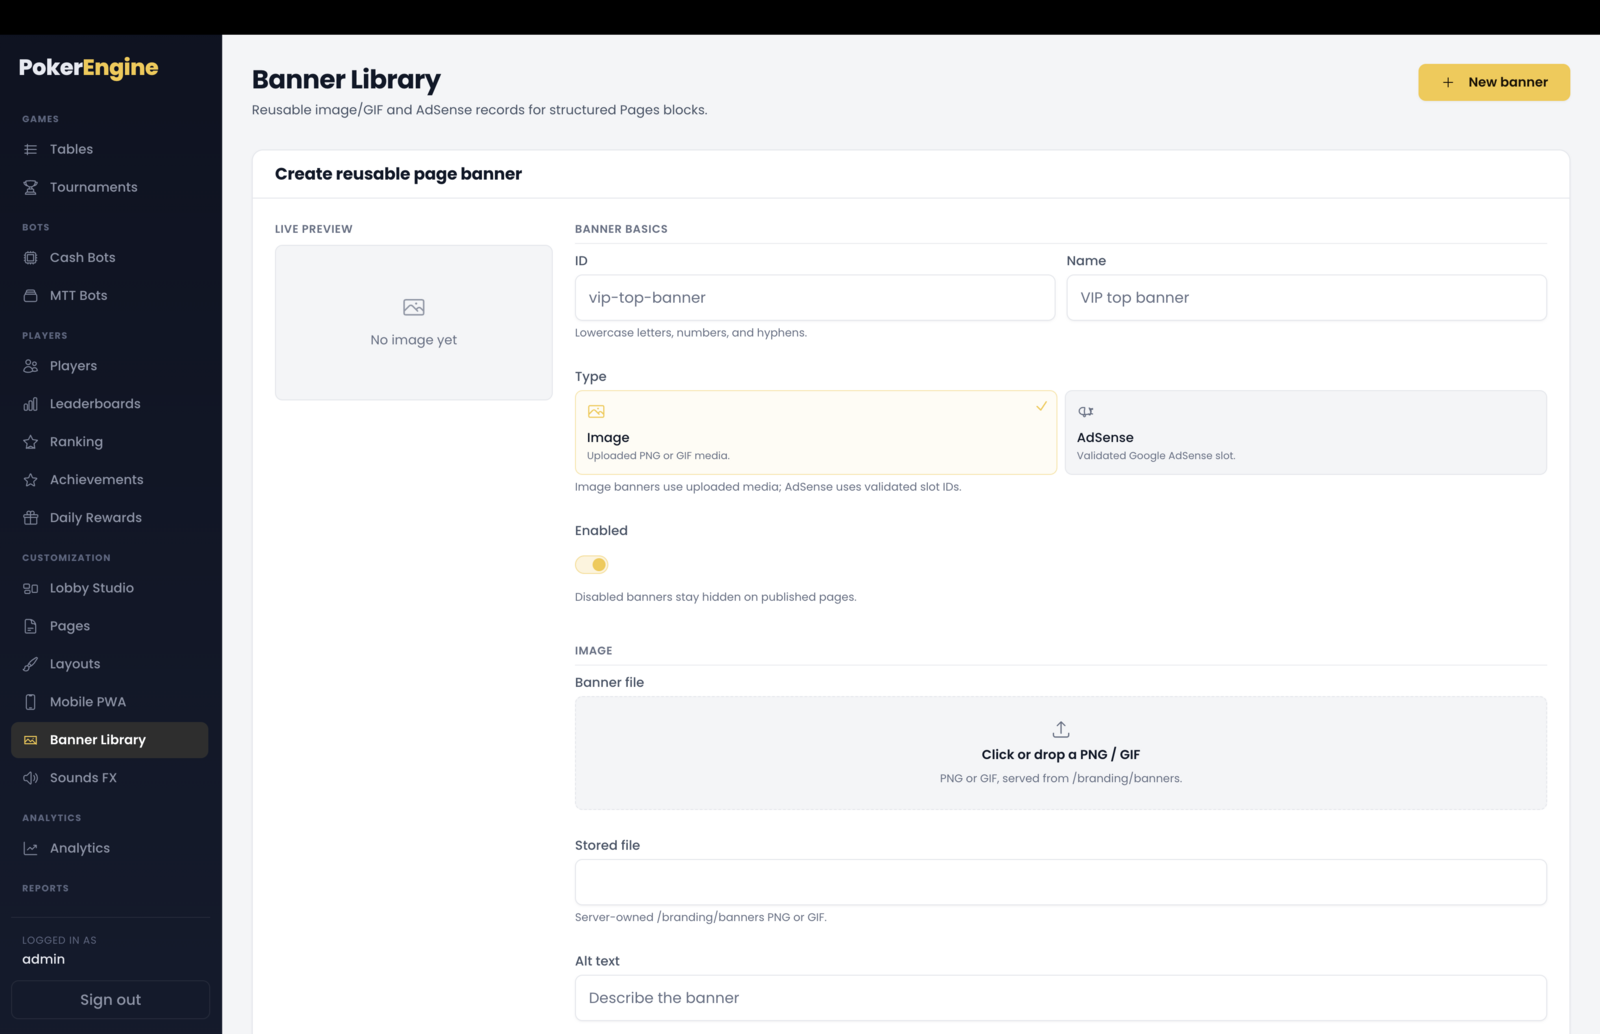
Click New banner, choose Image, and set:
- Name and ID — the name is your label; the ID is how it’s referenced (permanent once created).
- Image — upload a PNG or GIF, up to 2 MB.
- Alt text — a short description (required, for accessibility).
- Link (optional) — a URL the banner clicks through to, opening in the same tab or a new one.
- Sizing — a width preset (rail, compact, normal, wide, full, or a custom width) and how the image should fit its space.
- Enabled — turn it on or off; disabled banners simply don’t show.
A live preview shows exactly how it’ll look as you edit.
Using a banner
Once created, place a banner wherever you want it:
- In a page — add a Banner block in the Pages builder and pick your banner from the list.
- In a sidebar — the Promo and Image widgets can use a banner.
- By shortcode — each banner has a
[pe_banner id="…"]shortcode you can copy.
Because banners are referenced by ID, updating a banner here instantly refreshes it everywhere it appears.
AdSense banners (optional monetization)
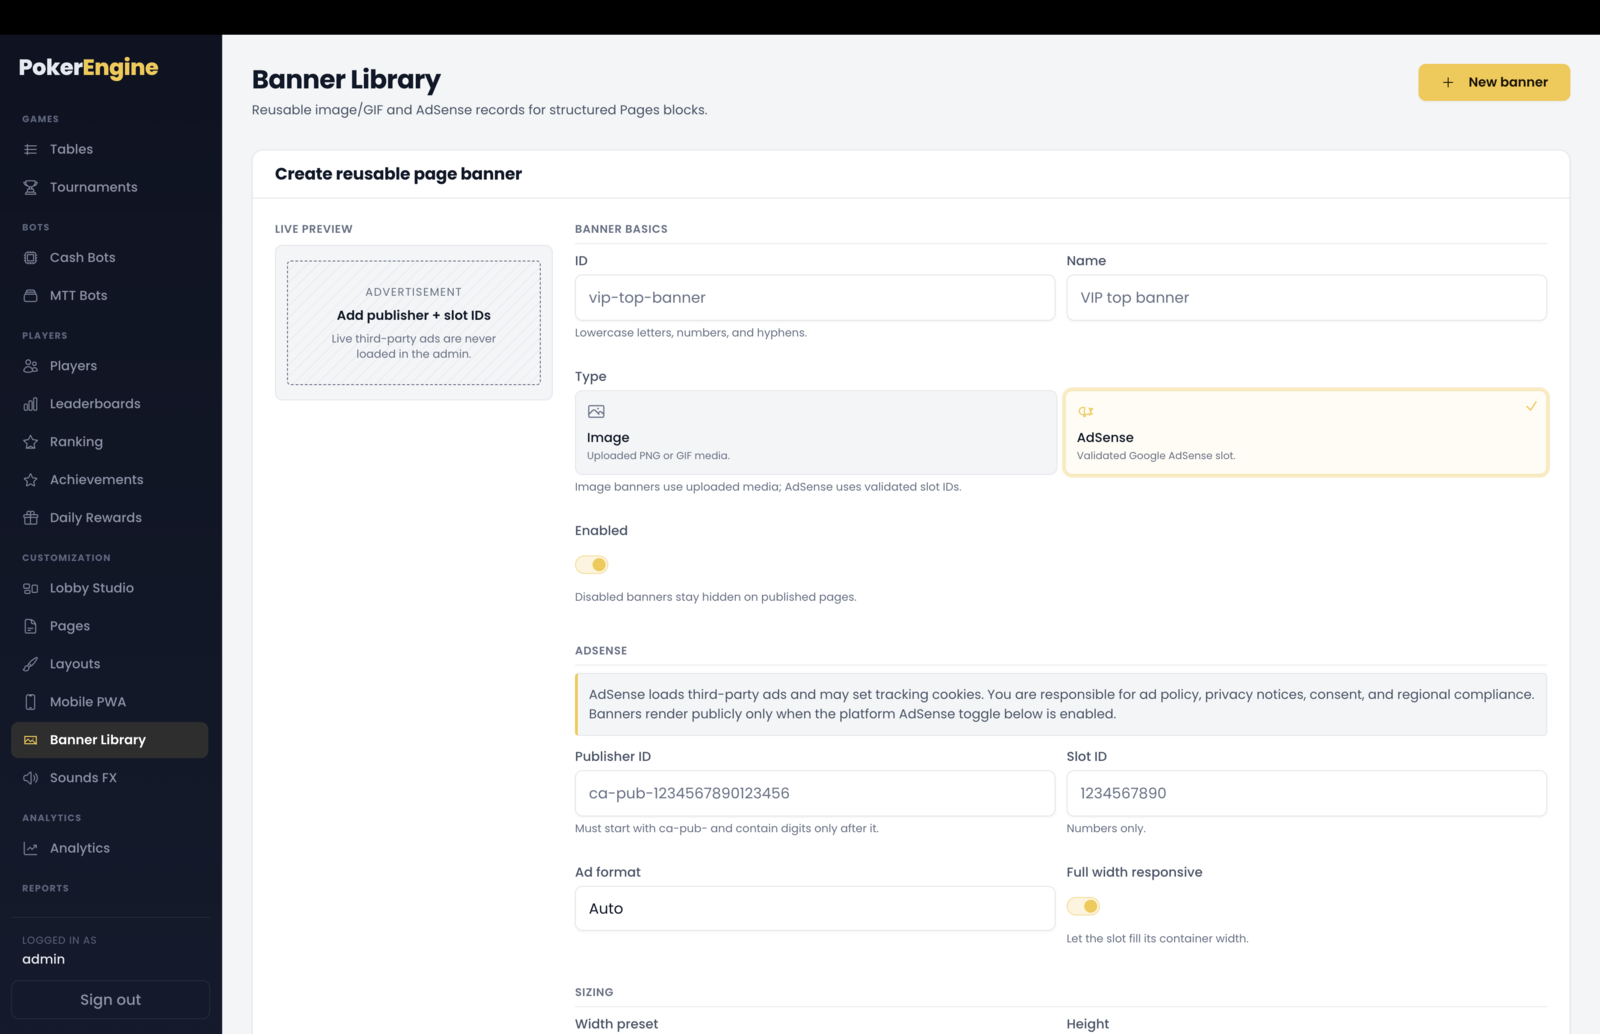
If you want to run Google AdSense ads on your platform, create an AdSense banner with your Publisher ID, Slot ID and ad format, then place it in a page or the AdSense sidebar widget. Two things to know:
- There’s a master AdSense switch at the bottom of the page — it’s off by default, and no ads show anywhere until you turn it on. Even a fully configured AdSense banner stays invisible while it’s off.
- You’re responsible for ad compliance — Google’s policies, privacy, consent and any regional rules. Image banners have none of these requirements.
In the admin, AdSense banners always show a placeholder — real ads are never loaded while you’re editing.
Good to know
- Name and image can change; the ID and type can’t. To switch a banner between Image and AdSense, or change its ID, create a new one.
- Deleting or disabling a banner is safe. Any page or widget using it simply hides that spot — nothing breaks.
- Images are PNG or GIF, up to 2 MB. Other formats aren’t accepted.
- Changes apply live — create, edit, enable or delete, and pages update on the next load with no restart.
Mobile PWA
The Mobile PWA section (under Customization) shapes the installed mobile app experience. PokerEngine is a Progressive Web App (PWA), which means players can install it to their phone’s home screen and use it like a native app — with your icon, your name and your colors. This section is where you set that up, plus the mobile navigation players use on their phones.
Like the rest of the platform, it works out of the box (default icon, default mobile menus, a working app manifest) — this section is for making it yours. It has two tabs, sharing a live phone preview.
PWA settings — your app’s identity
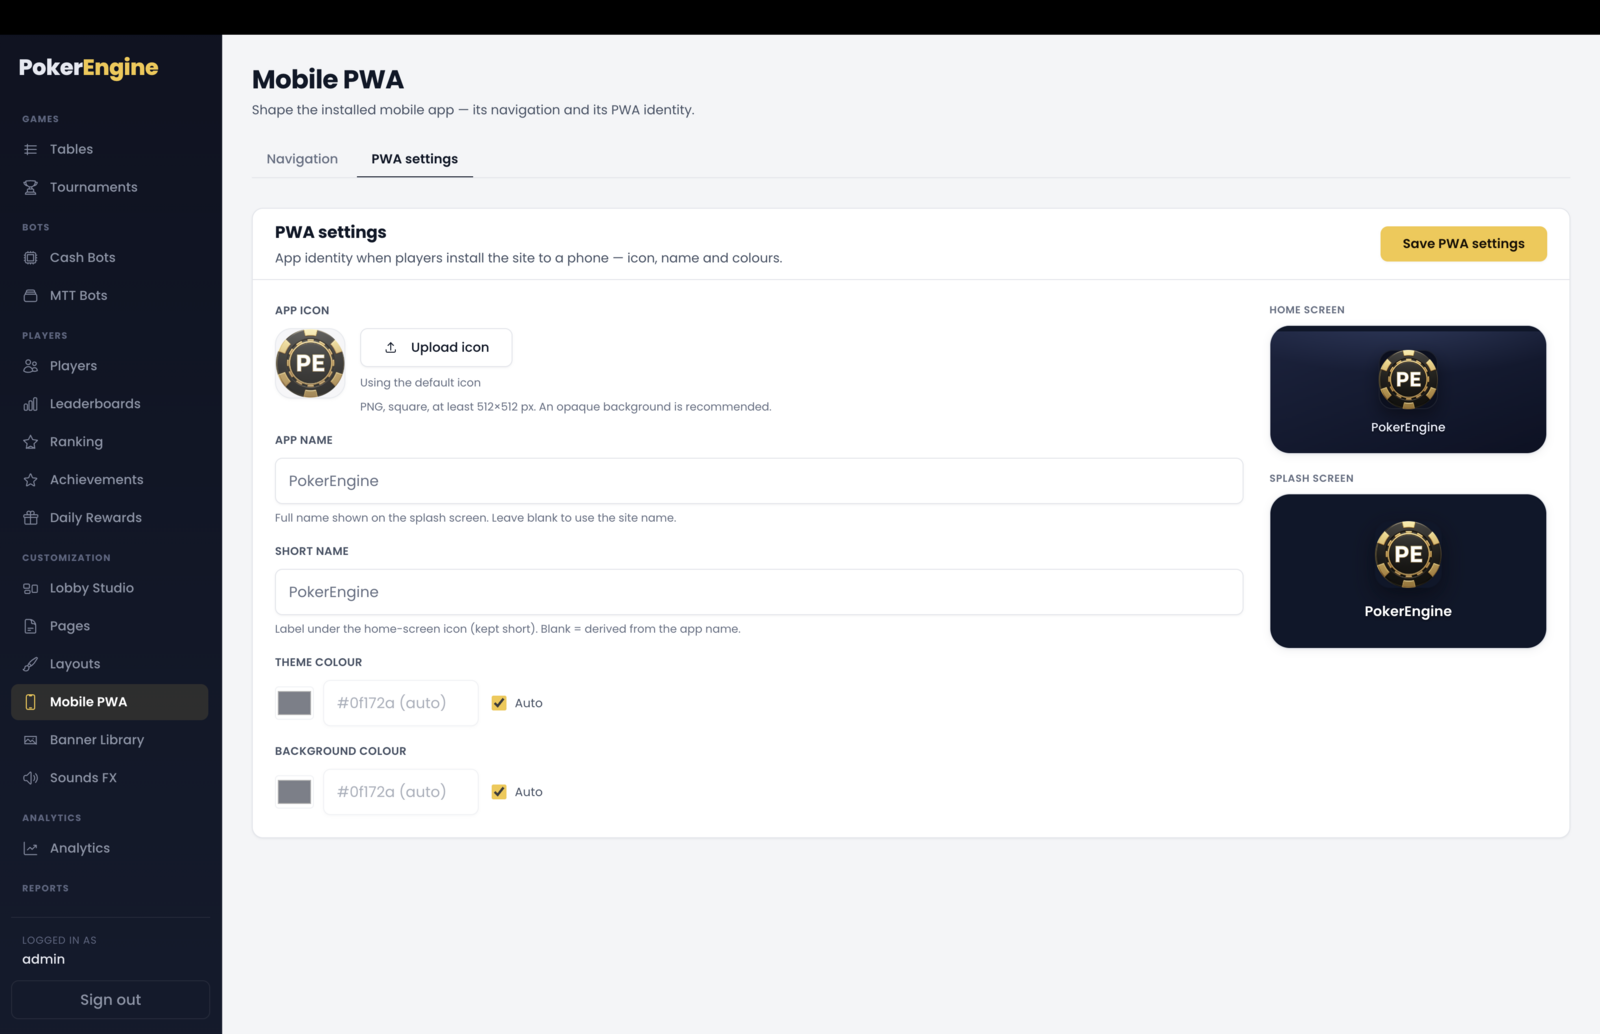
This is what players see when they install your platform to their home screen:
- App icon — a square PNG, at least 512×512 and up to 3 MB. Ships with a default; upload yours to replace it. (Use an opaque background — it becomes the rounded home-screen icon and the splash screen.)
- App name — the full name shown on the splash screen.
- Short name — the short label under the home-screen icon.
- Theme color — the color of the phone’s status/toolbar when your app is open.
- Background color — the splash-screen background while the app loads.
Both colors have an “Auto” option that follows your site theme automatically — so if you change your theme later, the app colors keep up. Two live mockups (home-screen tile and splash screen) show exactly how it’ll look.
Navigation — the mobile menus
Phones use their own navigation, which you build here (it’s separate from your desktop menu in Layouts, so you can tailor the mobile experience):
- Bottom bar — the tab bar at the bottom of the screen: 3 to 5 tabs of your choice. A “More” tab is added automatically as the last one.
- More menu — the sheet that opens from “More”: up to 12 shortcuts. It can even be left empty (players still get their identity and Sign out there).
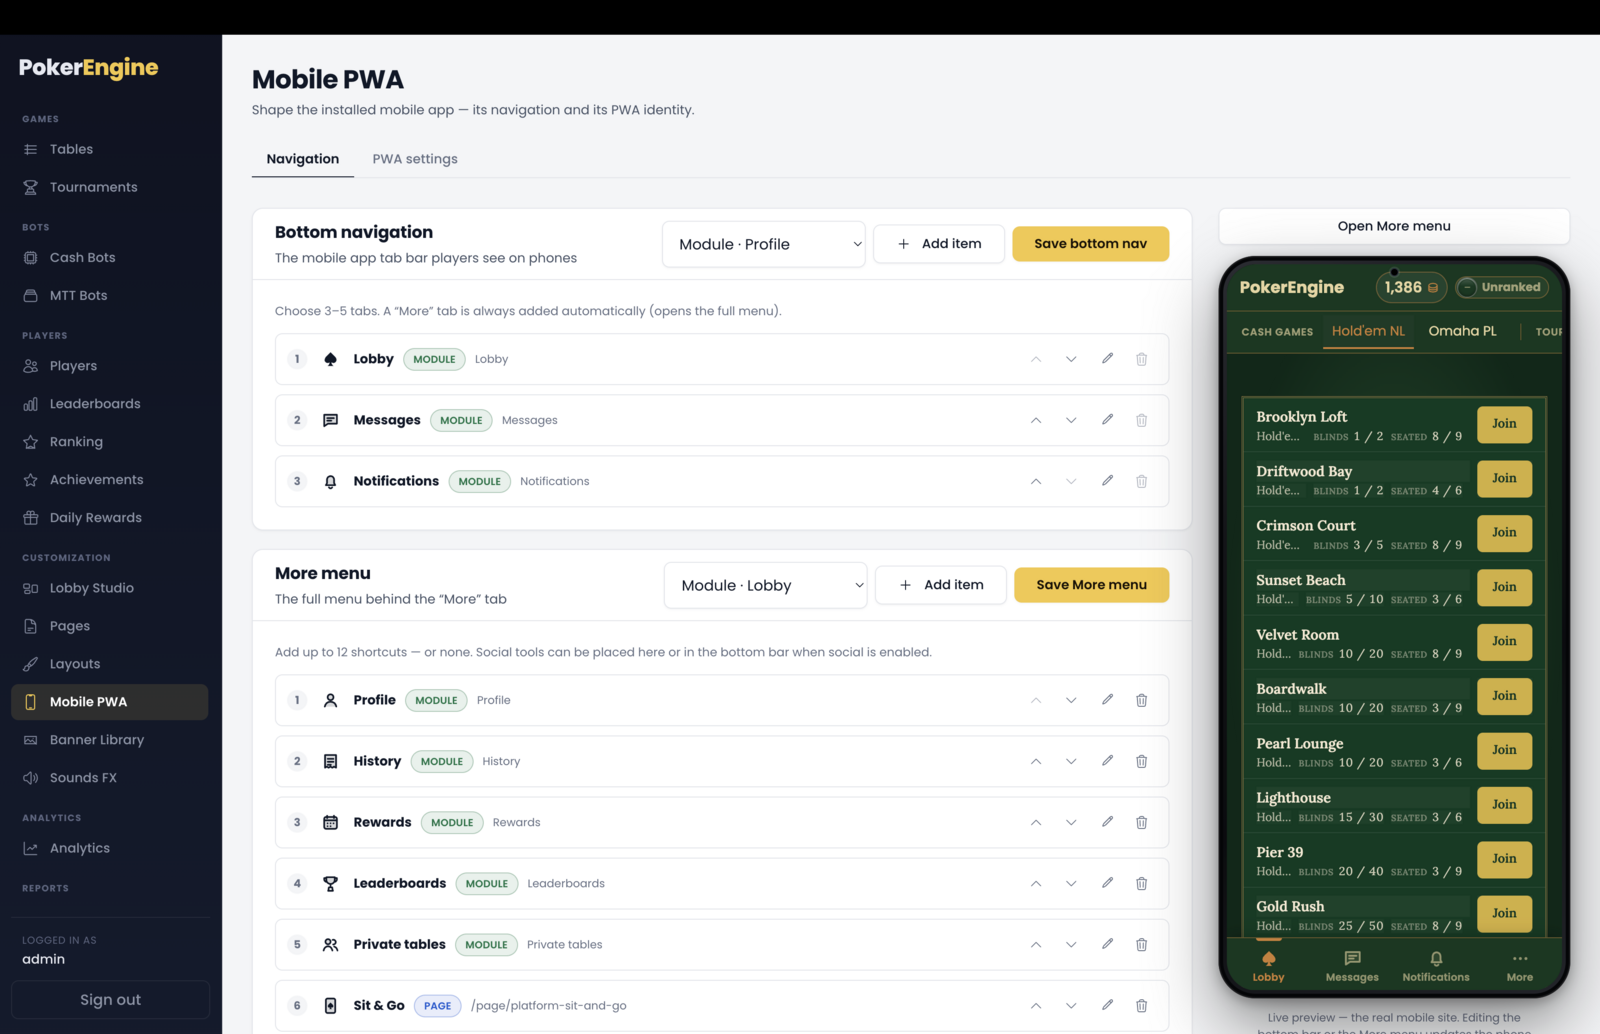
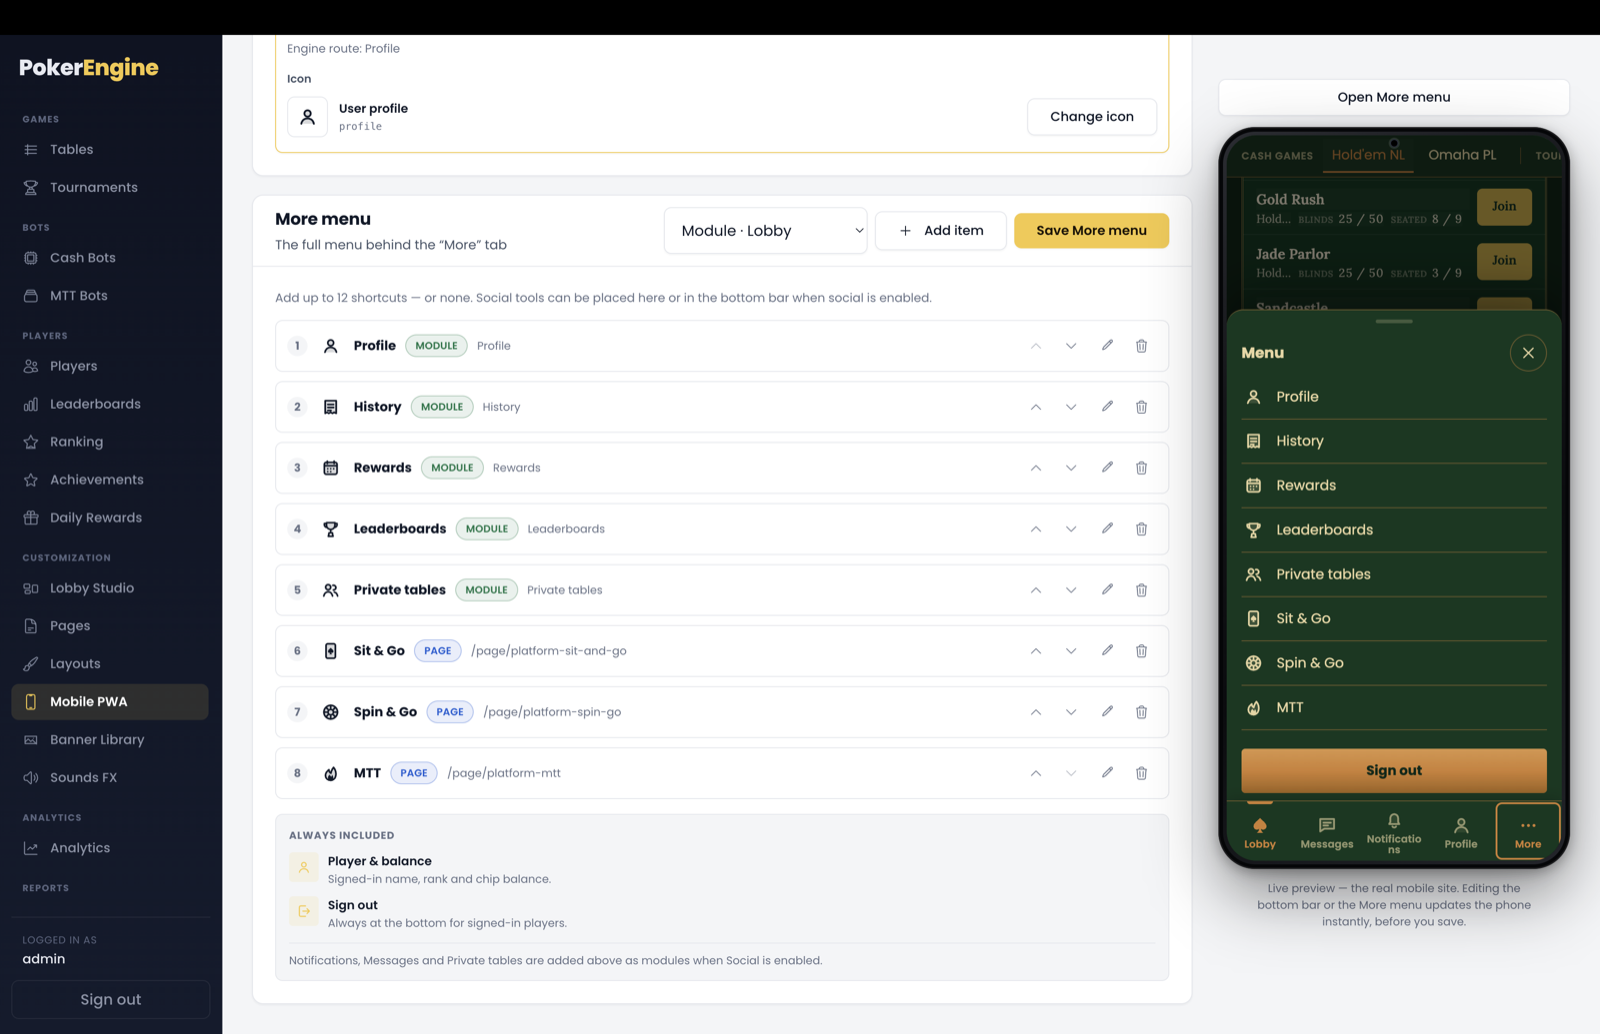
For each item you choose:
- Destination — a platform area (Lobby, Profile, History, Rewards, Leaderboards, Tournaments, and — if you use Social — Notifications, Messages, Private tables) or one of your published Pages.
- Label — a short name (up to 18 characters).
- Icon — pick from a large built-in icon library, or upload your own (PNG).
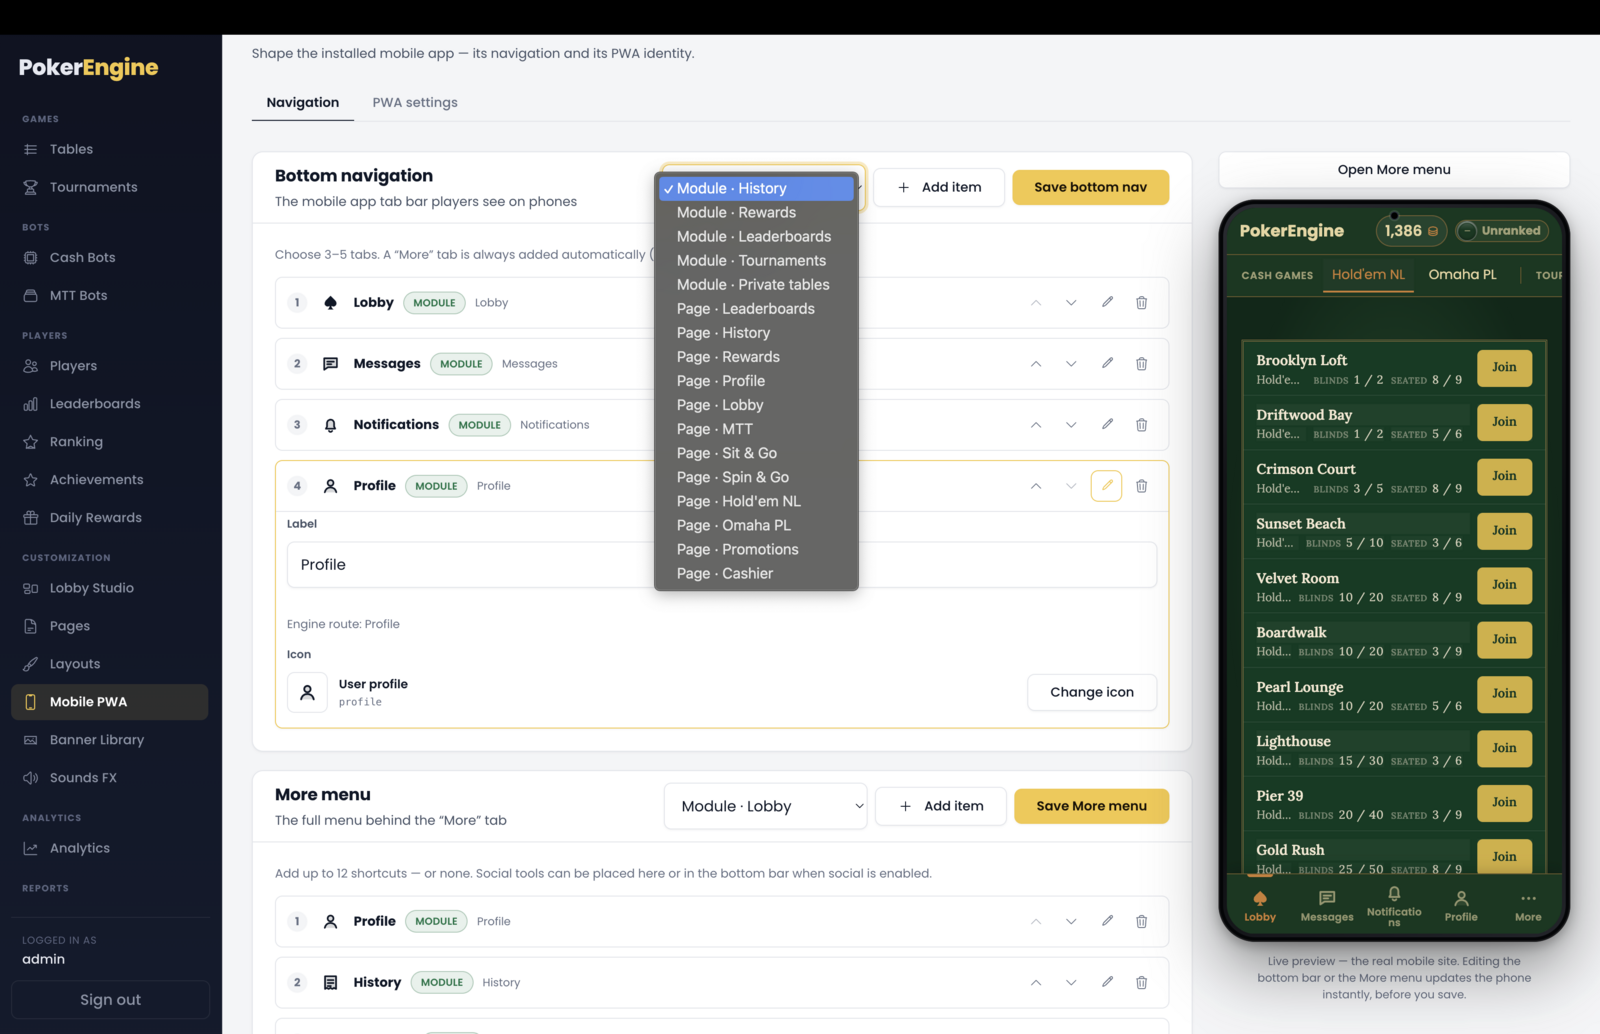
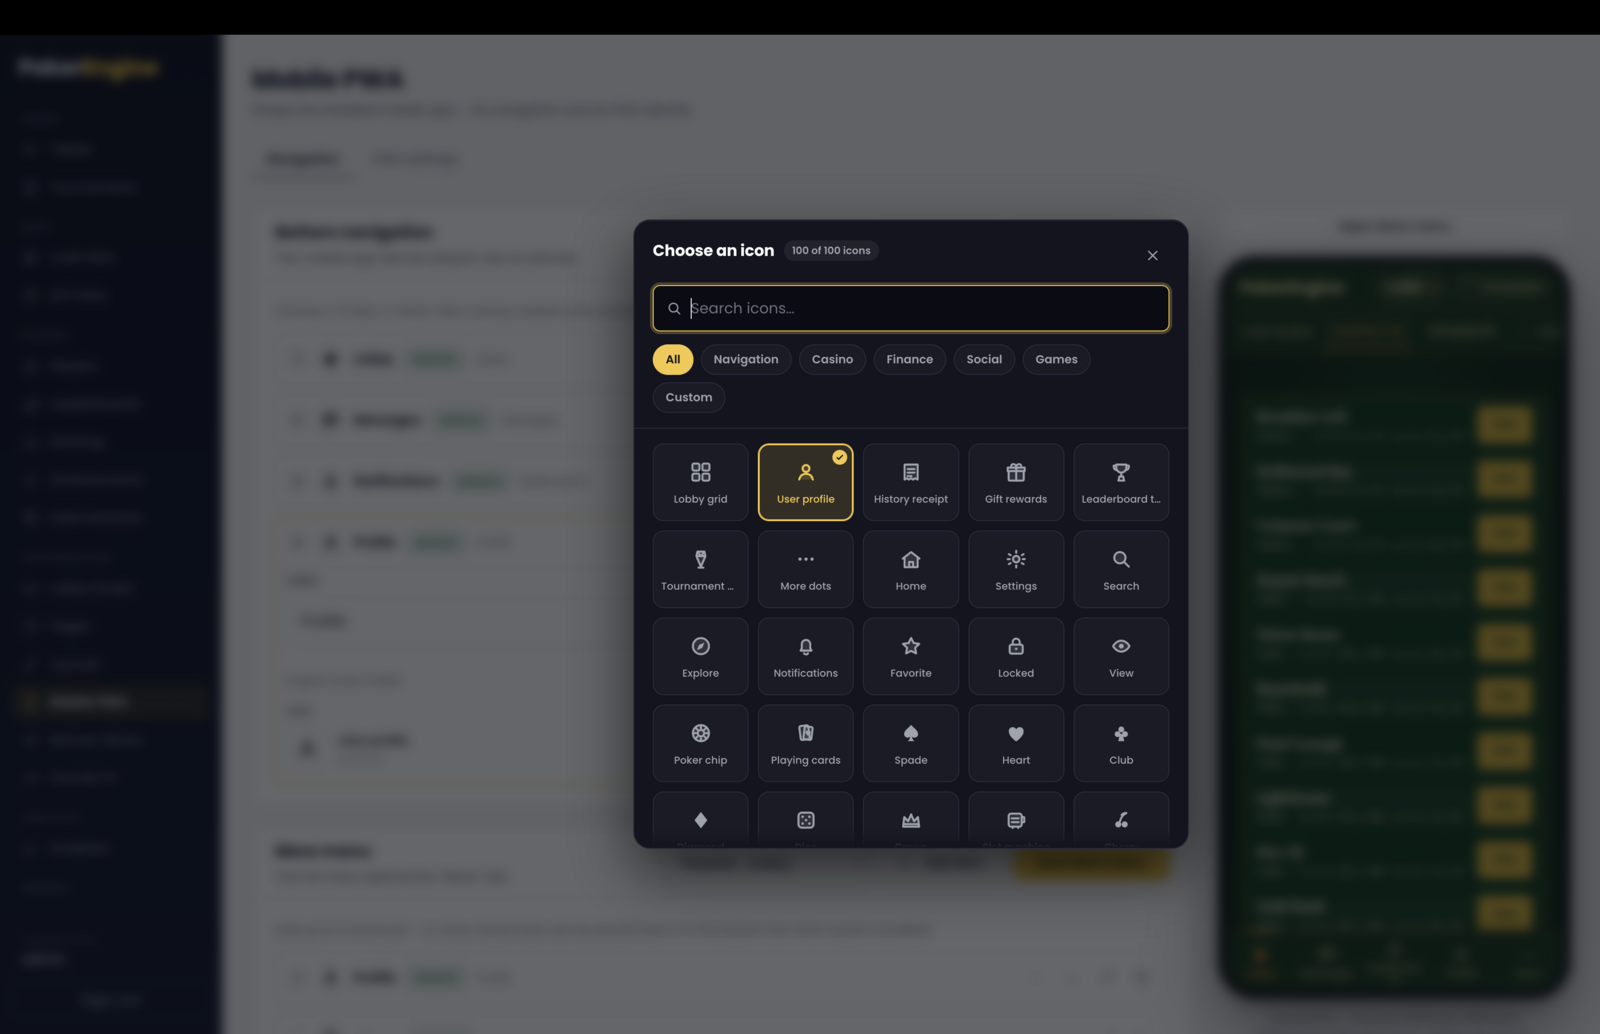
Reorder items with up/down, edit or remove them, and watch the phone preview update live as you go (you can even pop open the “More” sheet in the preview to check it).
How players install the app
Installation is handled automatically for players on mobile:
- Android / Chrome — players get a one-tap Install button that triggers the phone’s native “Add to home screen” prompt.
- iPhone / Safari — Apple doesn’t allow an automatic prompt, so players are shown the quick “Add to Home Screen” steps.
Once installed, your app opens full-screen with your branding, no browser bars.
Good to know
- Two different icons. The app icon (home screen) must be a square PNG of at least 512×512. The small navigation icons are a separate, lighter asset.
- Mobile and desktop menus are independent. Building your desktop navigation in Layouts doesn’t change the phone menus, and vice-versa — design each for its screen.
- Updates reach installed apps automatically. When you deploy a new version, players get it the next time they open the app — no need to reinstall or clear anything.
- Ready to use. A default icon, a sensible bottom bar (Lobby, Rewards, Ranks, Profile) and a full “More” menu ship configured — customize only what you want.
Sounds FX
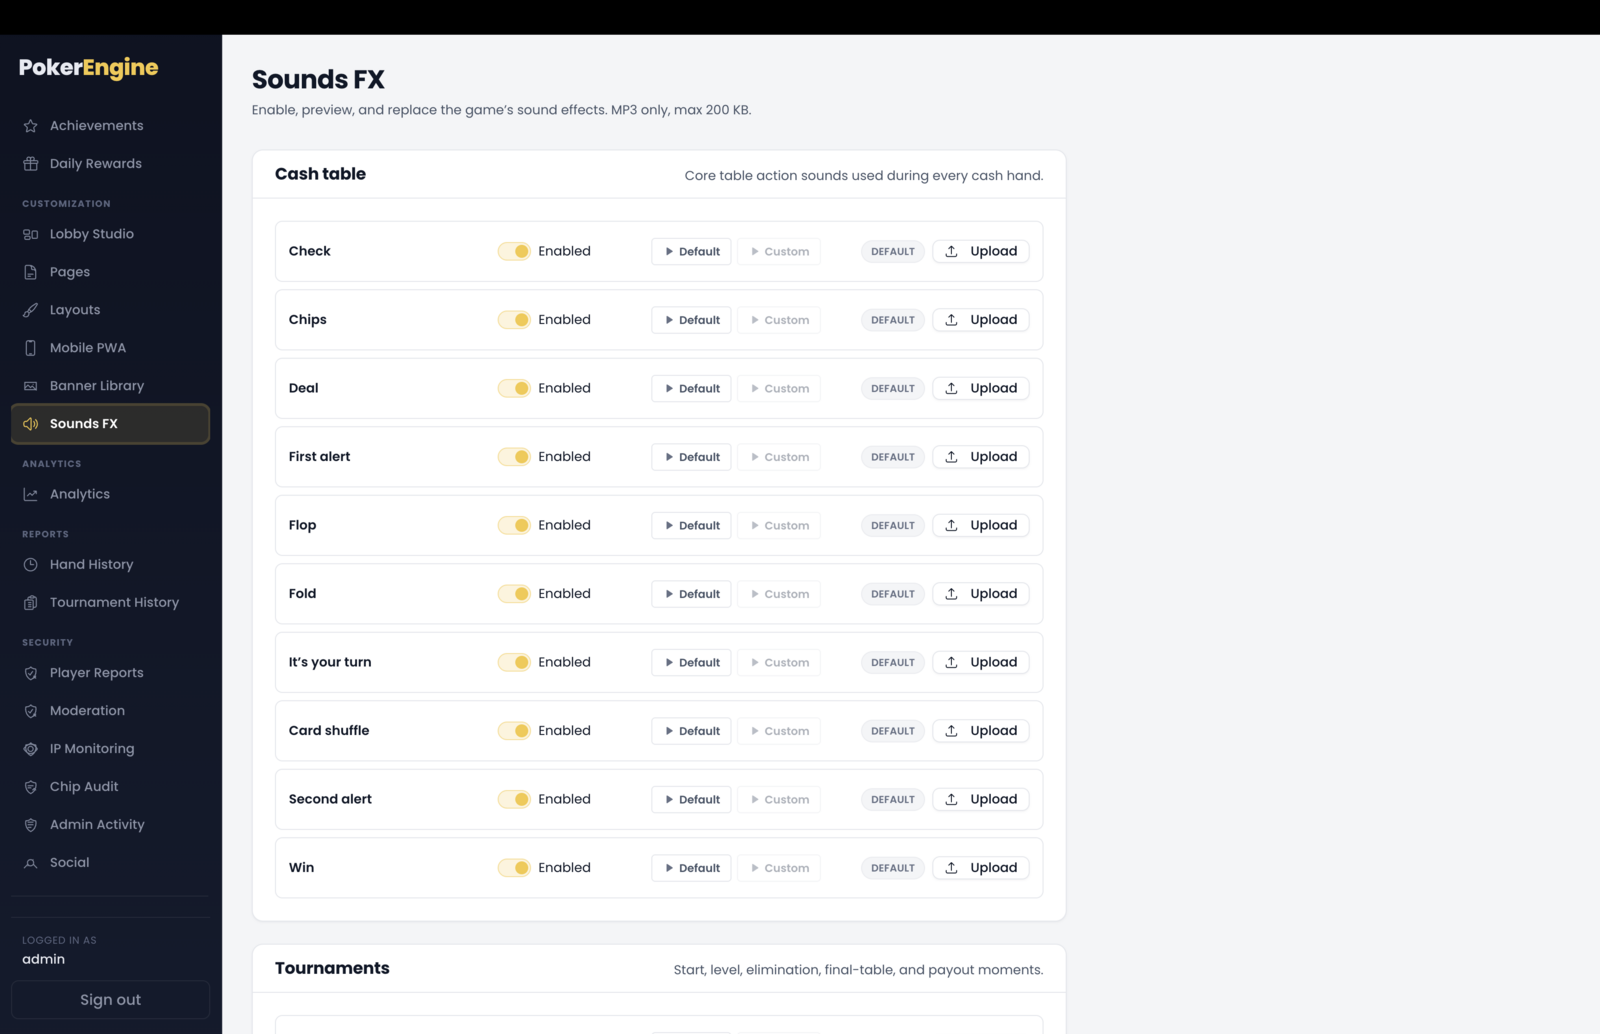
The Sounds FX section (under Customization) lets you customize the game’s audio — the little sounds that make a poker room feel alive: cards dealing, chips betting, the “it’s your turn” alert, a win chime, tournament fanfares, the Spin & Go wheel, and more. You can turn individual sounds on or off, preview them, and replace any of them with your own audio.
Everything ships ready to use: PokerEngine comes with a full set of built-in sounds, all enabled, so your game sounds great from the first launch. This section is only for tweaking.
What you can customize
Sounds are grouped into four sections:
- Cash table — the core in-game sounds: card deal, shuffle, check, fold, chips/bet, flop, win, “it’s your turn”, and turn-timer alerts.
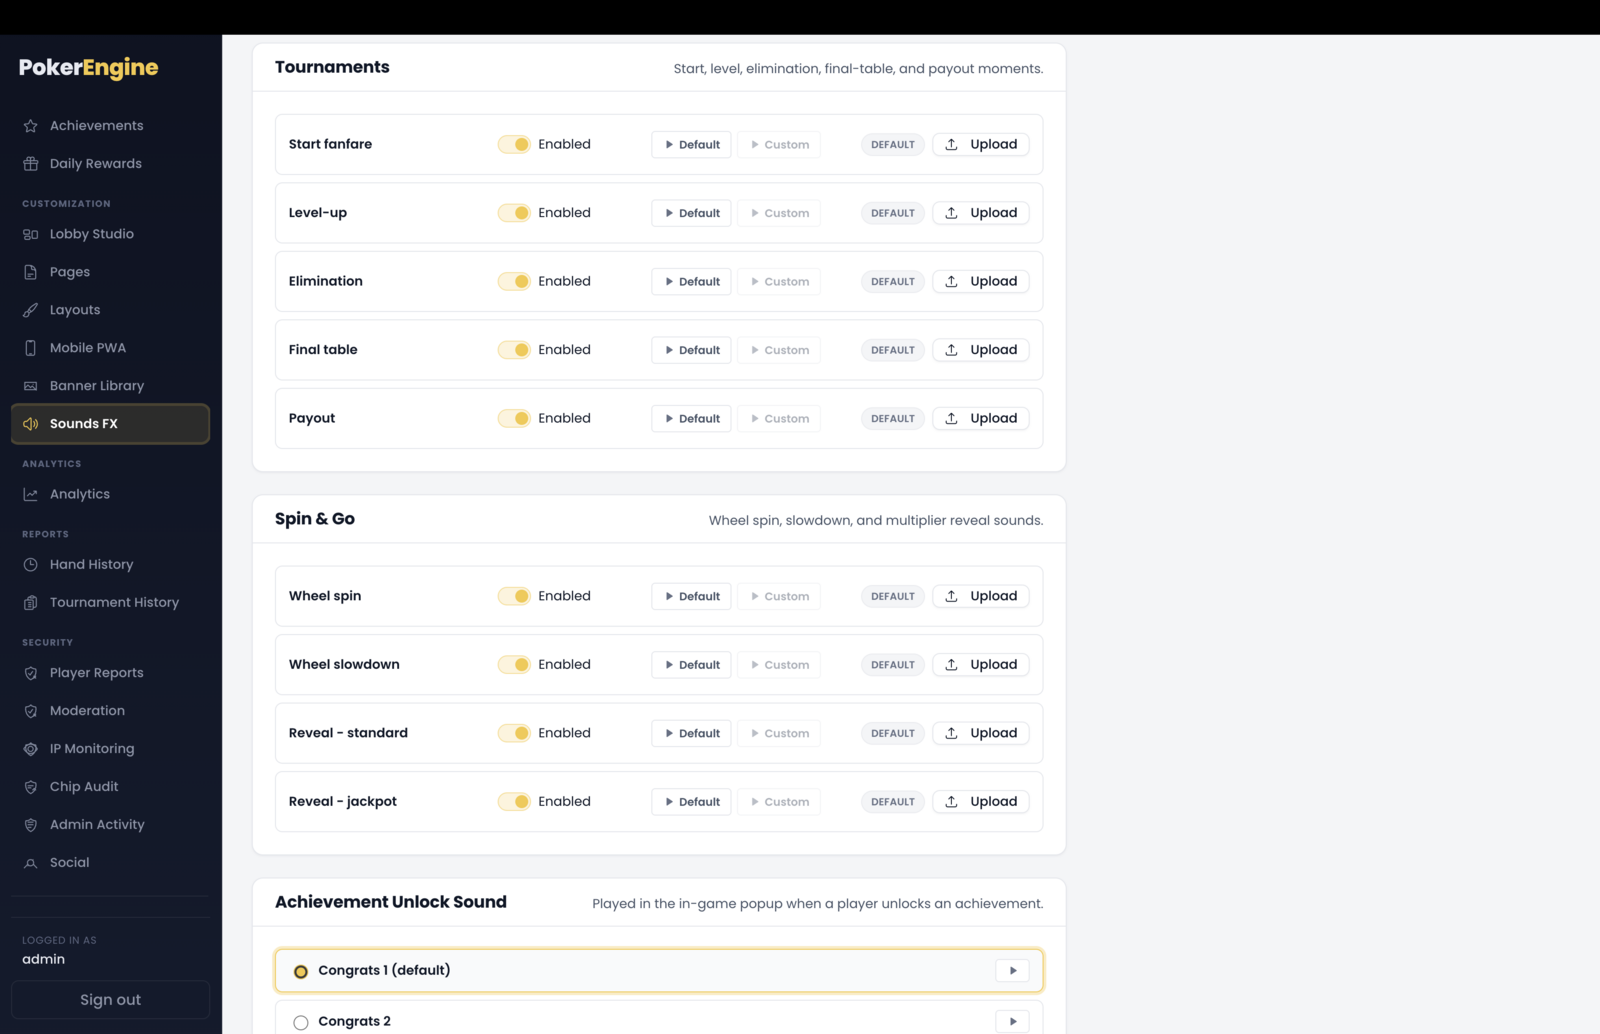
- Tournaments — the tournament moments: start fanfare, level-up, elimination, final table, and payout.
- Spin & Go — the wheel: spin, slowdown, and the standard/jackpot reveal.
- Achievement unlock — the sound played when a player earns an achievement. Pick from four bundled “congrats” chimes, or upload your own.
Working with a sound
For each sound you get:
- Enable / Disable — silence a sound in-game without deleting anything.
- Preview — play the default (and your custom version, once uploaded) right in the admin to hear it.
- Replace — upload your own audio to override the default.
- Revert — go back to the built-in sound at any time.
Each row clearly shows whether the Default or your Custom sound is currently playing.
Uploading your own sounds
- Format: MP3 only.
- Size: up to 200 KB per sound (keep clips short and punchy — that’s plenty for a UI sound).
Changes save instantly and go live immediately — players already connected hear the new sounds without refreshing.
How players hear and control sound
- Sound just works — the browser needs one interaction before audio can play, which happens naturally on the player’s first click; there’s no “click to enable sound” screen to worry about.
- Players control their own volume and mute. Each player has a volume/mute control, and their choice always wins over the default. There’s a default starting volume for brand-new players, set on the Settings page — it only affects players who haven’t chosen their own level yet.
Good to know
- Ready to use. A full set of sounds ships enabled by default — you never need to upload anything to have a fully-audible game.
- MP3, 200 KB max. Longer or heavier files are rejected; short UI-style clips are the goal.
- Reverting keeps your on/off choice. Restoring a sound to its default doesn’t re-enable it if you’d turned it off.
- Everything applies live — no restart, and connected players update on the fly.
Hand History
The Hand History section (under Reports) records every hand played on your platform and lets you browse, search, replay it step by step, and export it. It’s your tool for player support, settling disputes, and auditing what happened at the table.
It works out of the box — every resolved hand is captured automatically.
Browsing hands
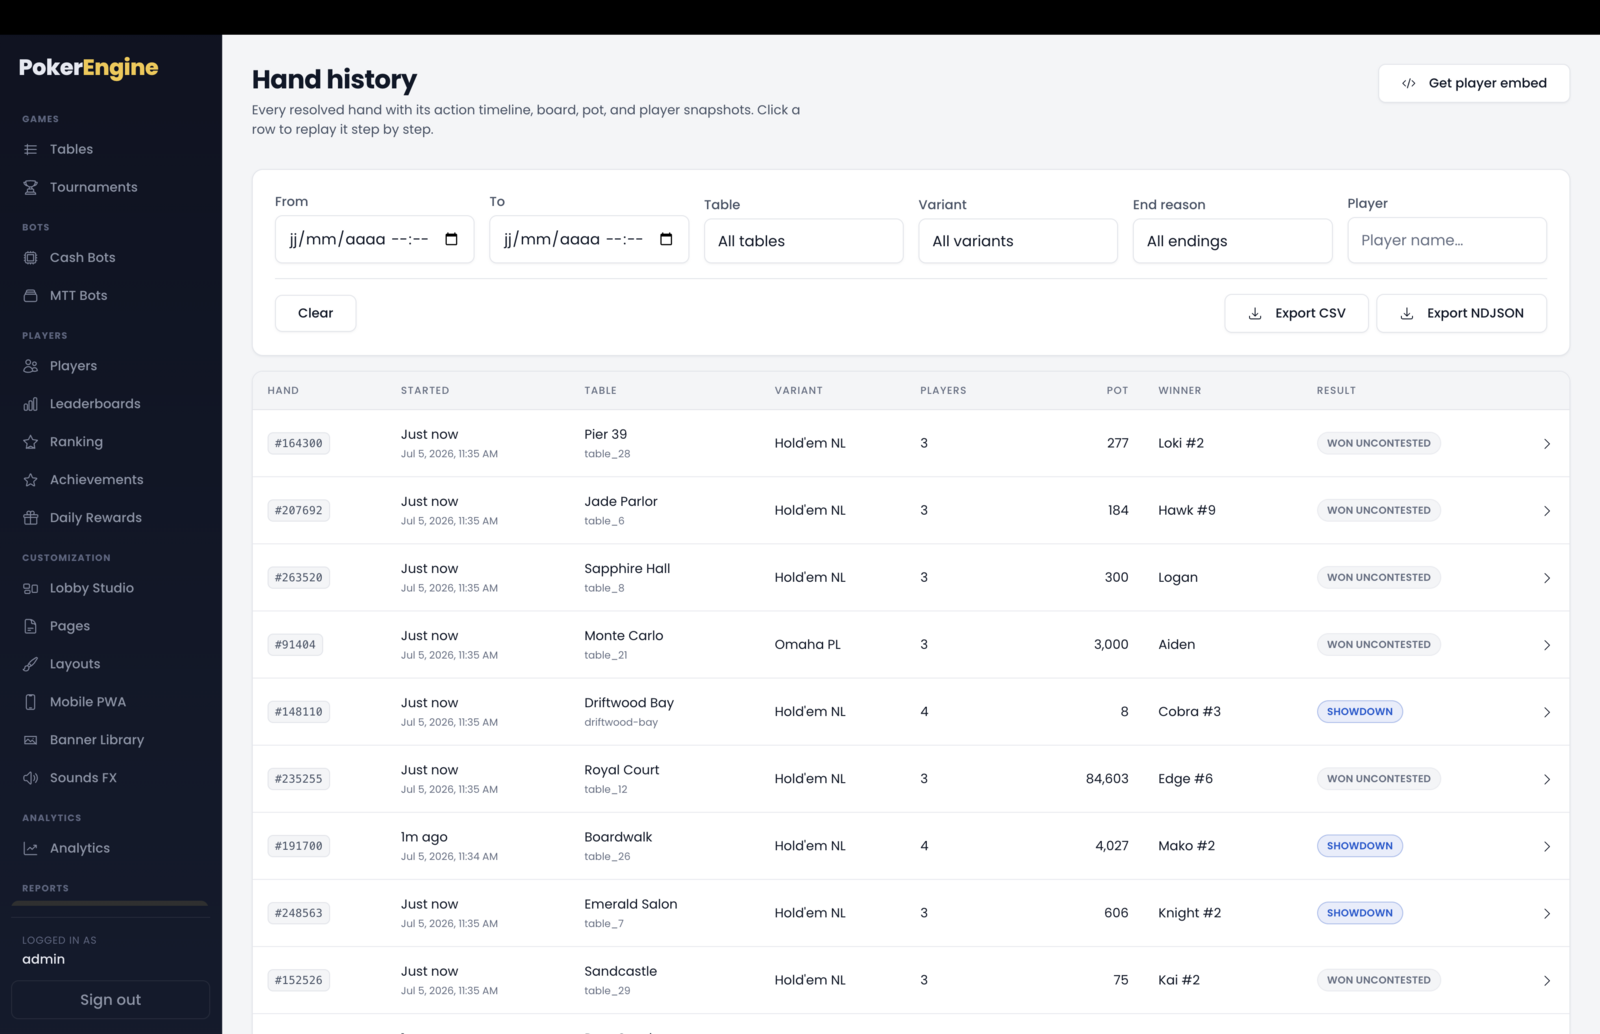
The list shows one row per hand with:
- Hand number, when it started (your local time), and the table.
- Variant (Hold’em NL, Omaha PL, Omaha NL), the number of players dealt in, and the pot size.
- Winner (click the name to jump to their profile) and the result (Showdown, Won uncontested, or Lone survivor).
Click any row to open its full replay.
Searching & filtering
Narrow things down with the filter bar:
- Date range (from / to)
- Table
- Variant
- End reason (showdown, won uncontested, lone survivor)
- Player — type a name to find that player’s hands
You can also arrive here pre-filtered to a specific table or tournament (for example from another screen), with a banner showing the active scope and a Clear button.
Replaying a hand
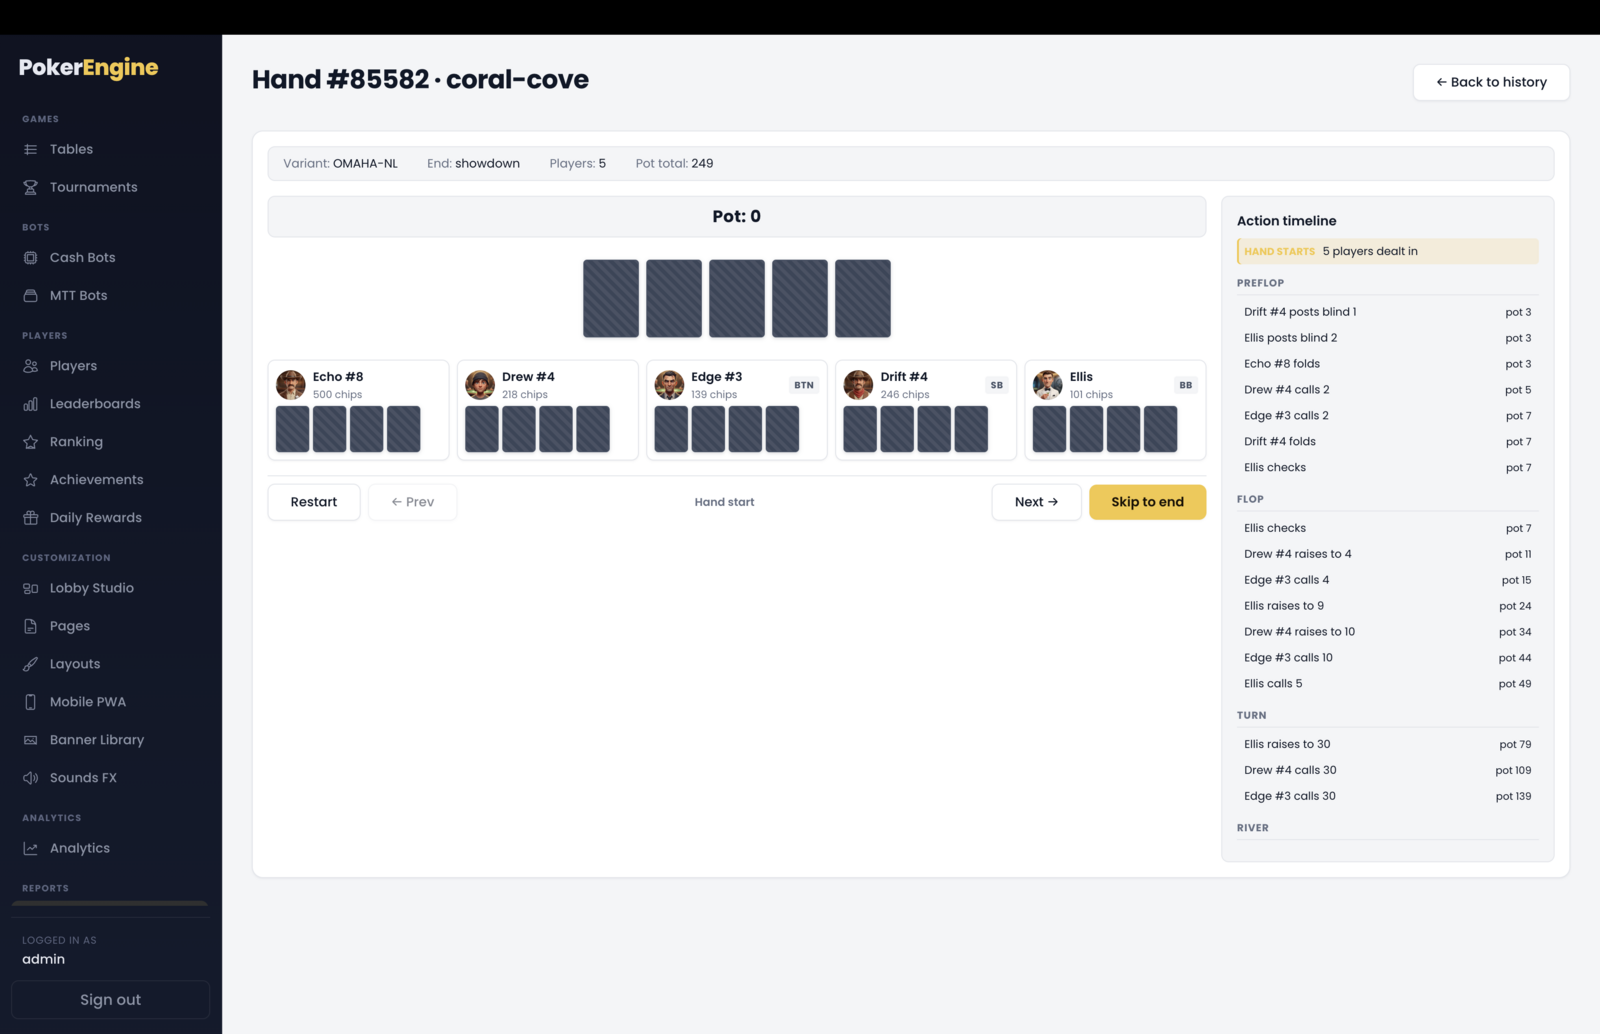
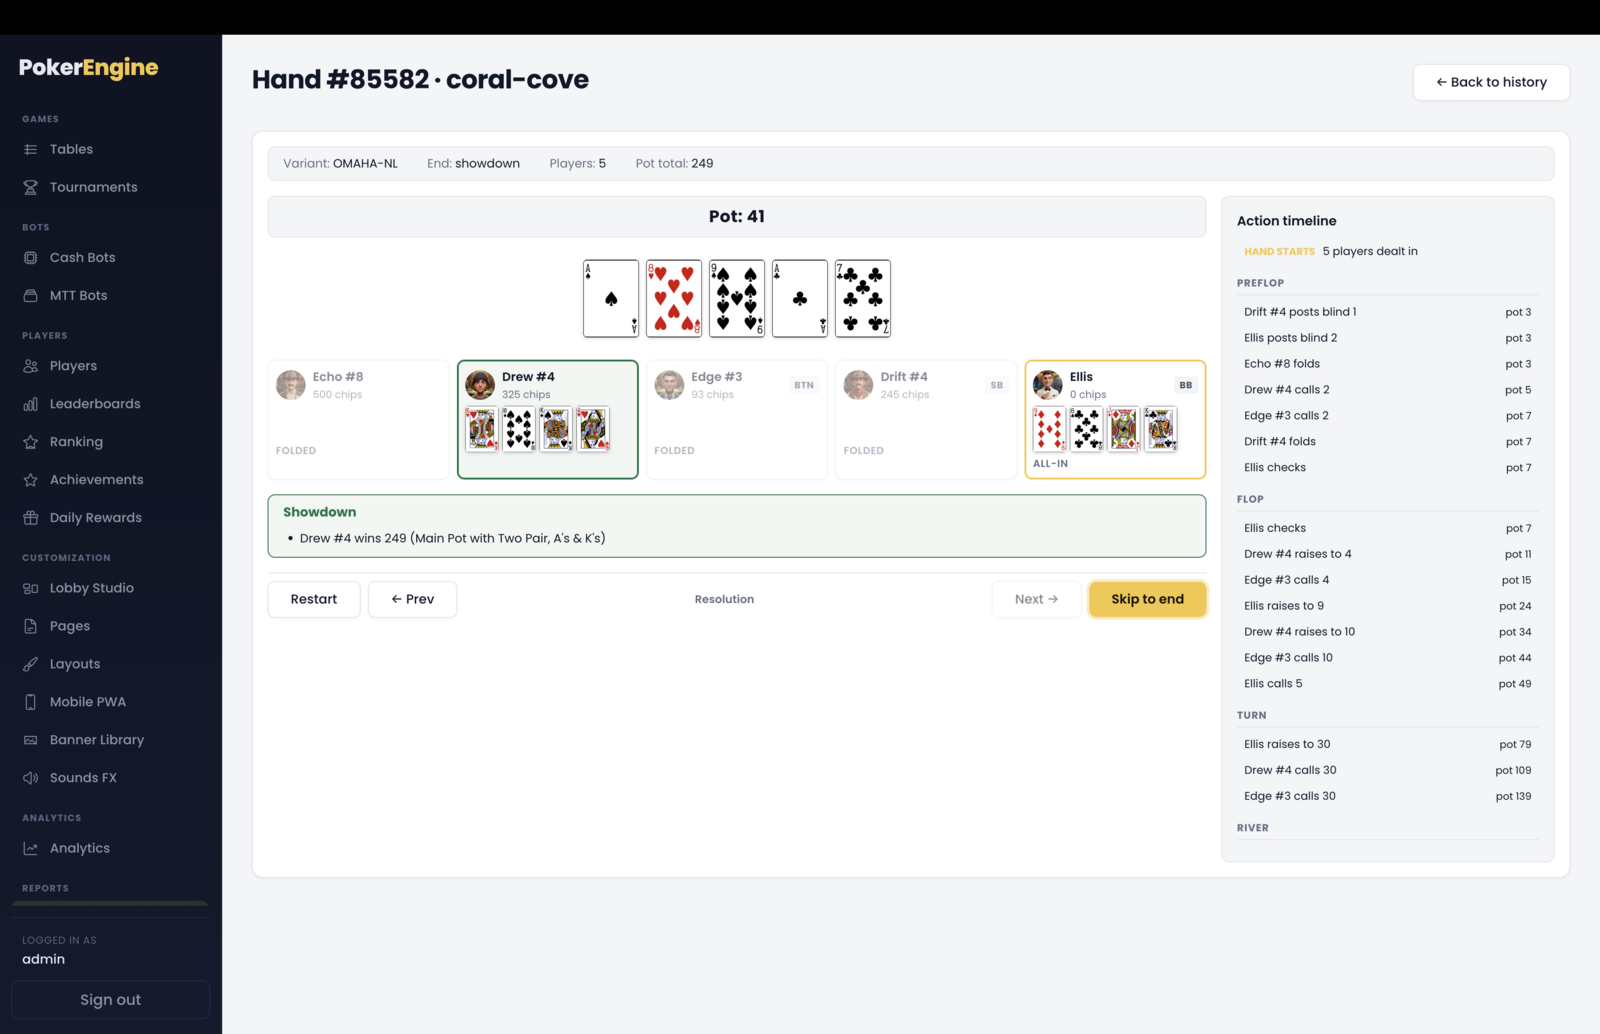
Opening a hand gives you a full step-by-step replay:
- The board reveals card by card, street by street (flop, turn, river).
- Each seat shows the player, their chips, position and status (folded, all-in), with winners highlighted.
- The action timeline lists every move — check, bet, call, raise, fold — with the running pot; click any step to jump to it, or use the Prev / Next / Skip to end controls (arrow keys work too).
- Hole cards are shown only for hands that went to showdown. Cards that were folded or won without a showdown were never revealed at the table, so they’re never stored — not even you can see mucked cards. This keeps the record honest to what actually happened.
Exporting
Need the data outside the platform? Export a date range as:
- CSV — one row per hand (great for spreadsheets).
- NDJSON — the full detail including the complete action timeline (great for deeper analysis or archiving).
A date-range picker shows a live estimate of how many hands and how big the file will be before you download. To protect performance, exports are limited to one every few minutes.
How long history is kept
Hands are stored in your database, so they accumulate over time. PokerEngine includes a cleanup routine you can schedule (for example, once a night) to automatically remove hands older than a chosen number of days (30 by default). This keeps your database lean — set the retention window to whatever suits your needs, or keep more history if you prefer. (Scheduling the cleanup is a quick one-time setup on your server.)
Good to know
- Both players and bots appear in history — each seat is marked accordingly.
- Times display in your local timezone (stored internally as UTC), so keep that in mind when cross-referencing with a player.
- Players can see their own hands too. Each player has a personal hand history (their hands only) inside the platform. Optionally, you can also let players view their own history on a separate external site via an embed — but that’s not needed to use the feature.
- Records can’t be edited — the history is a faithful, tamper-free record of what happened.
Tournament History
The Tournament History section (under Reports) lets you review every tournament that has finished or been cancelled — its results, final standings and prize payouts. It’s the tournament companion to Hand History: where you go to see how past events played out.
This is a read-only review section. You create, run and cancel tournaments in the separate Tournaments section; here you look back at the ones that are over.
Overview at a glance
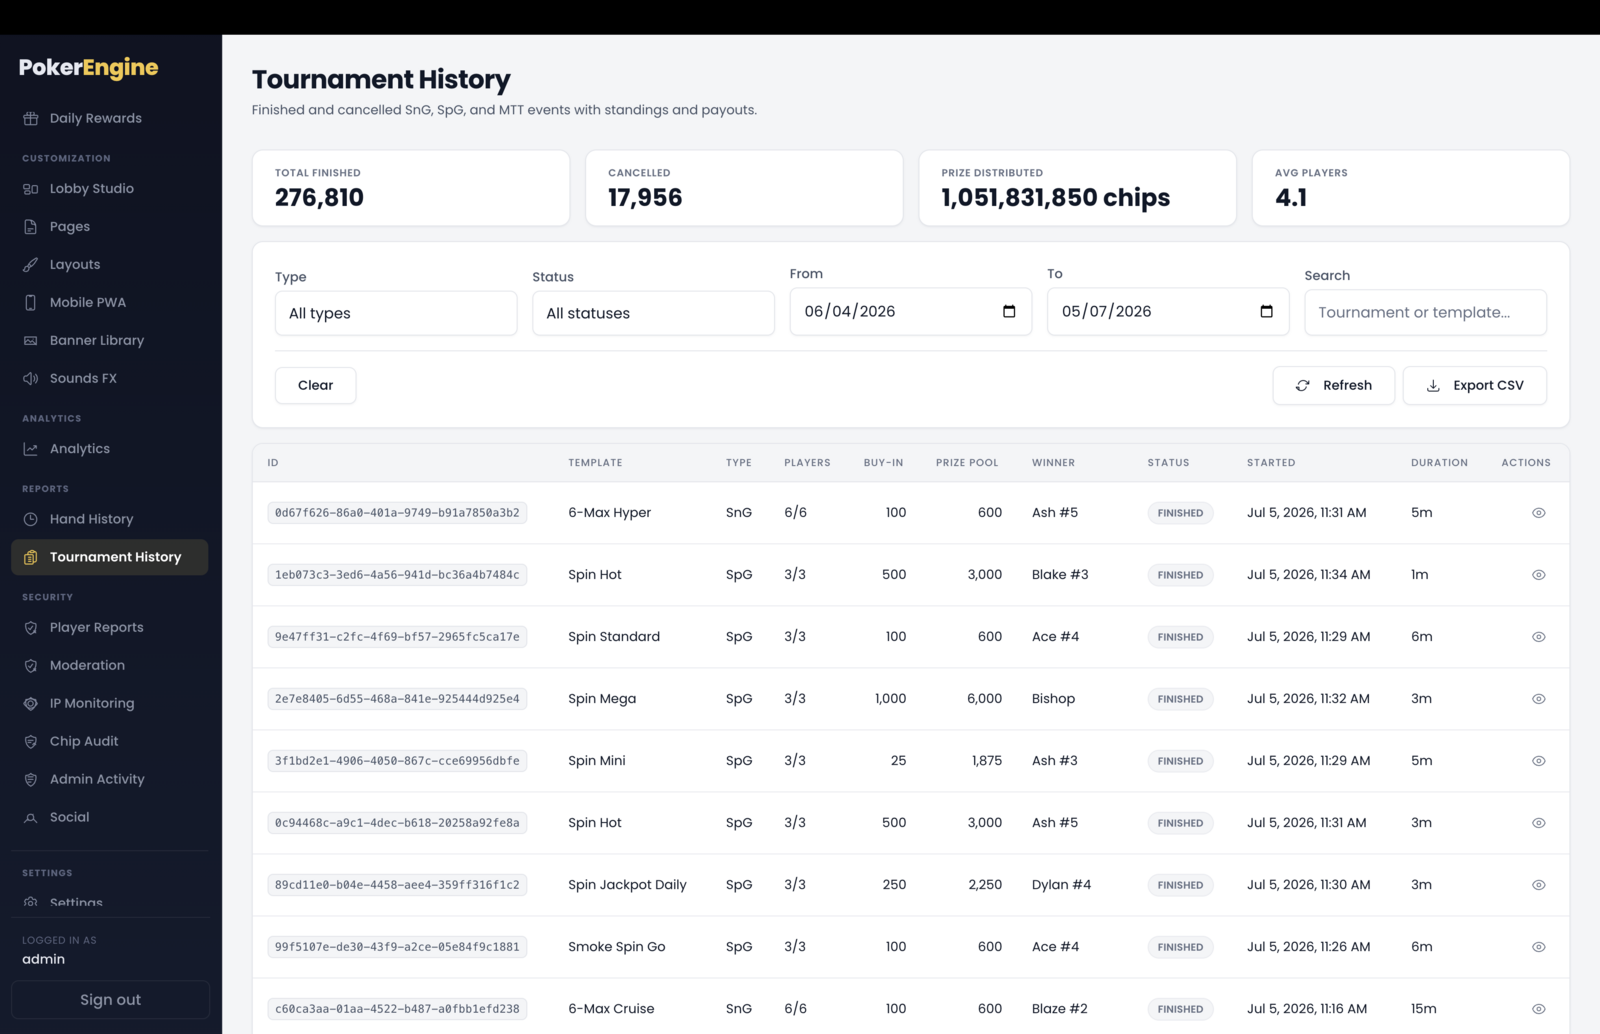
At the top, a few summary cards show your totals: tournaments finished, cancelled, prizes distributed (in chips), and the average number of players per event.
Browsing tournaments
The list shows one row per event with:
- Template and type (Sit & Go, Spin & Go, or MTT).
- Players (entries), buy-in, and prize pool.
- Winner, status (Finished / Cancelled), start time, and duration.
Filter by type, status, a date range (the last 90 days are shown by default), or search by tournament, template, or player name. Cursor-based paging keeps it fast even with lots of history.
Tournament details
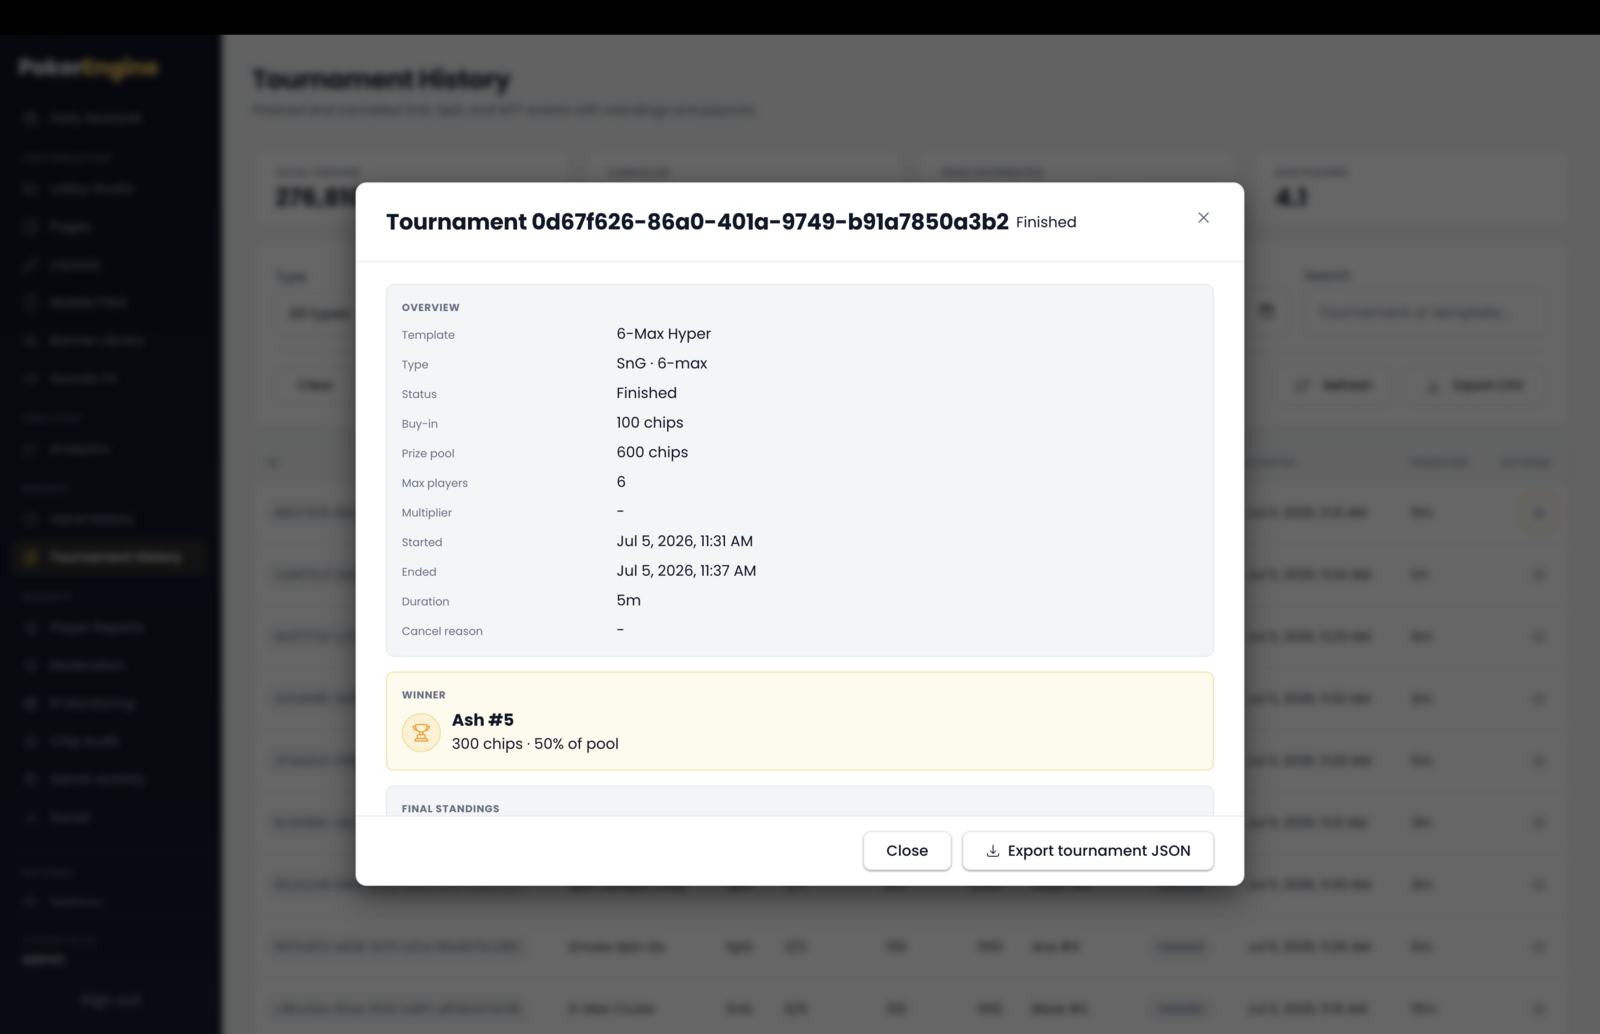
Click the view icon on any row to open its full breakdown:
- Overview — template, type, buy-in, prize pool, start/end times, duration, and (for cancelled events) the cancel reason. For Spin & Go, it shows the drawn multiplier.
- Winner — the champion with their prize and share of the pool; for MTTs, a podium of the top three.
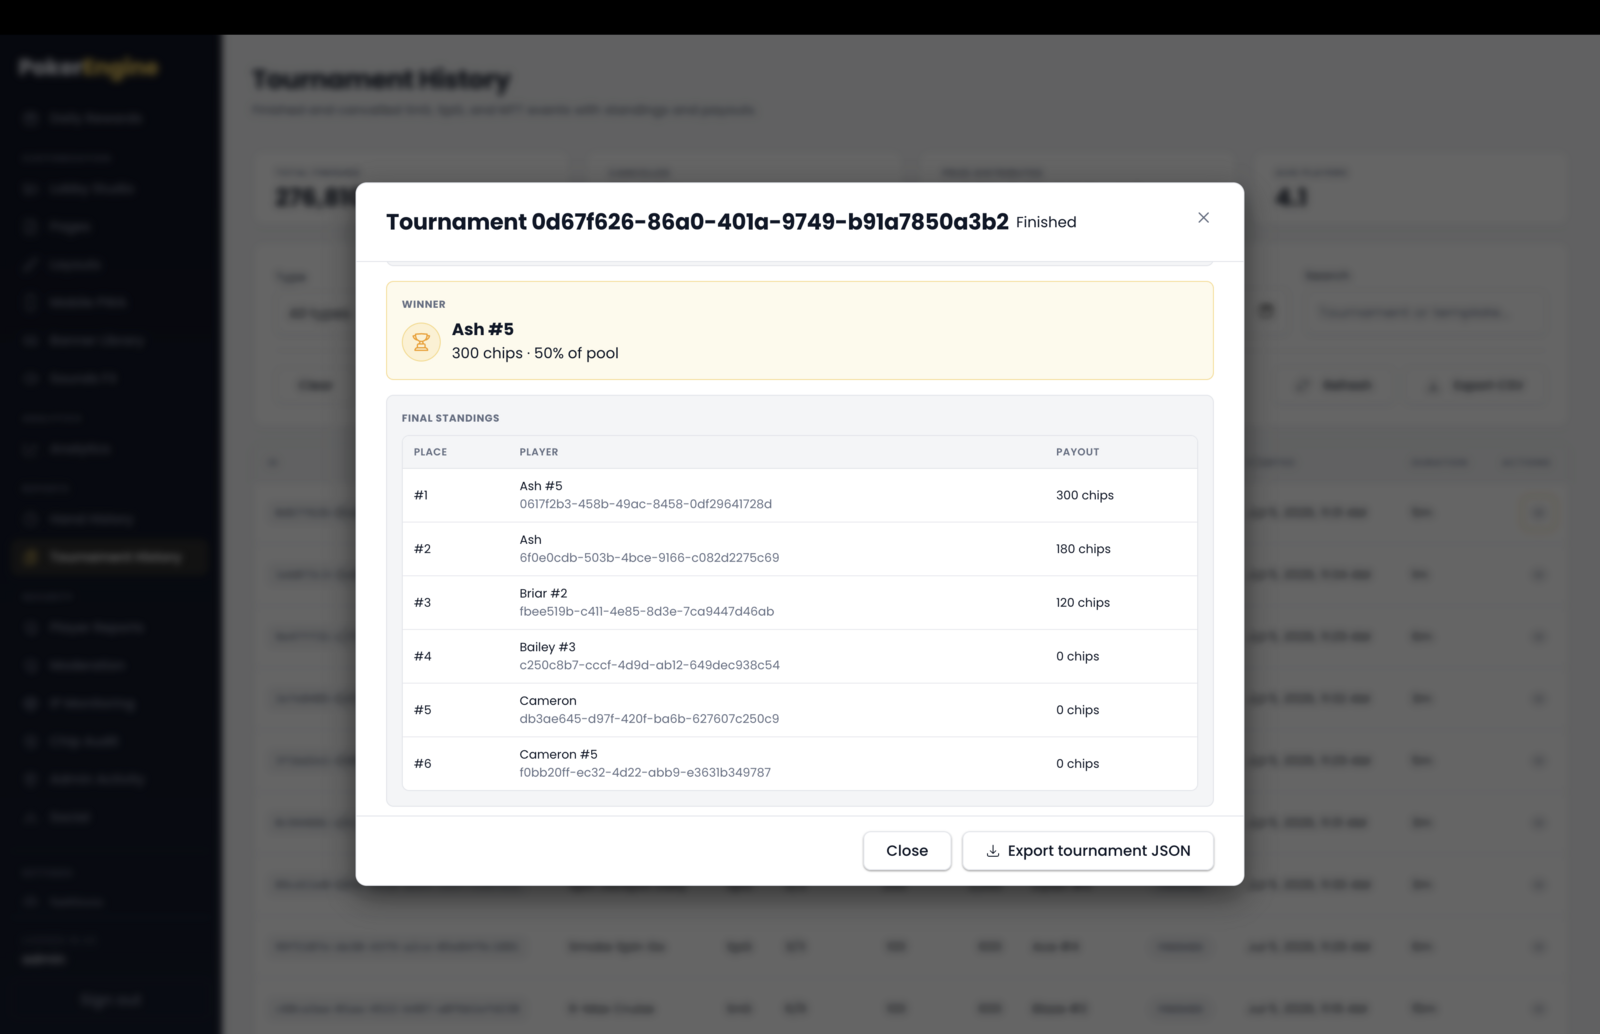
- Final standings — the complete finishing order, place by place, with each player’s payout.
- Payouts — a clean summary of who got paid and how much.
- Timeline — the key moments: created, registration opened, started, and finished (or cancelled).
You can export a single tournament as JSON from this view for your records.
Exporting
From the list you can export to CSV over a chosen date range — every event with its template, type, players, buy-in, prize pool, total paid out, winner, status and timing — ready for a spreadsheet.
Good to know
- This is a review tool, not a control panel. Creating, running, filling with bots and cancelling all happen in the live Tournaments section; Tournament History only shows completed and cancelled events.
- Both players and bots appear in standings and can be listed as the winner — a full, honest record of the event.
- Cancelled tournaments are included, with their cancel reason. When a tournament is cancelled, entrants are refunded automatically — that refund shows in the chip records rather than as a payout here.
- Times display in your local timezone (stored internally as UTC), so keep that in mind when comparing with a player.
- History is kept and works automatically — every finished or cancelled tournament is recorded as it happens, with no setup required.
Player Reports
The Player Reports section (under Security) is your review queue for reports that players file about other players — for things like abuse, cheating, or spam. It’s where you triage what your community flags and decide whether to act.
Player Reports works hand-in-hand with the Moderation section: reports come in here, and when one warrants action you escalate it into Moderation to suspend or ban the player — in a single step.
What players can report
Players report someone from that player’s profile (opened from the lobby, a table, or chat) using a Report button. They pick a reason and can add a short note. The five reasons are:
Abuse · Cheating · Griefing · Spam · Chat
To let players file reports, enable Reporting in your Social settings. Even if you later turn reporting off, your review queue here stays available so you can clear any backlog.
The report queue
The queue lists each report with:
- Reporter — who filed it (click to view their profile).
- Reported player — who was reported (with quick links to see all reports about them or to moderate them).
- Category — the reason, color-coded by severity.
- Note — the reporter’s free-text explanation.
- Created — when it came in.
- Status — Open, Reviewed, Dismissed, or Actioned.
The Open filter shows a live count of pending reports so you always know how many are waiting.
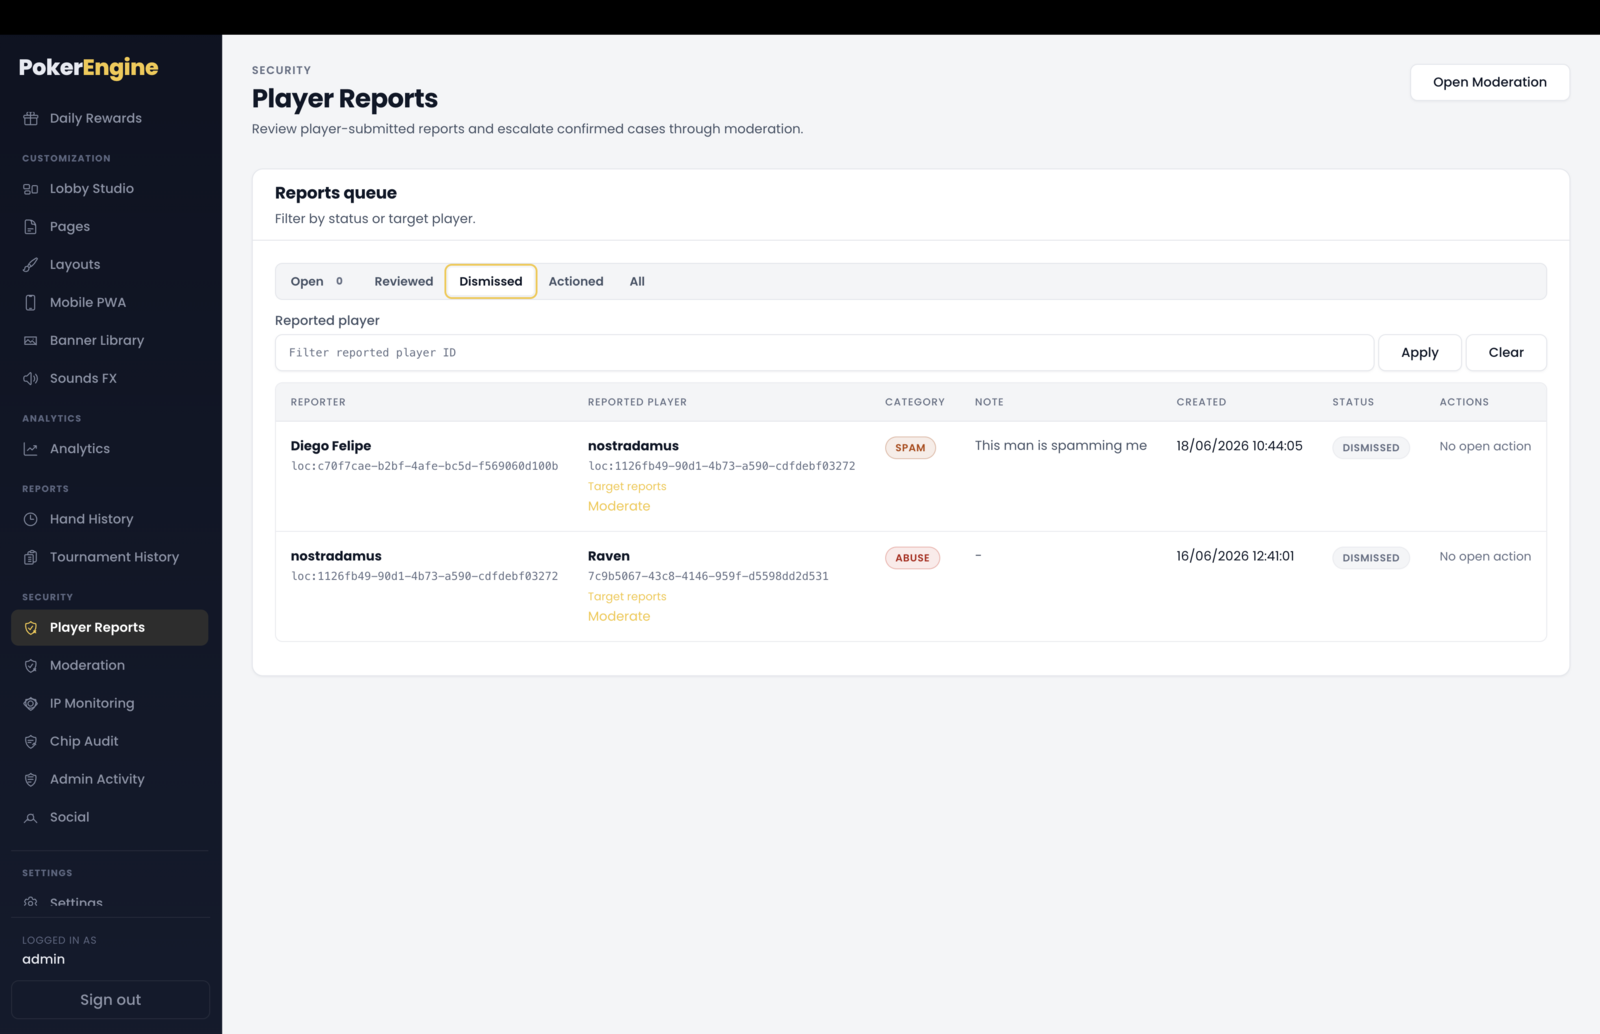
Filtering
Filter the queue by status (Open, Reviewed, Dismissed, Actioned, or All), and by a specific reported player to see everything filed about one person.
Acting on a report
For any open report you have three choices:
- Dismiss — close it with no action (e.g. an unfounded report).
- Mark reviewed — acknowledge it without punishing anyone.
- Take action — open the Moderation dialog for the reported player, where you can suspend (until a date you choose) or ban them with a reason. When you confirm, the player is moderated and the report is stamped as “Actioned” automatically.
Every decision is recorded in your admin activity log, so there’s always a trail of who reviewed what.
Good to know
- Two-part system. Player Reports is the intake queue; Moderation is where suspensions and bans actually happen. Escalating from a report ties the two together in one flow.
- Built-in abuse protection. Players can’t report themselves, can’t spam-report the same person repeatedly, and are limited to a handful of reports per day — so the queue stays meaningful.
- Reports carry the reporter’s note. There’s no automatic chat transcript attached, so you triage using the note plus the linked player profiles.
- Reporter privacy. Players are told only moderators can see their report; full identities are visible only to you here.
- Ready to use. The review queue works out of the box — just enable Reporting in Social settings to let players start submitting.
Moderation
The Moderation section (under Security) is where you enforce your platform’s rules: suspend, ban, or chat-mute players, and lift those actions when appropriate. It’s the companion to Player Reports — reports come in there, and you take action here (you can jump straight from a report to the right player).
The page has three parts: a player finder to look someone up and act on them, a list of suspended and banned players, and a separate list of chat-muted players.
The moderation actions
| Action | What it does | Duration | Reason |
|---|---|---|---|
| Ban | Blocks the account completely — the player can’t log in or play. | Permanent (until you lift it). | Required |
| Suspend | Temporarily blocks the account. | Until a date/time you choose (or leave open-ended). | Required |
| Chat mute | The player can still log in and play, but can’t send chat or reactions. | Optional end date (or permanent). | Optional |
| Unban | Restores a suspended or banned account. | Immediate | — |
| Unmute | Restores chat for a muted player. | Immediate | — |
Moderating a player
- In Find player, search by name, player ID, or email.
- Click Moderate to open the action dialog — choose Ban or Suspend, set a date (for suspend), and write a reason. Or click Mute from chat for a chat-only mute.
You can also arrive here straight from a report: in Player Reports, “Take action” opens this dialog with the reported player already filled in.
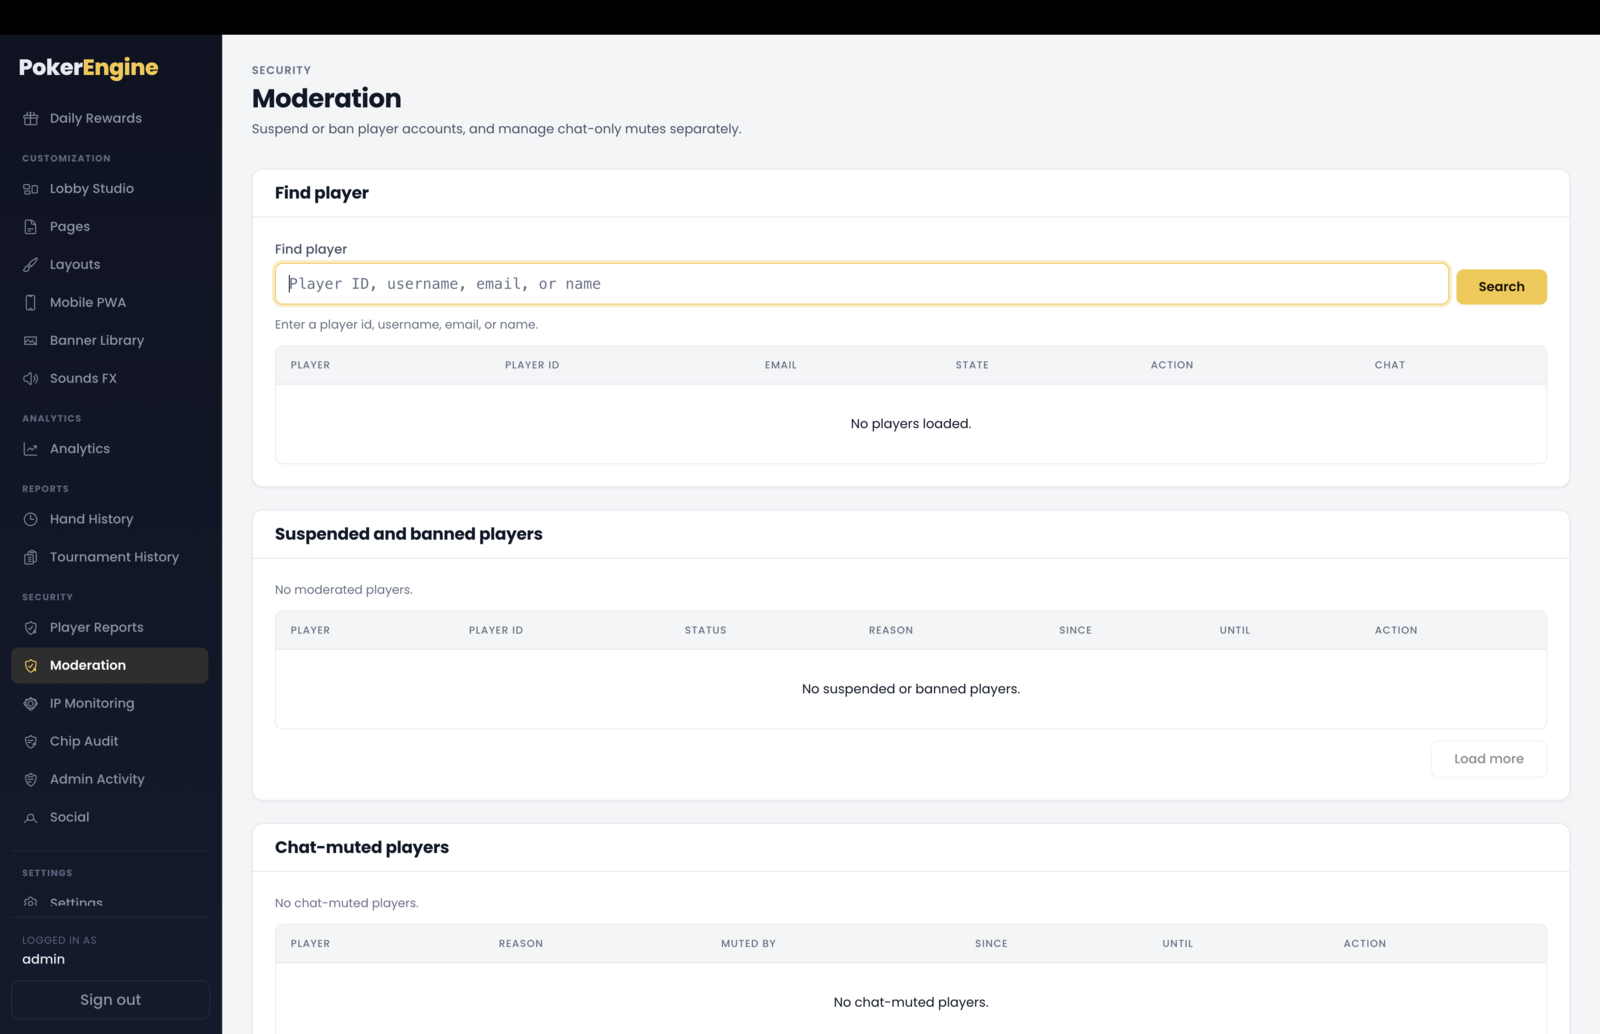
What a blocked player experiences
- Banned or suspended — they’re signed out and can’t log back in or take a seat until it’s lifted. If they were seated, they’re removed from the table.
- Suspensions lift themselves. Once the suspension end time passes, the player automatically regains access — no action needed from you (though they’ll still appear in the list until you unban them, so you can keep it tidy).
- Chat-muted — they play normally, but their chat messages simply don’t send.
If you have email set up, banning/suspending sends the player a notification with your reason, and unbanning sends a reinstatement email.
Good to know
- Ban vs. Suspend vs. Chat-mute. Ban is a permanent account block; Suspend is a temporary one that expires on its own; Chat-mute only silences chat and leaves play untouched — account blocks and chat mutes are tracked separately.
- Reasons are for your records and the email. The reason you enter is logged and included in the player’s email; the on-screen message the blocked player sees is generic.
- Bots aren’t moderated here — this section is for real players only.
- Every action is logged. Moderation actions appear in your Admin Activity log, so there’s always an audit trail.
- Ready to use. Ban, suspend and unban work out of the box. Chat-muting is part of the social features (enable it in Social settings), and moderation emails require your email (SMTP) to be configured.
IP Monitoring
The IP Monitoring section (under Security) helps you spot multi-accounting and possible collusion by looking at where players connect from. If two “different” players always share the same connection, that’s worth a look — this section is your investigative tool for exactly that.
It’s read-only: you investigate here, then act (suspend/ban) in the Moderation section.
The four panels
The page shows four investigation tools side by side:
- Shared IPs — the overview. It lists connections (IP addresses) used by more than one account, with how many accounts share each and when it was last active. This is your headline signal: an IP shared by several accounts is a lead to investigate. You set the threshold (minimum number of accounts) and the time window.
- Search by IP — enter an IP to see which accounts have connected from it.
- Search by Fingerprint — a lightweight browser fingerprint that can link the same person even if their IP changes (e.g. a phone switching networks).
- Player History — enter a player to see their full connection log: the IPs, browsers and times they’ve connected from.
You investigate by drilling down: click a shared IP to see who uses it, click a player to see their history, click any of their IPs to see who else used it, and so on.
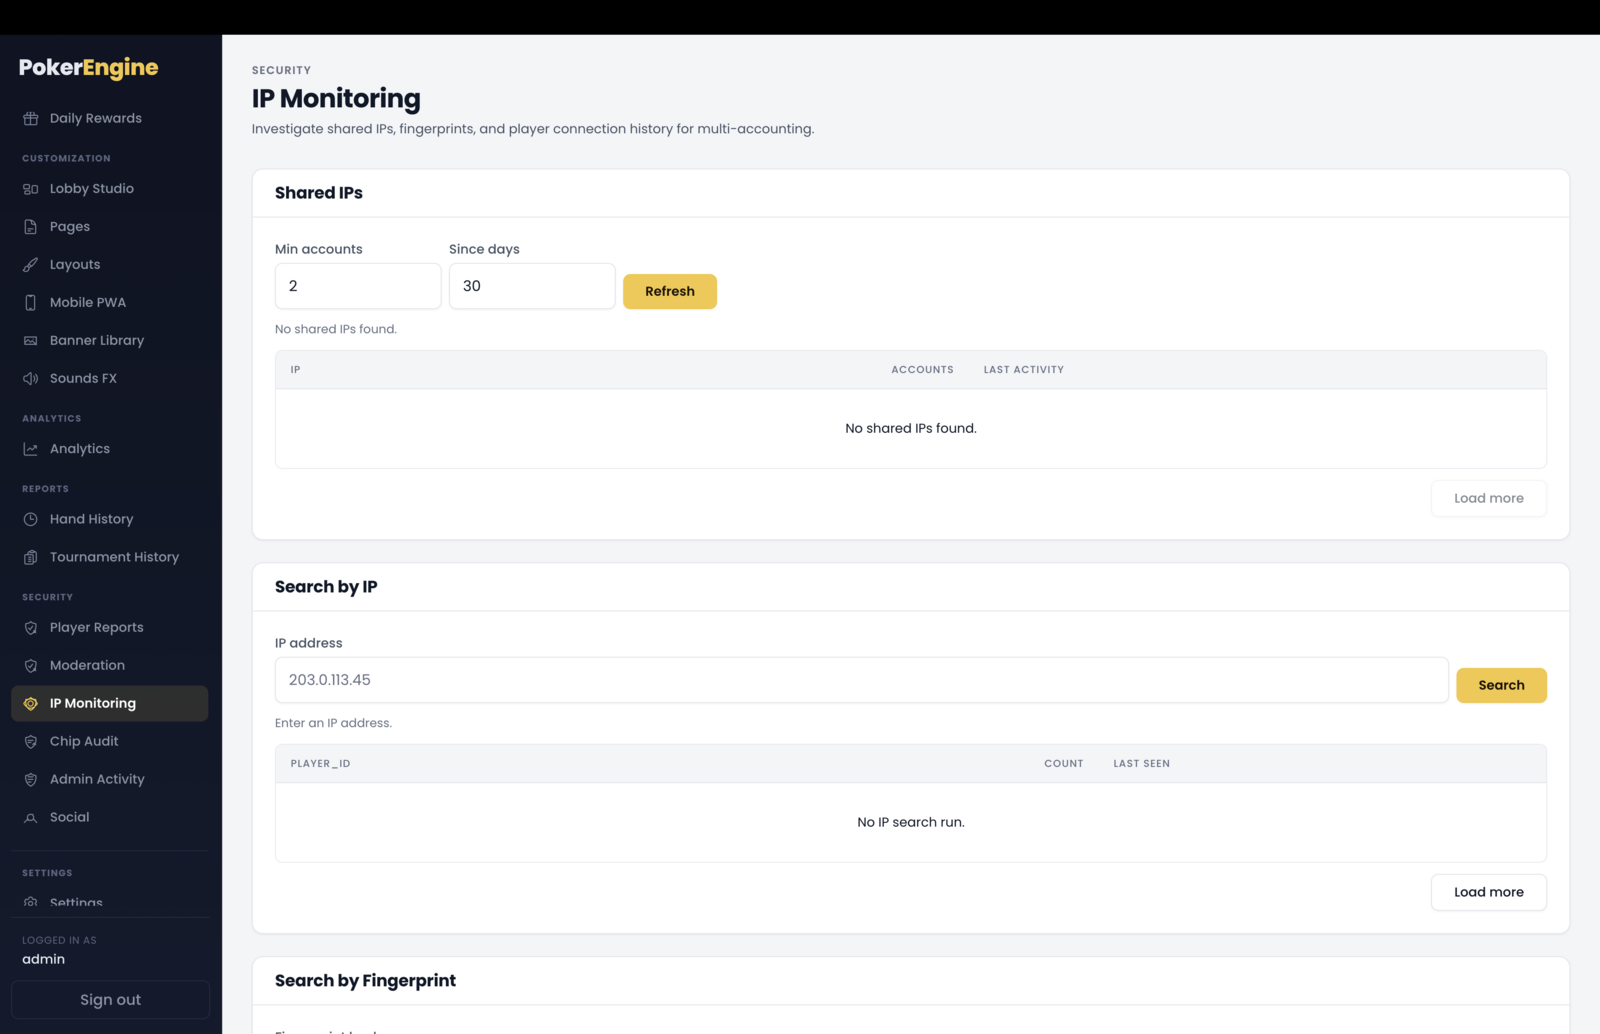
Important: getting the real player IP (reverse-proxy setups)
Because PokerEngine typically runs behind a reverse proxy (nginx, Traefik, Cloudflare, etc.),
you must tell it to trust that proxy so it logs the player’s real IP and not the proxy’s. This is
a one-time setting (TRUST_PROXY) in your server environment — for a typical single reverse proxy, set
it to 1. If it’s not set correctly, every logged IP will look identical (the proxy’s address) and the
shared-IP detection won’t work. You can see the current value on the Settings → Security tab.
Privacy & retention
IP addresses are personal data, so PokerEngine gives you the controls to handle them responsibly:
- Automatic cleanup — a scheduled routine removes IP logs older than a number of days you choose (90 by default). Schedule it once on your server.
- Erasure — deleting a player also erases their IP history.
- Off switch — you can disable IP logging entirely if you prefer not to store it.
As the operator, you’re responsible for setting an appropriate retention period and disclosing IP logging in your own privacy policy (a privacy notice template is included in the documentation to help).
Good to know
- It’s a signal, not proof. A shared IP is completely normal for households, offices, shared Wi-Fi, mobile networks and VPNs. Treat it as a lead to investigate, never as automatic evidence — and the fingerprint match is an even weaker, secondary hint.
- Act in Moderation. This section is for investigating; to actually suspend or ban someone, switch to the Moderation section.
- Logs are recorded when a player sits at a table (not just from browsing), so a player who never sits leaves no entry.
- Bots never appear here — only real players’ connections are logged.
Analytics
The Analytics section is your platform’s dashboard. It’s built around one practical question every operator has at launch: how many real humans are here versus bots — so I know when I can safely dial the bots down? As your real player base grows, Analytics shows you exactly that, alongside signups, retention and your most active players.
It works out of the box — no setup — and the live view refreshes automatically every 15 seconds. The page has three zones.
1. Live pulse — what’s happening right now
A real-time snapshot of activity this moment:
- Humans online — real players connected right now.
- Humans seated and Bots seated — how many of each are sitting at tables, plus the human-to-bot ratio.
- Bot breakdown — where your bots are deployed: cash tables, Sit & Go, Spin & Go, MTT, plus idle and bankrupt.
- A plain-language recommendation — a banner that reads the situation and advises, e.g. “No humans seated yet”, “Humans are arriving”, or “Healthy human activity — you can safely dial bots down.” This is your cue for managing the bot pool.
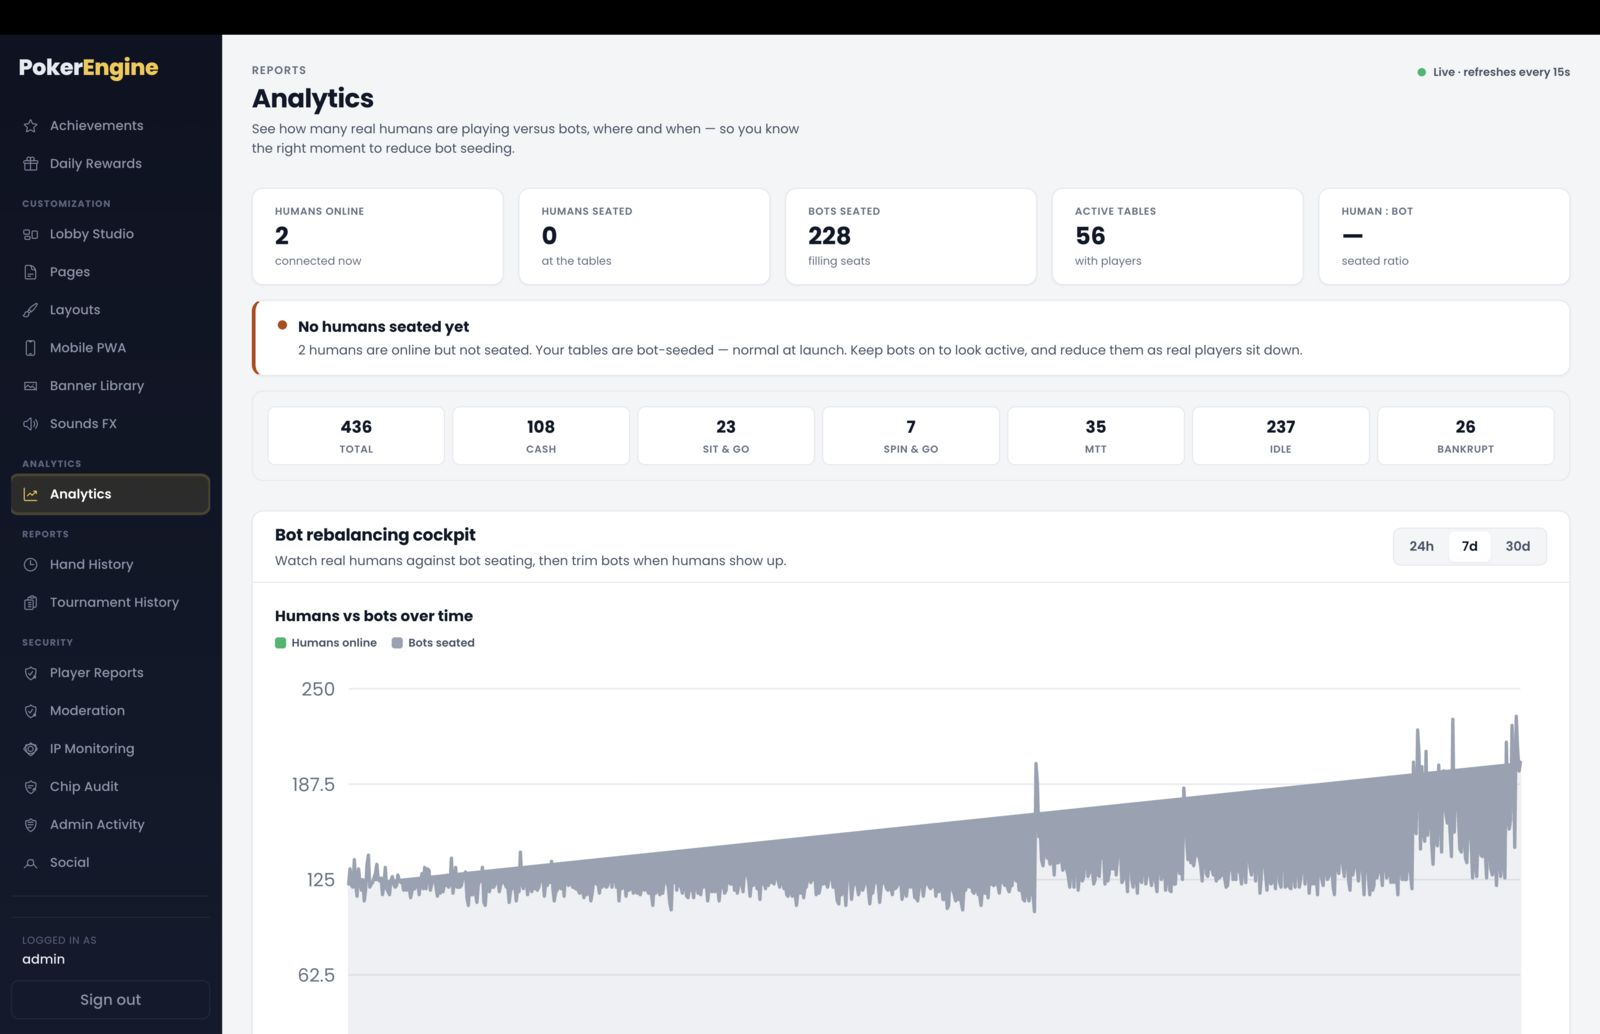
2. Trends — humans vs bots over time
The history that helps you spot patterns:
- Humans vs bots over time — a chart tracking real humans online against bots seated, over 24 hours, 7 days or 30 days.
- “When are humans online?” heatmap — a 7-day × 24-hour grid showing when your real players tend to be active (in your local time), so you can time promotions and see your peak hours.
- Table composition — a live list of your tables sorted by how many humans (or bots) are at each, with a quick link to manage bots.
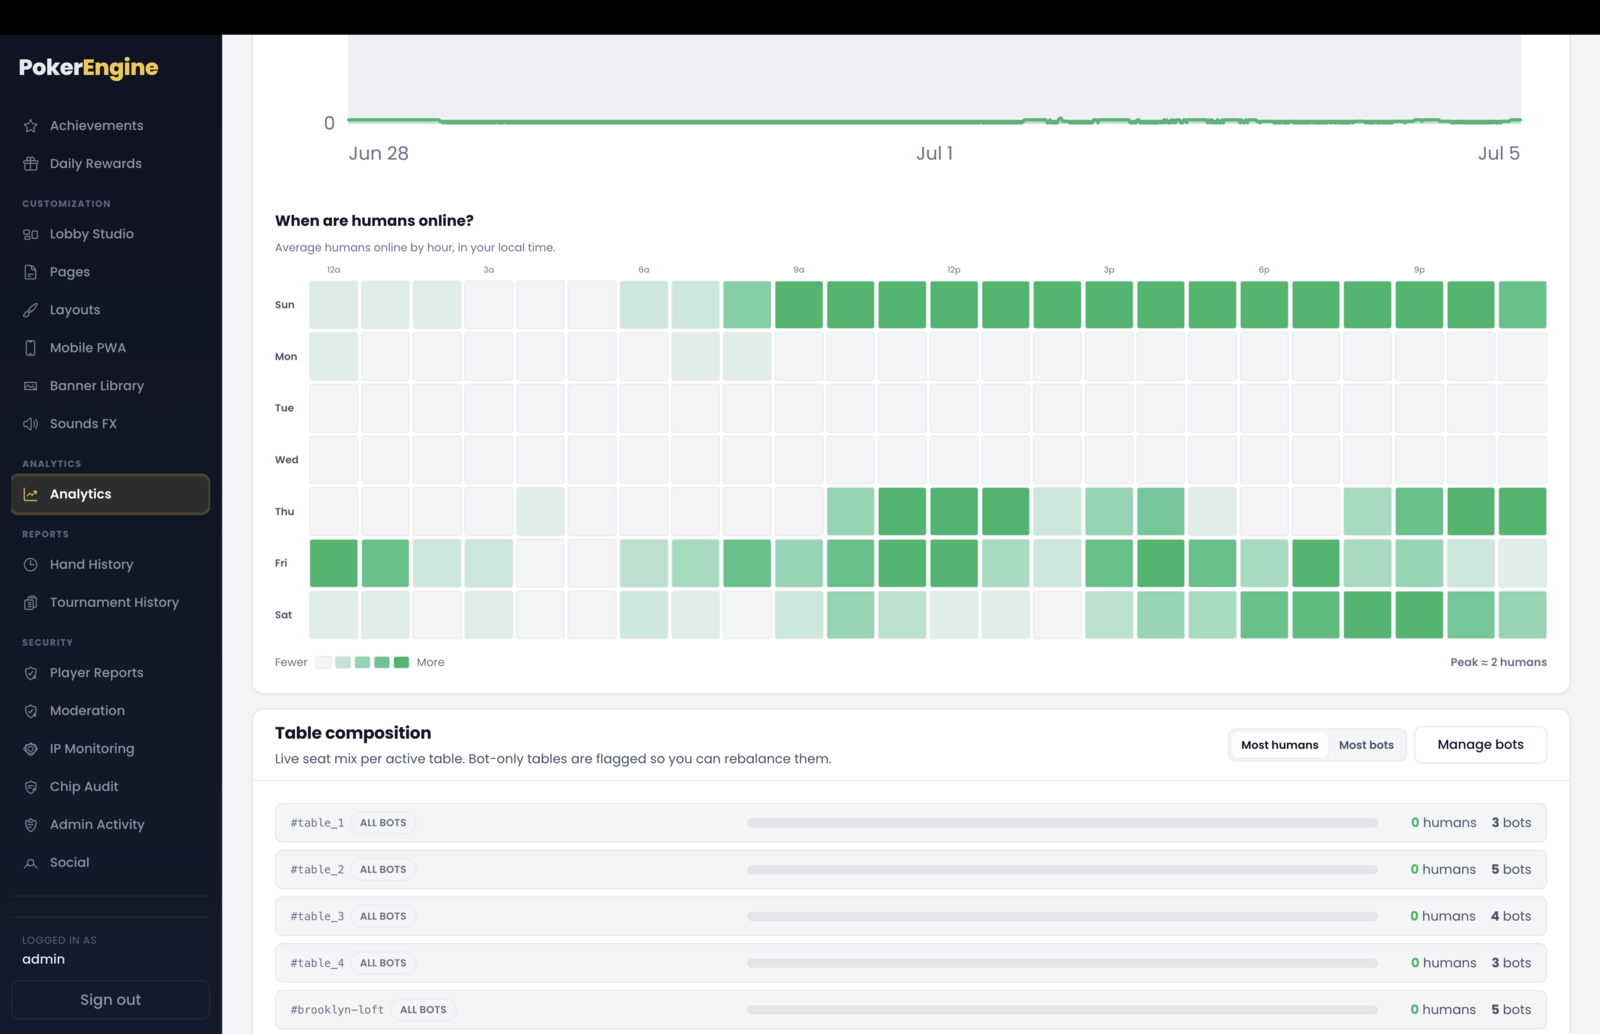
3. Real players — your human audience (bots excluded)
This zone is humans only — bots are filtered out completely, so these numbers reflect your real business:
- Active players — DAU / WAU / MAU (distinct real players active in the last day, week and month).
- New registrations — signups over time, with a per-day bar chart.
- Retention — how many players came back on two or more days, the average number of days played, and a per-day “connected players” chart.
- Daily-reward streaks — claims today / this week / this month, the longest active streak, and your top streakers.
- Top players — your most active real players by hands played.
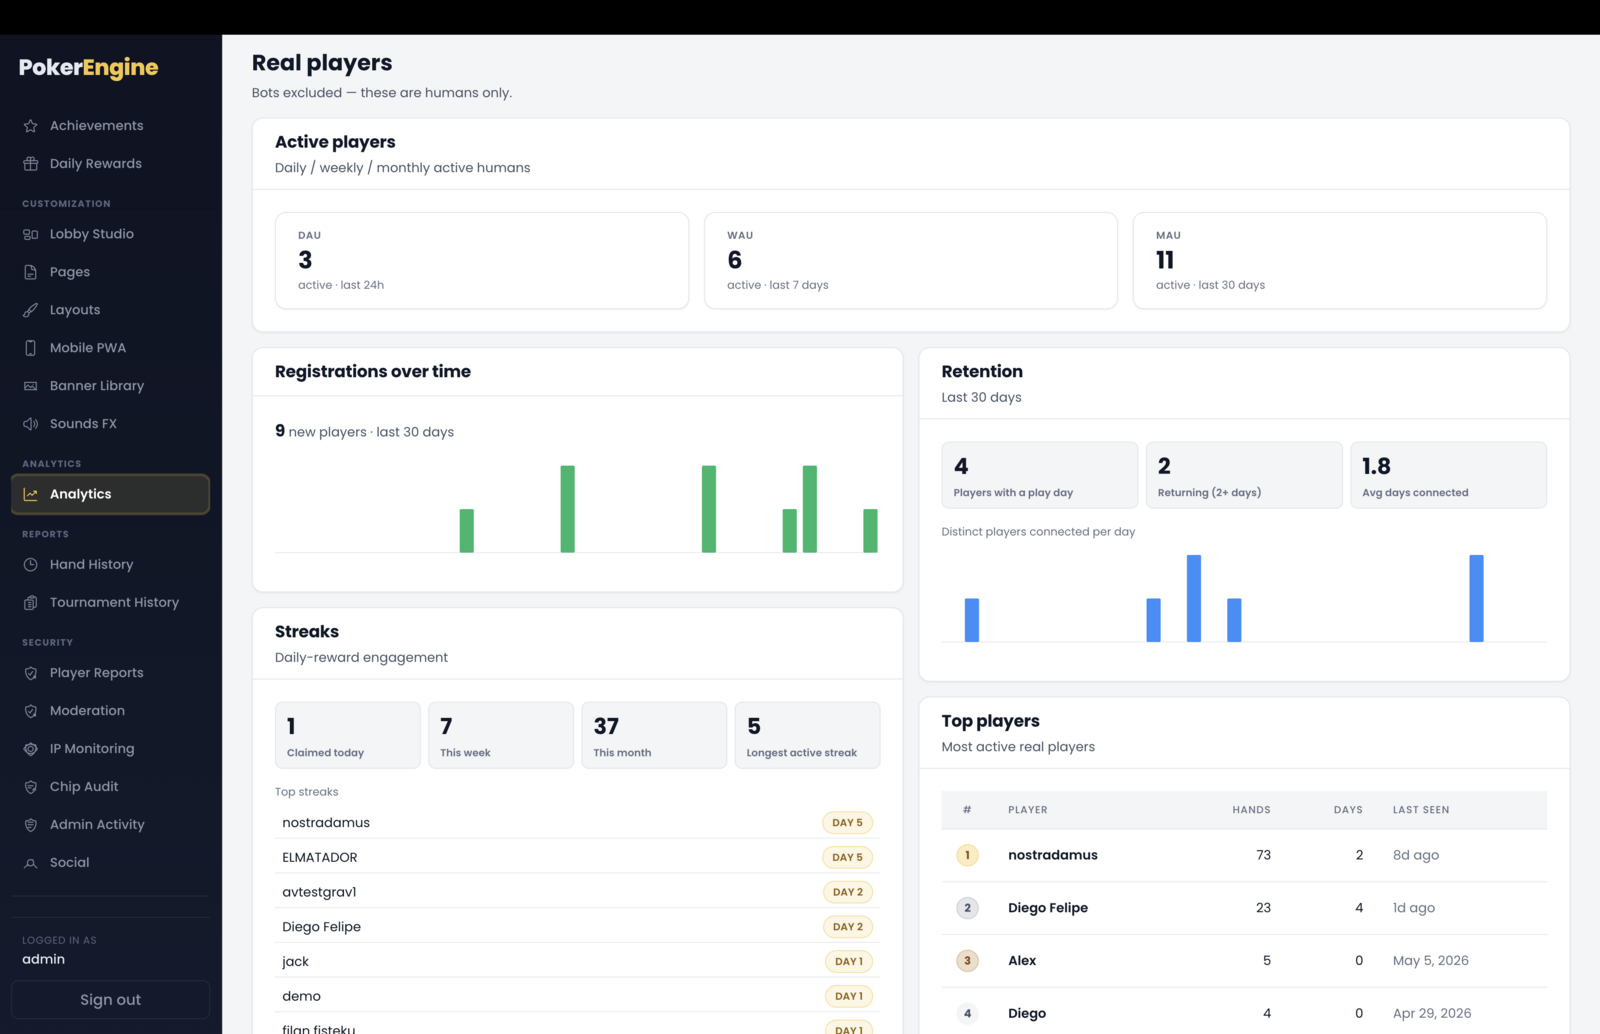
Good to know
- Bots are shown on purpose — but only in zones 1 and 2. The whole point of those zones is the human-vs-bot picture. Zone 3 excludes bots entirely, so a busy-looking lobby with a near-zero DAU simply means your tables are bot-seeded — completely normal at launch.
- “Online” means connected right now (live), while “active” (DAU/WAU/MAU) counts distinct players seen within a rolling window.
- Live pulse and player stats are real-time; the trend charts are built from periodic snapshots (about every 12 minutes), so brand-new activity appears on the curves shortly after, not instantly. On a fresh install the trend charts fill in once there’s a little history.
- Most date breakdowns use UTC; the activity heatmap is shown in your own local time (it’s labeled as such).
- Use it to manage your bots. Watch the human numbers climb, and when real activity is healthy at your peak hours, reduce your bot counts (in the Bots sections) so real players increasingly play each other.
Chip Audit
The Chip Audit section (under Security) is your accountability trail for manual chip adjustments. Any time an admin sets, adds, or subtracts a player’s chips, it’s recorded here — who did it, to which player, why, and from what balance to what balance. It’s how you keep chip changes transparent and catch anything that looks off.
What it covers — and what it doesn’t: this view lists admin chip adjustments only. Normal gameplay chip movements (hand wins and losses, buy-ins, rewards) are handled automatically by the game and aren’t part of this audit — this is specifically the trail of manual interventions.
What the audit shows
Each entry shows:
- Date — when the adjustment happened.
- Player — whose chips were changed (click to see just that player’s adjustments).
- Operation — Set, Add, or Subtract.
- Before → After — the balance before and after.
- Δ (delta) — the exact change, positive or negative.
- Reason — the note the admin entered.
- Admin — which admin performed it.
Large adjustments are highlighted so unusually big changes stand out at a glance (you set the threshold with the “Min amount” filter).
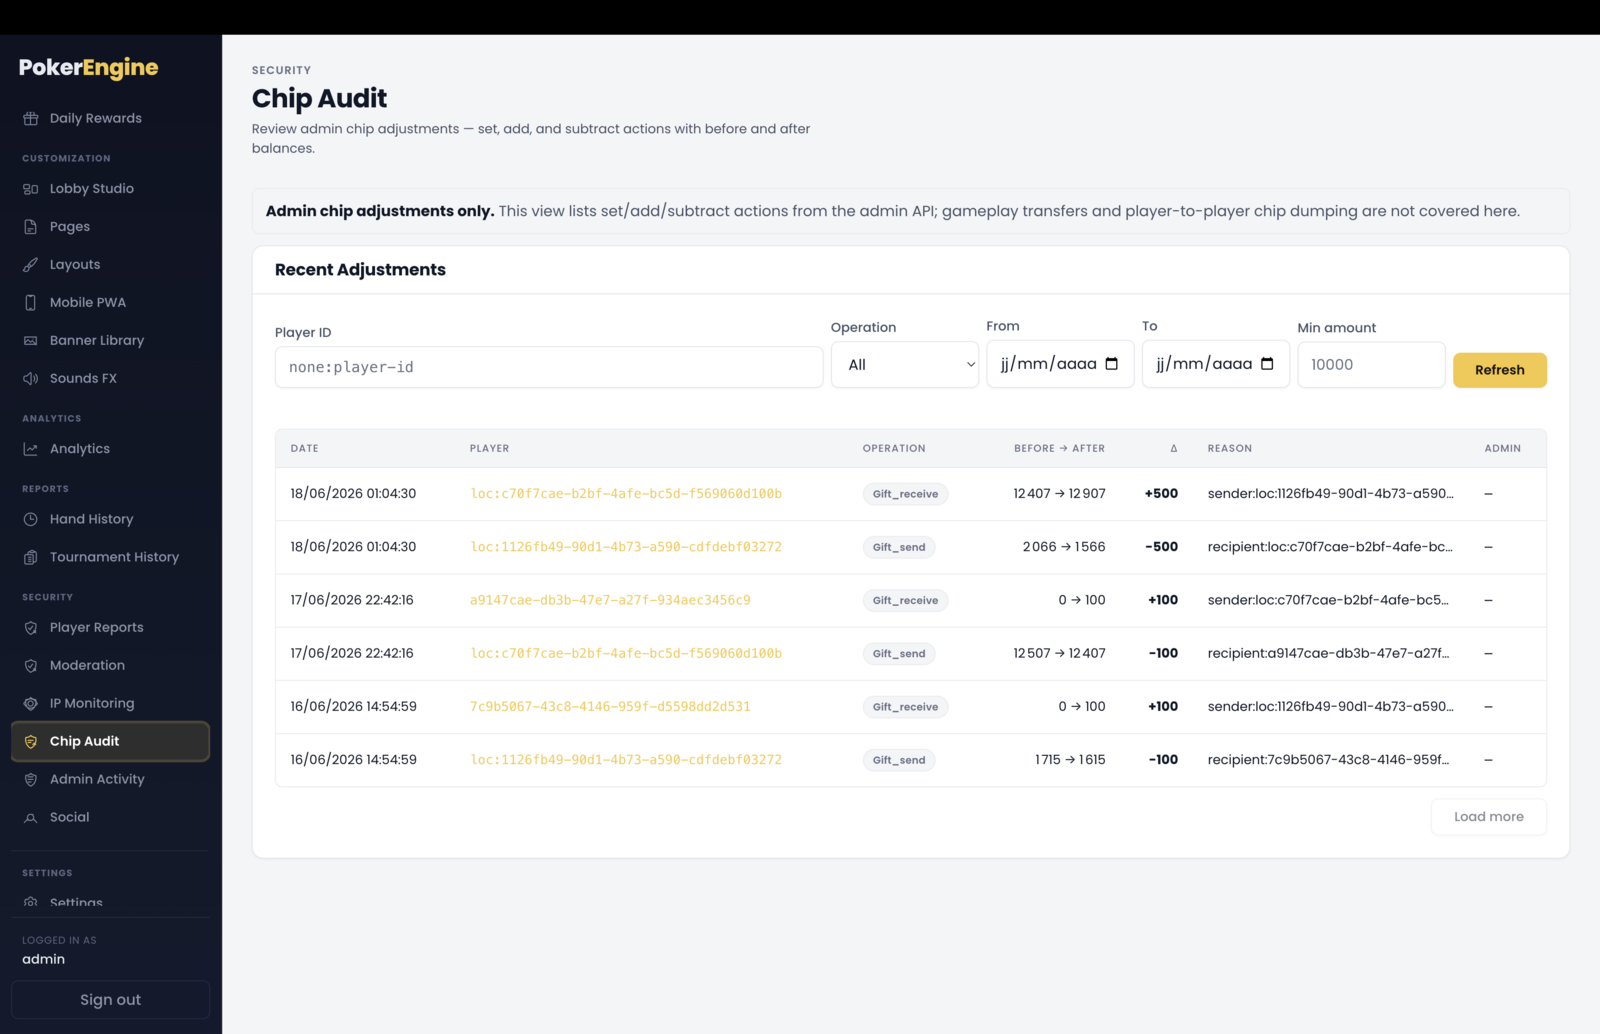
Filtering
Narrow the log down by:
- Player — everything done to one player.
- Operation — Set, Add, or Subtract.
- Date range.
- Minimum amount — only show adjustments at or above a size (this also drives the large-adjustment highlighting).
For example, to spot an admin repeatedly topping up one player, filter to that player and operation Add, then scan the Admin column for a recurring name.
Good to know
- Records are permanent and can’t be edited. Each adjustment is written together with the actual balance change in a single step, so the audit can never disagree with reality — a tamper-proof trail.
- This is the record side of manual chip changes. It shows adjustments made through the admin chip tools; it is not a full money-flow ledger of every hand.
- The Admin column can be blank for actions taken through a shared admin token (which carries no name) rather than a signed-in admin — that’s expected, not an error.
- Bots are included — if you ever adjust a bot’s chips, it’s logged here too.
- Times display in your local timezone (stored internally as UTC).
- Complements the Admin Activity log. Admin Activity records who did what across the whole admin; Chip Audit zooms in on the financial detail of chip changes specifically.
- Ready to use. The audit works out of the box, with no setup — filters, per-player drill-down and highlighting all included.
Admin Activity
The Admin Activity section (under Security) is your platform’s master audit trail — a single log of every change an admin makes. Whenever anyone updates a setting, creates or edits a table or tournament, adjusts a player, publishes a page, moderates someone, or changes anything else in the admin, it’s recorded here: who did it, what, when, and whether it succeeded.
It’s the go-to record for accountability and peace of mind — especially useful if more than one person has admin access.
What gets logged
- Every admin change across the whole platform is captured automatically — you don’t configure anything.
- Both successes and failures are recorded, so you can also see attempts that were rejected or errored.
- Simply viewing pages isn’t logged — only actions that actually change something.
What each entry shows
- Date — when it happened.
- Admin — which admin performed the action.
- Action — what was done (e.g.
settings.update,table.create,player.ban,player.chips.add). - Target — what it acted on (a specific player, table, page, etc.) — click to filter to that target.
- Status — whether it succeeded (a green badge) or failed (amber/red).
- Details — a short summary of what changed.
Notable rows stand out: failed actions are flagged, and sensitive actions (bans, deletions, license or settings changes, and large chip adjustments) are highlighted.
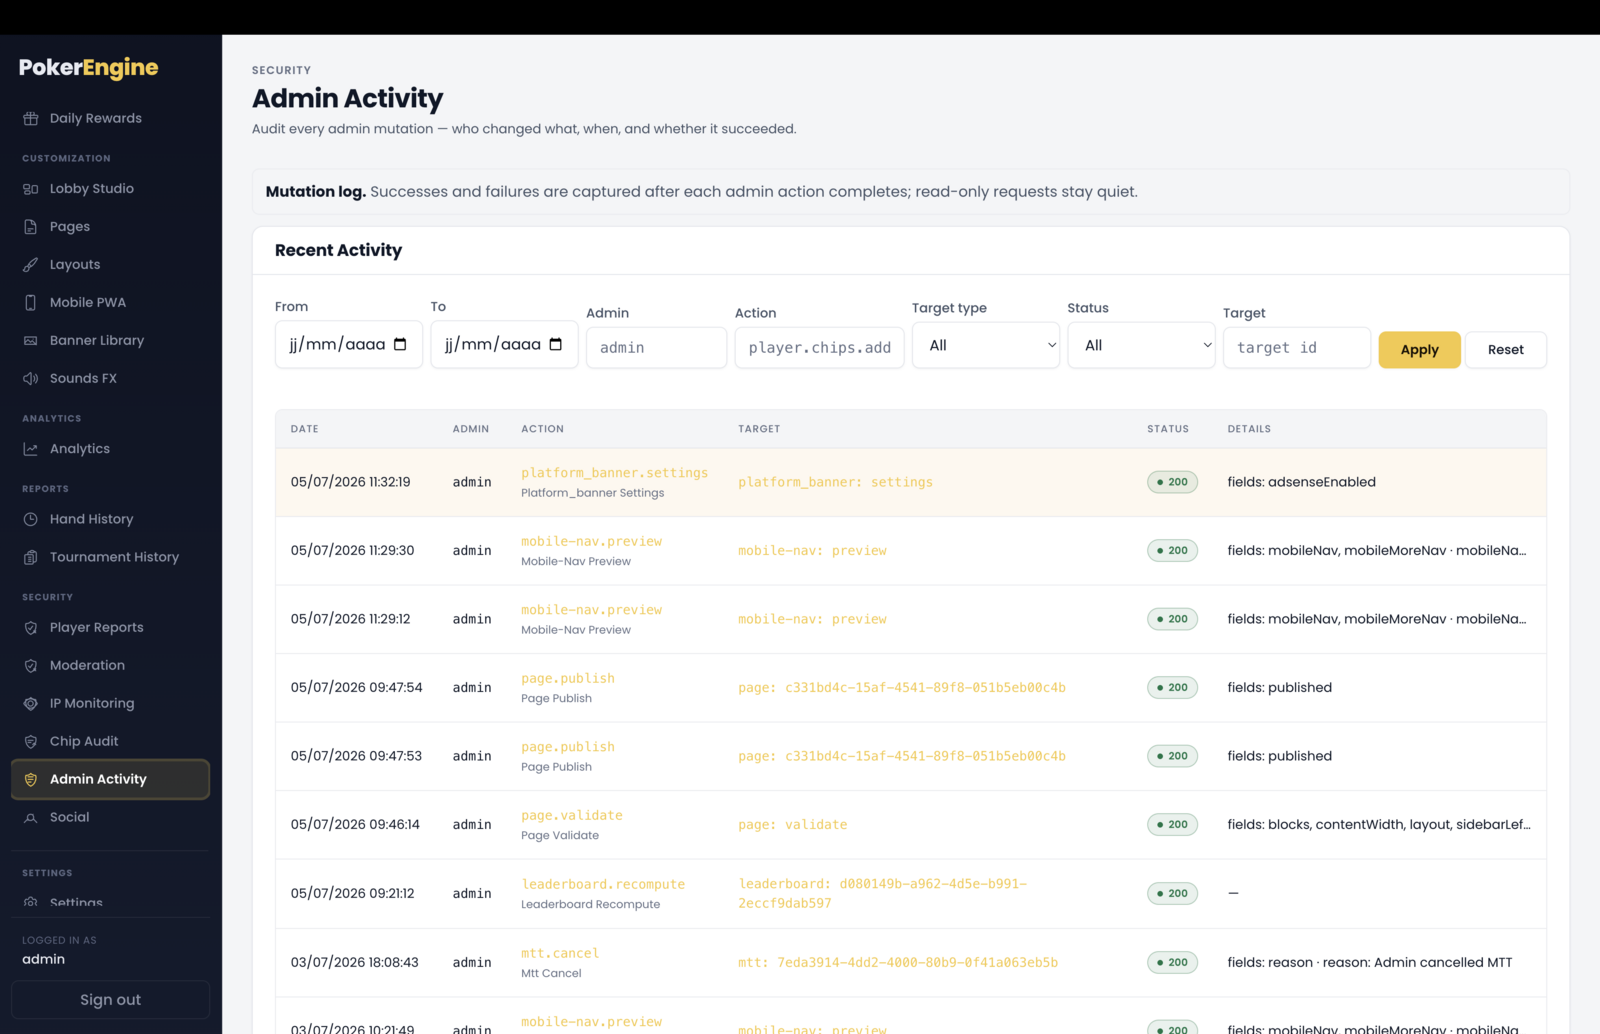
Filtering
Find what you need by date range, admin, action, target type (player, table, bot, page, setting…), status (success, client failure, server failure), or a specific target. Click any action or target in a row to instantly filter to it.
Good to know
- It’s automatic and complete. Every admin action — including ones added in future updates — is logged without any setup, so nothing slips through.
- For named accountability, use individual admin logins. When someone signs in with an admin account, their username is recorded. If you use the shared admin token instead, actions are logged as a generic “admin” — so give each person their own login if you want to know exactly who did what.
- Secrets are never stored. Passwords, tokens and keys are automatically stripped from the details — the log records what changed, never the sensitive values.
- Times display in your local timezone.
- It complements the other Security logs. Admin Activity is the cross-cutting timeline of everything; Chip Audit is the detailed view for chip adjustments, and Moderation is the dedicated surface for suspensions and bans.
- It grows over time. Since it keeps a complete history, the log accumulates — you can trim old entries directly in your database if it ever gets large.
- Ready to use. Fully working out of the box, view-only, with filtering and drill-down included.
Settings
The Settings section is where you configure platform-wide options. It’s organized into tabs across the top — General, Gameplay, Players & Auth, Emails, Updates, Backups, Licence, Support, Security — each covering one area. Edit any tab and click Save once to apply everything; a Revert button undoes unsaved changes.
Most settings apply live (no restart). A few environment-level options (shown on the Security tab) require a quick server restart, and the page tells you which.
General
The General tab covers your basic site identity and a couple of housekeeping defaults, with a live preview of a poker table on the right so you can see your name and logo update as you type.
To avoid confusion: this tab sets the in-game table branding (the watermark on the felt) plus a couple of basics. Your overall platform look — theme, colors, login page, menus, footer — is designed in the separate Layouts section.
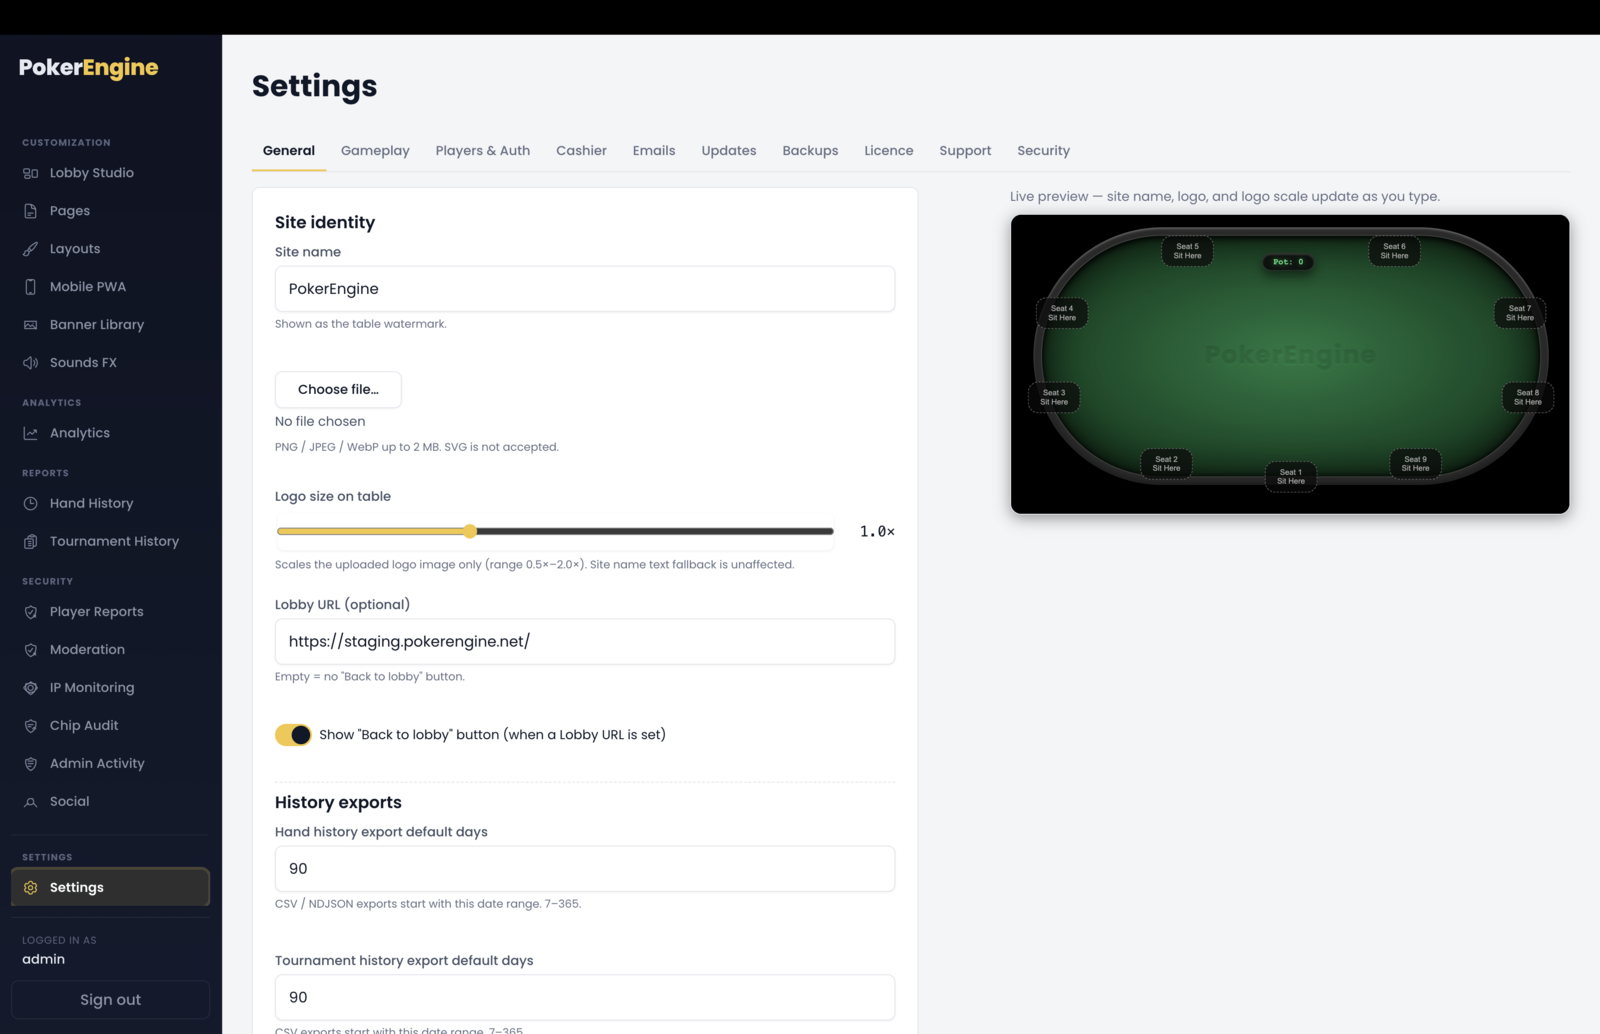
Site identity
- Site name — shown as the watermark on the poker table (behind the felt). Defaults to “PokerEngine”; change it to your brand.
- Logo — upload a logo image to use as the table watermark instead of the text (PNG, JPEG or WebP, up to 2 MB — SVG isn’t accepted). Remove it anytime to go back to the text watermark.
- Logo size on table — a slider to scale your uploaded logo (0.5×–2×) so it sits nicely on the felt.
- Lobby URL (optional) — a link for a “Back to lobby” button, if you want players to be able to jump back to an external lobby or landing page.
- Show “Back to lobby” button — turns that button on (it only appears when you’ve set a Lobby URL). Off by default.
History exports
- Hand history export default days — the default date range pre-filled when you export hand history (7–365, default 90). This is just a sensible starting range; you can always pick a different range at export time.
- Tournament history export default days — the same, for tournament-history exports.
Good to know
- Everything here applies live — save and it’s in effect, no restart.
- Table branding vs. platform look. The logo and name here brand the poker table; to brand your lobby, pages and menus, use Layouts.
- The logo saves as soon as you pick it (it doesn’t wait for the Save button), and only one logo is kept per install — a new upload replaces the old one.
- Ready to use. Sensible defaults ship out of the box (a working watermark, no logo required, export ranges pre-set), so you can leave this tab untouched and everything still works.
Gameplay
The Gameplay tab tunes how the game feels — the timers that pace a hand, how tournament lobbies are laid out, and the achievement notifications players get. Everything here applies live (changes take effect from the next hand — no restart).
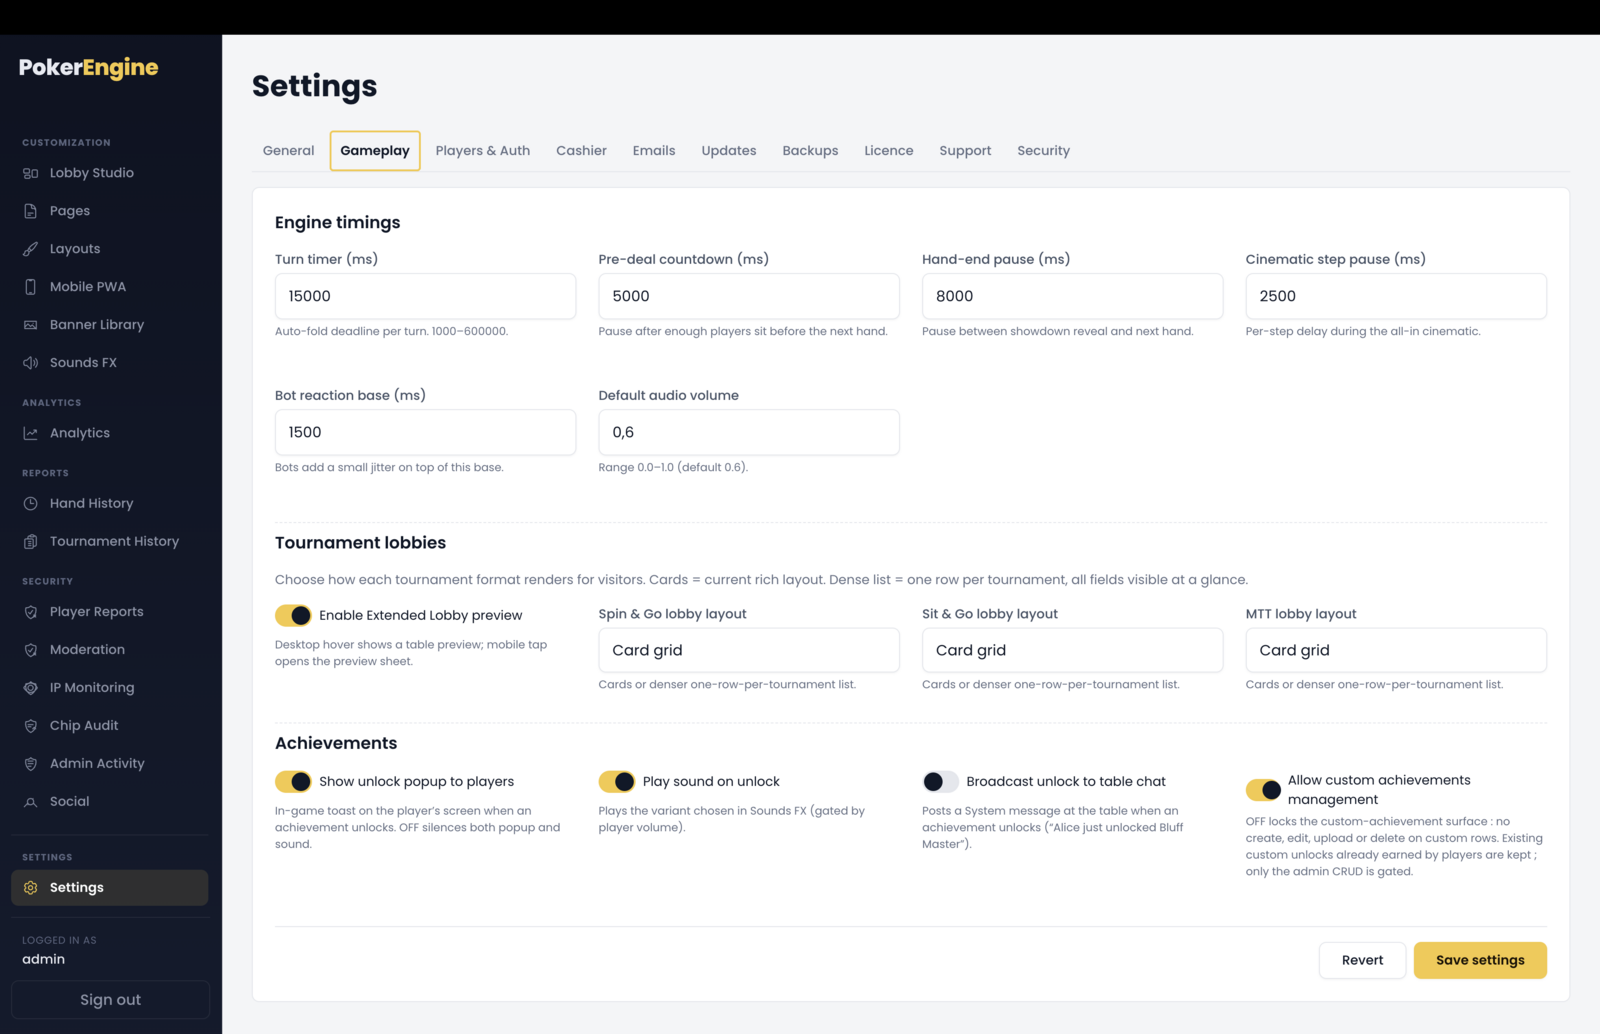
Engine timings
These control the rhythm of play. The defaults are well-balanced; adjust them only if you want a faster or slower feel.
- Turn timer — how long a player has to act before they’re auto-folded (default 15 seconds). This is the real clock; the on-screen countdown ring mirrors it.
- Pre-deal countdown — a short pause once enough players are seated, before the next hand is dealt (default 5 seconds).
- Hand-end pause — the breathing room after a hand is decided, before the next one starts (default ~10 seconds).
- All-in animation pause — the pacing of the dramatic all-in reveal (default 2.5 seconds per step).
- Bot reaction time — how long bots “think” before acting (default 1.5 seconds, with a little natural variation).
- Default audio volume — the starting sound level for new players (default 60%). Each player controls their own volume after that.
Tournament lobby layout
Choose how each tournament format’s lobby looks to players — a card grid or a dense list — independently for Spin & Go, Sit & Go, and MTT. All default to grid.
Achievements
These control the player-facing achievement experience (the badges you manage in the Achievements section):
- Show unlock popup — a celebratory toast when a player earns an achievement (on by default). Turning this off also silences the unlock sound.
- Play sound on unlock — plays the congratulations sound you chose in Sounds FX (on by default, and still subject to each player’s own volume).
- Announce unlocks in table chat — posts a “so-and-so just unlocked X” message at the table (off by default).
- Allow custom achievements — enables creating and editing your own achievements in the Achievements section (on by default). Turning it off just locks editing; players keep any badges they already earned.
Good to know
- Timings apply from the next hand — no restart, and connected players’ clocks re-sync automatically.
- The volume setting only affects new players — everyone can still set their own level.
- The achievement toggles here are the master switches for the notifications described in the Achievements and Sounds FX sections.
- Ready to use. Every field ships with a sensible default, so a fresh install plays perfectly without touching this tab.
Players & Auth
The Players & Auth tab controls how players sign up and log in, and what they start with. It has three parts: Players, Email & verification, and Google sign-in.
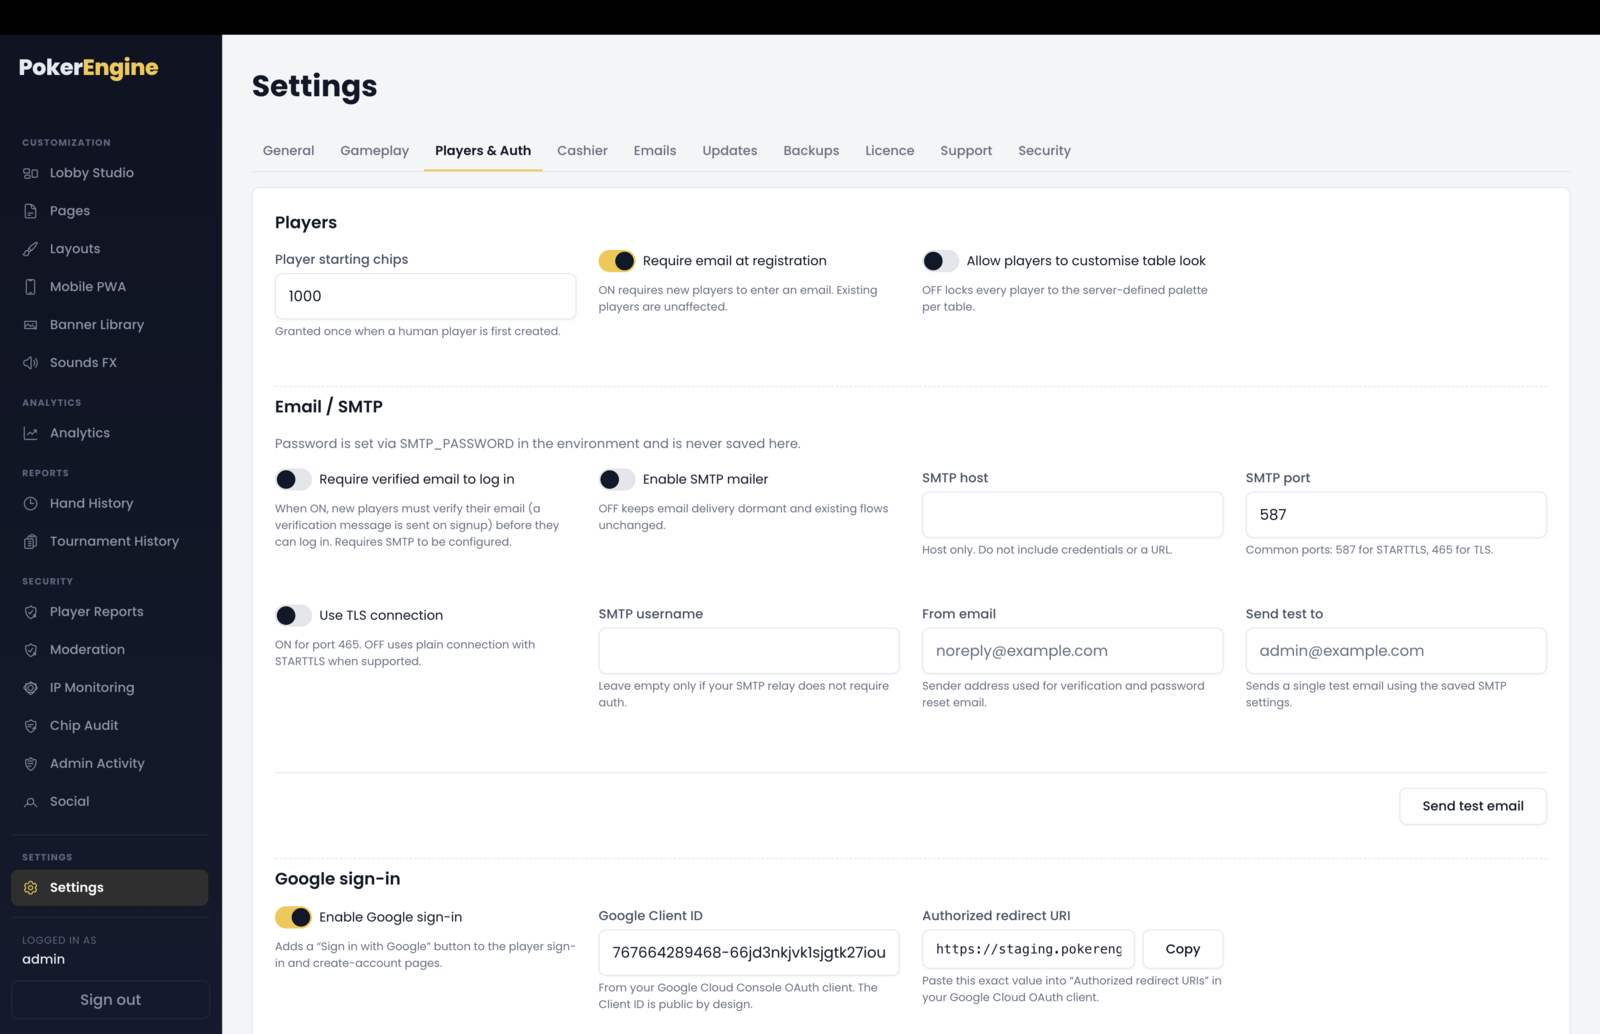
Players
- Player starting chips — how many chips a new human player receives when they first sign up (default 1,000).
- Require email at registration — whether new players must provide an email to sign up (on by default).
- Allow players to customise the table look — when on (default), players can pick their own felt / rim / chip colors; when off, everyone sees your server-defined table look. (This is about the table’s appearance only — not display names or avatars.)
Email & verification
- Require verified email to log in — when on (default), new players must click a verification link before they can log in. This needs email (SMTP) to be set up — if email isn’t configured, the requirement is quietly skipped.
- SMTP settings — connect your email provider so PokerEngine can send verification and password-reset emails: host, port, TLS, username, and the “from” address. For security, the email password is set in your server’s environment (
.env), not here. A Send test email button lets you confirm it works.
You customize the actual look and wording of your emails in the separate Emails tab.
Google sign-in
Let players log in with their Google account. You provide your own Google credentials (a quick one-time setup in the Google Cloud Console — the documentation includes a step-by-step guide):
- Enable Google sign-in — adds a “Sign in with Google” button to the login page (off by default).
- Google Client ID — paste the Client ID from your Google OAuth credentials here.
- Authorized redirect URI — the tab shows the exact URI (with a Copy button) to paste into your Google credentials so Google knows where to send players back.
- Client Secret — for security, your Google Client Secret goes in your server’s environment (
.env), not in the admin. The tab shows a badge telling you whether the secret is detected on the server, and a copyable.envline. Because it’s an environment value, a quick restart is needed after you add it.
Google sign-in only appears to players once it’s enabled and fully configured (Client ID here + Client Secret in the environment).
Good to know
- Email verification and emails need SMTP. Set up the SMTP section (and add the email password to your environment) before relying on verification or any emails.
- Avatars are automatic. New players are given a random avatar from the built-in gallery, and if they have a Gravatar for their email, that’s used instead — nothing to configure here.
- Google credentials are yours. As a white-label product, you create your own Google OAuth client, so sign-in runs under your project. Client ID goes in the admin, Client Secret in the environment.
- Ready to use. Out of the box, players sign up with an email and 1,000 chips, get an avatar automatically, and can customize their table — no configuration required. Email verification and Google sign-in are optional add-ons you enable when ready.
Emails
The Emails tab lets you customize the automatic emails PokerEngine sends players. It ships with a set of ready-made, branded templates, so with email set up your platform sends professional emails without you editing anything — customizing is optional.
Reminder: this tab is about the content and look of your emails. The connection to your email provider (SMTP) is set on the Players & Auth tab — emails won’t actually send until that’s configured.
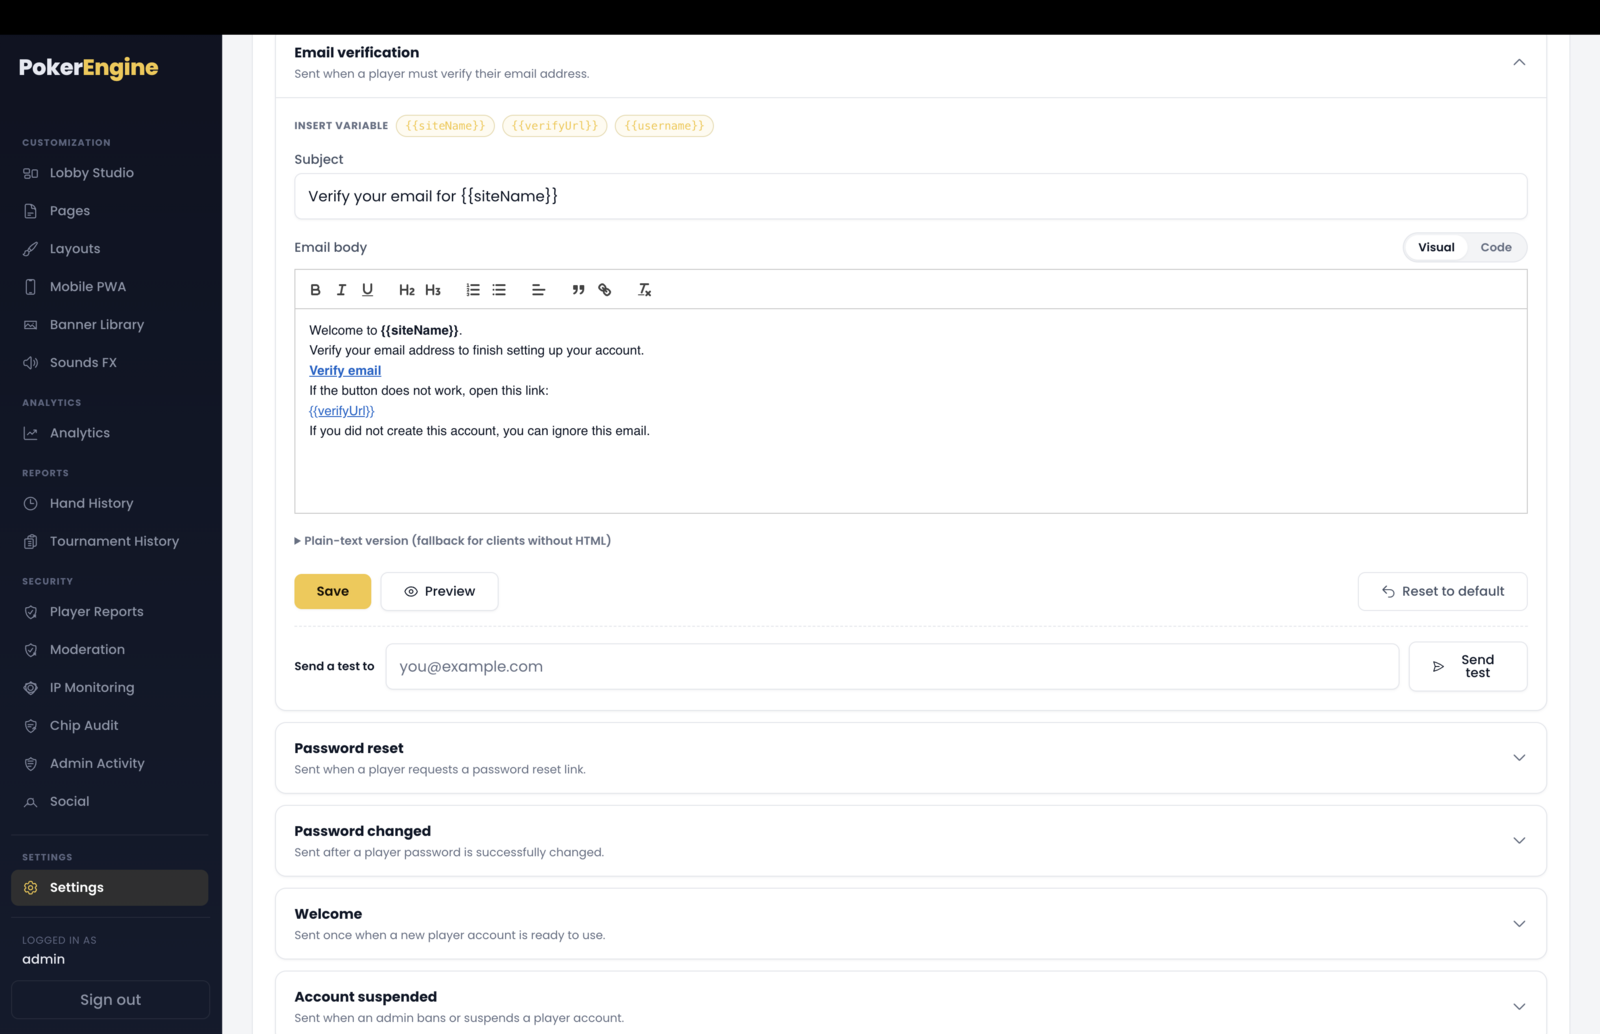
The six emails
- Email verification — asks a new player to confirm their email address.
- Password reset — sends a reset link when a player forgets their password.
- Password changed — confirms a password was changed.
- Welcome — greets a new player once their account is ready.
- Account suspended — notifies a player when you suspend or ban them (includes your reason).
- Account reinstated — lets a player know their account has been restored.
You can’t add or remove templates — these are the six the platform sends.
Editing an email
Each email is a card you expand to edit:
- Subject — the email’s subject line.
- Body — edit visually (a simple formatting toolbar) or switch to Code for raw HTML.
- Plain-text version — an optional fallback for email apps that don’t show HTML.
- Variables — click a chip to insert a placeholder that’s filled in automatically when the email is sent — like the player’s name, your site name, and the relevant link. Each email has its own set of allowed variables.
Three buttons help you work safely: Preview (see the finished, branded email with sample data — no email is sent), Send test (send it to an address you type, to check it for real — requires SMTP), and Reset to default (discard your changes and restore the built-in version).
Email branding
One global control here — the accent color used for the header stripe and buttons in every email. Your logo and site name in emails come from the General tab (Site identity), so set those once and every email matches your brand.
Good to know
- Emails only send once SMTP is set up (on the Players & Auth tab). Until then, Preview still works, but Send test will remind you to configure it.
- Logo and name aren’t here — they’re inherited from the General tab; this tab controls wording, layout and the accent color.
- Use the variable chips rather than typing placeholders by hand; only each email’s own variables are allowed.
- Ready to use. All six emails have polished defaults, so once your email provider is connected, everything just works — and you can always reset a template back to default.
Updates
The Updates tab (the “Update center”) lets you update PokerEngine right from the admin — no developer needed. When a new version is released, you upload the update package and the platform handles the rest: it backs itself up, installs the new version, restarts, and checks everything came back healthy — automatically rolling back if anything goes wrong.
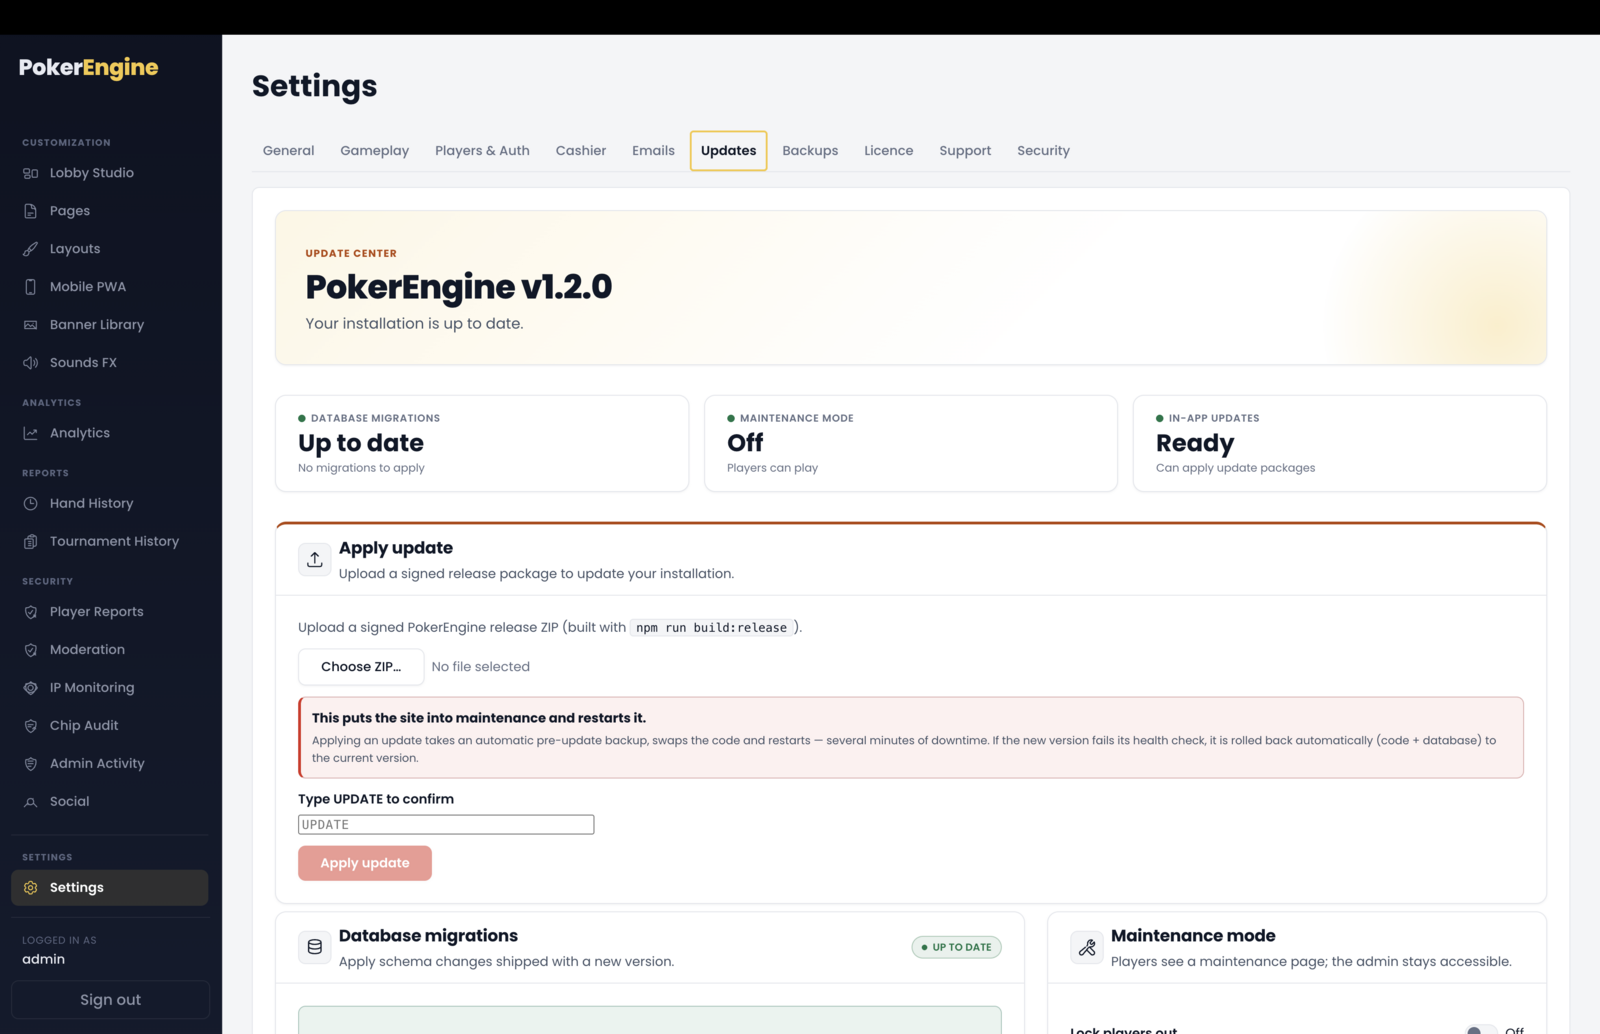
What it shows
- Your current version (e.g. “PokerEngine v1.2.1”).
- Pending database migrations — whether any database updates are waiting.
- Maintenance mode — whether players are currently locked out.
- In-app updates: Ready / Not ready — whether your server setup supports one-click updates (it needs a code volume and an auto-restart policy; the standard Docker setup qualifies).
Applying an update
Get the official update package (a .zip) for the new version, choose the file in Apply
update, type UPDATE to confirm, and click Apply update. From here it’s
automatic — a full-screen progress overlay keeps you posted and finishes with a Reload admin button.
Behind the scenes, in order: the platform takes a fresh backup, puts the site into maintenance,
installs the new version, restarts, and verifies it’s healthy. If the
new version doesn’t come up cleanly, it automatically rolls back to the previous version and database.
Built-in safety
- Only official, signed packages are accepted. Update files are cryptographically signed; anything tampered with or not a genuine release is rejected before anything is touched.
- A backup is taken automatically before every update — nothing is applied against an un-backed-up database.
- Automatic rollback if the update fails its health check or won’t start.
- Brief downtime. The site goes into maintenance and restarts during the update, so plan updates for a quiet moment — the overlay tracks progress.
The other controls here
- Run pending migrations — applies any waiting database updates. Run this after a version update if migrations are pending.
- Maintenance mode — manually lock players out (e.g. before doing server work) and turn it back off.
- Create backup / Manage backups — a shortcut to take a backup or jump to the Backups tab.
Good to know
- Updates only go forward — you install newer versions, not older ones.
- Some updates need a manual step. If a release adds new software dependencies, the one-click updater will tell you it must be applied manually (following the included guide) — this is rare and clearly signposted.
- Ready to use. No configuration needed; on a standard deployment the updater is ready, and every update is backed up and reversible by design.
Backups
The Backups tab manages database backups — snapshots of your platform’s data (players, hands, tournaments, settings, and so on). You can create one anytime, download it to keep a copy elsewhere, and restore from one if you ever need to roll back.
What’s included: this backs up the database. Your application code is versioned separately by the Updates system, and it doesn’t include uploaded image/sound files — so keep your own copies of any custom assets.
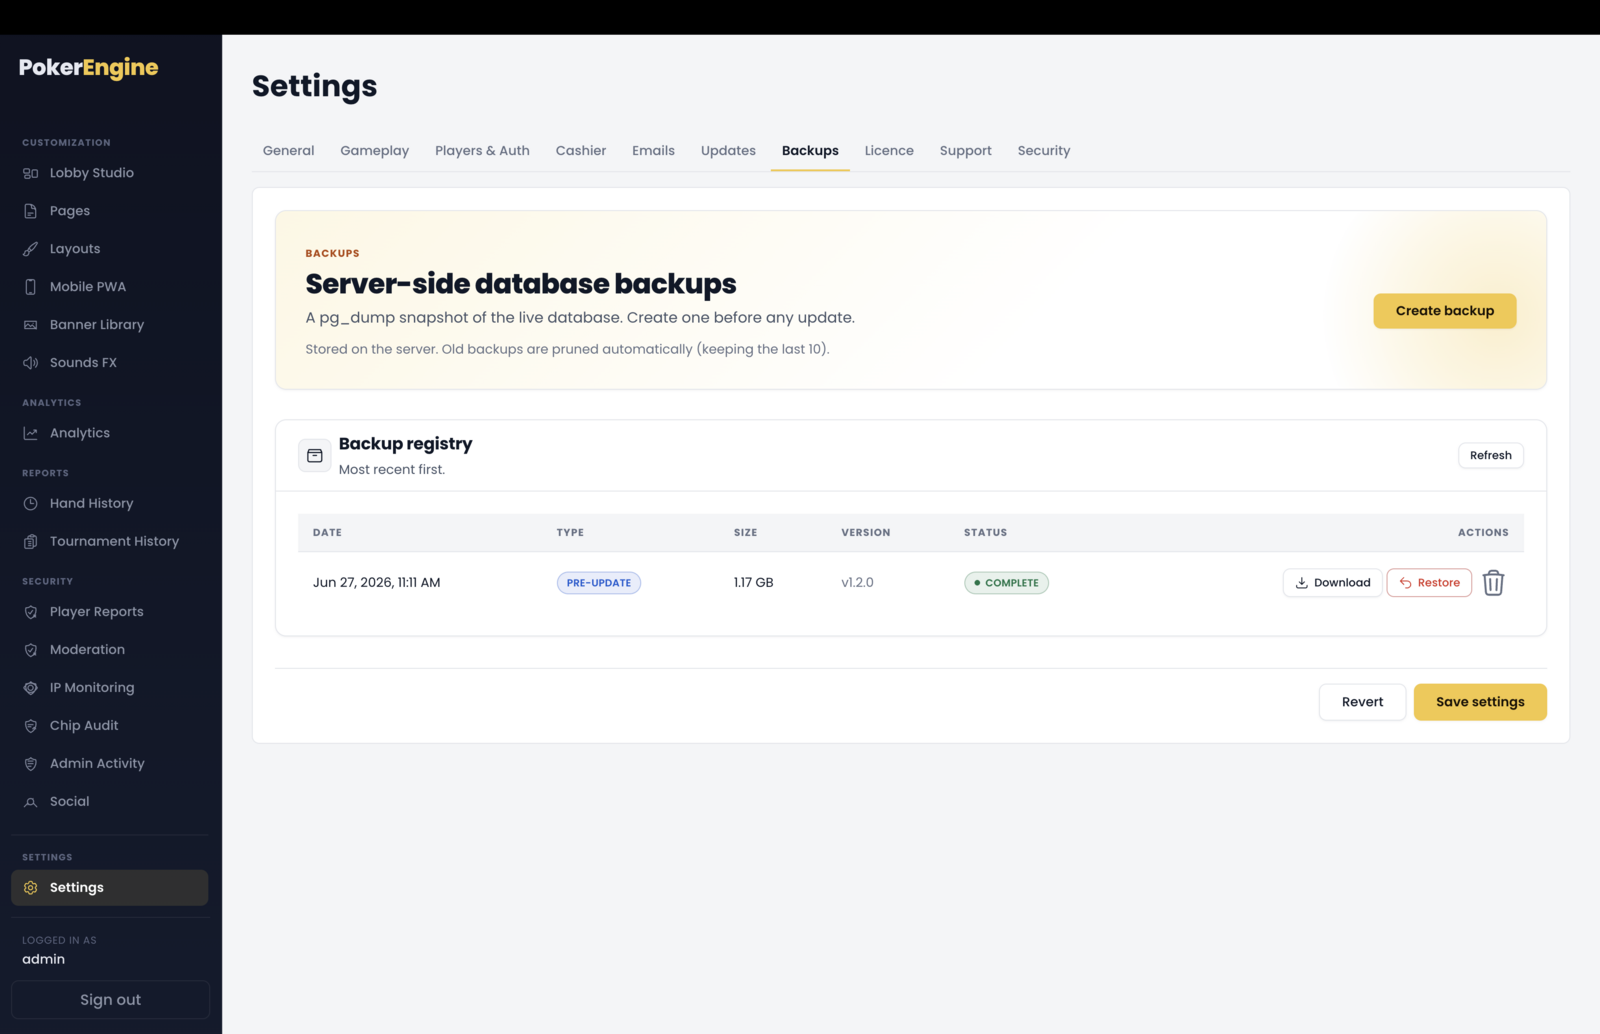
The backup list
Each backup shows its date, type, size, the version it was made on, and its status (Creating…, Complete, or Failed). Types you’ll see:
- Manual — one you created.
- Pre-update — taken automatically before an update.
- Pre-restore — a safety snapshot taken automatically just before a restore.
Creating a backup
Click Create backup. It runs in the background and appears in the list when it’s done (only one backup runs at a time). It’s a good habit to create one before any big change — and updates already do this for you.
Restoring from a backup
Restoring replaces your current database with the backup, so it’s a careful, guarded action: click Restore on a completed backup, read the warning, and type RESTORE to confirm. Then it’s automatic and safe — the system first takes an automatic safety backup of your current data (so a restore can itself be undone), enters maintenance mode, restores the database, and restarts. The restore runs all-or-nothing — if anything goes wrong, it rolls back and your data is left intact. When it’s back online, the site stays in maintenance so you can check everything looks right; turn maintenance off (in the Updates tab) when you’re happy.
Download, delete, and retention
- Download — save a backup to your own computer or storage. Backups live on your server, so downloading is how you keep a safe copy off-site.
- Delete — permanently remove a backup from the server.
- Automatic cleanup — the platform keeps your most recent backups (the last 10 by default) and prunes older manual ones. The automatic pre-update and pre-restore safety backups are kept until you delete them yourself.
Good to know
- Database only. These are database snapshots, not a full copy of code and uploaded files.
- Restore is reversible. Because a safety backup is taken first and the restore is all-or-nothing, you’re protected against a bad restore.
- Watch your disk space. Backups add up on the server over time; download important ones and delete what you don’t need.
- Ready to use. Works out of the box — create backups on demand, and updates create them for you automatically.
Licence
The Licence tab is where you activate your copy of PokerEngine with your Envato/CodeCanyon purchase code — the standard way to register a marketplace product you’ve bought.
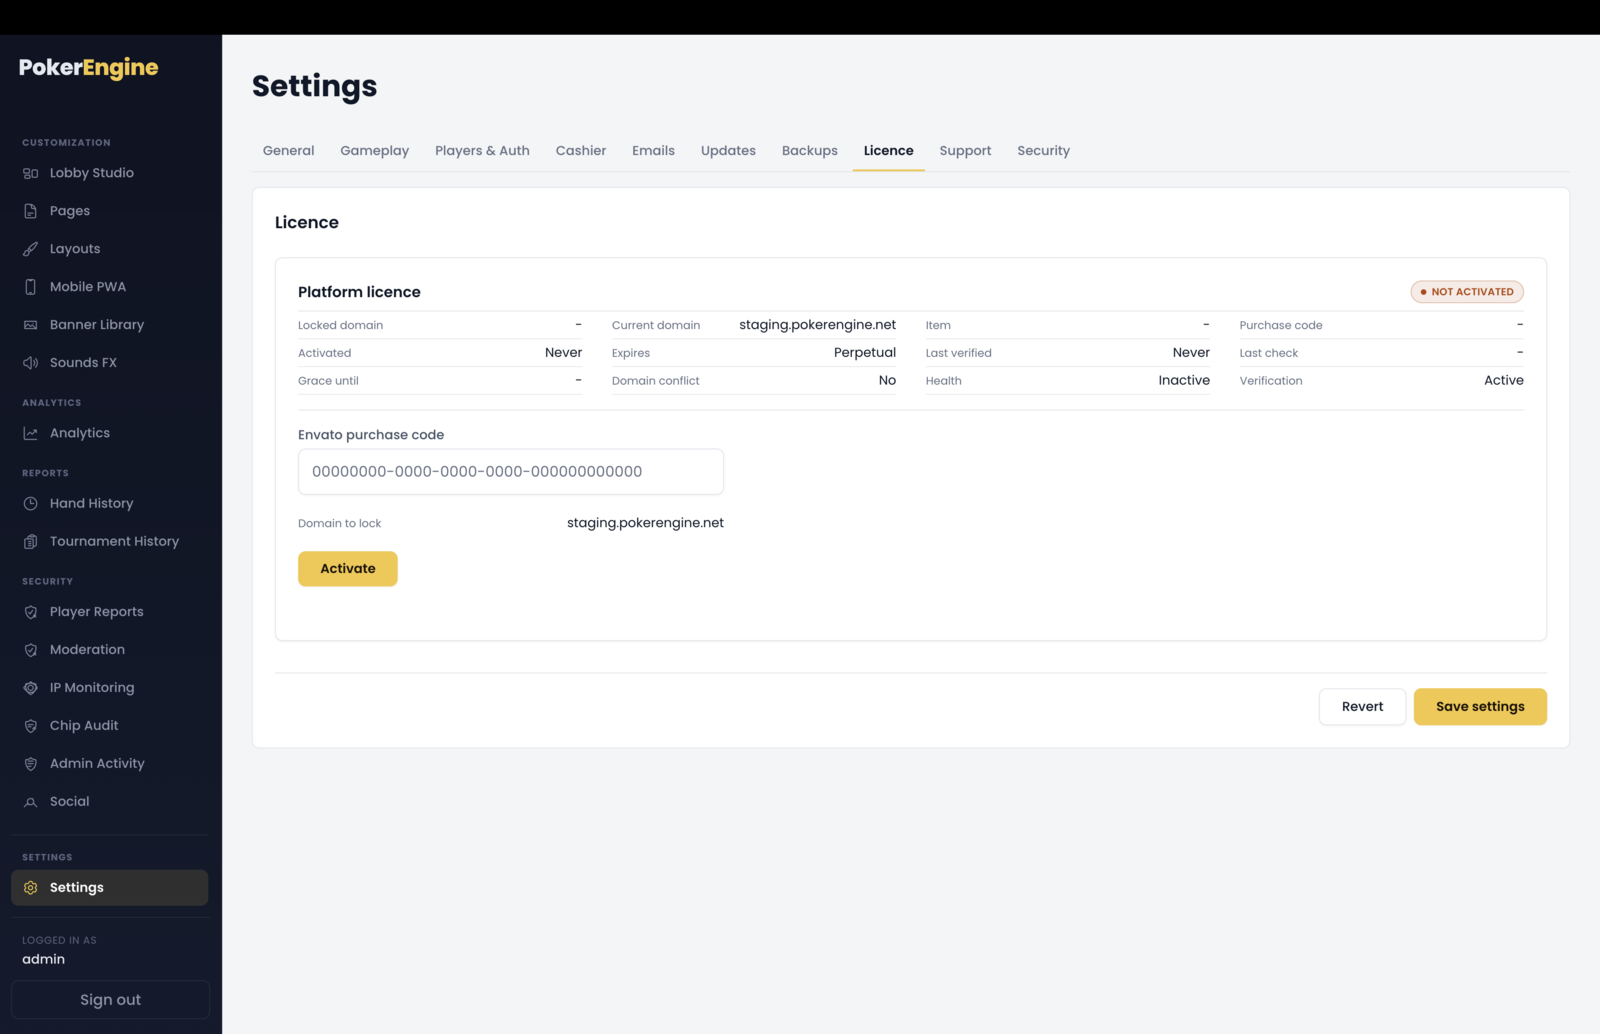
Finding your purchase code
Your purchase code is on your CodeCanyon Downloads page: next to your PokerEngine purchase, choose
“License certificate & purchase code” — the code is a long string that looks like
00000000-0000-0000-0000-000000000000.
Activating
Paste your purchase code into the Envato purchase code field, check the domain to lock shown (the address you’re running on now), and click Activate. Your licence is verified and locked to that domain, and the status badge turns to Active.
What the status shows
- Active / Not activated badge.
- Locked domain vs current domain — so you can see if you’re running on the domain the licence was activated for.
- Activated date and Expires — PokerEngine licences are perpetual (no expiry), so this shows “Perpetual”.
- Health — a quick indicator that everything’s in order.
Re-verify and deactivate
- Re-verify now — re-check your licence on demand (it’s also re-checked periodically in the background).
- Deactivate — clear the local activation record (for example, if you’re moving to a different domain), then activate again on the new one.
Good to know
- One licence per domain/deployment. Each site you run needs its own Envato licence, following Envato’s standard Regular vs Extended licence terms. If you serve an activated copy from a different domain, the tab flags a domain mismatch.
- Offline-tolerant. A brief network hiccup during a background re-check won’t cause any problem — there’s a grace period, and any warning is just an admin reminder.
- Ready to use. Activation is a quick one-time step; paste your code, lock your domain, and you’re set.
Support
The Support tab is your direct line to our support team, right inside your admin. You can open tickets, ask questions, send suggestions, and see our replies — a two-way conversation without leaving the platform.
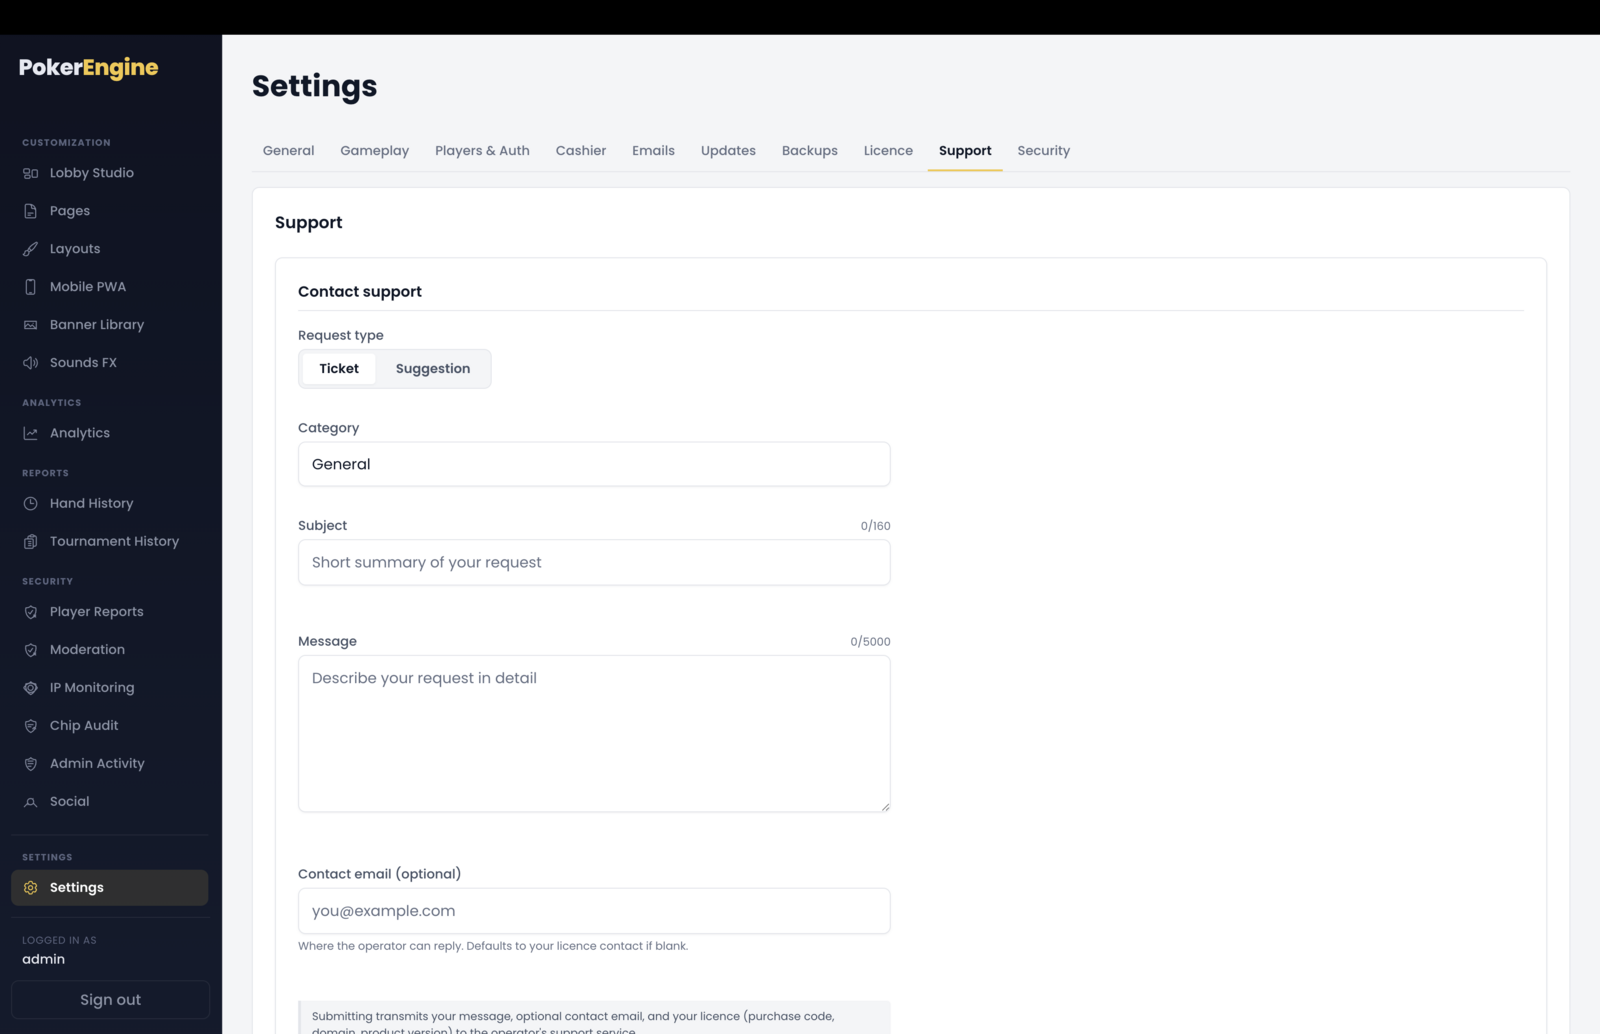
Getting help
- Open a request — choose Ticket (a question or issue) or Suggestion, pick a category, add a subject and message, and optionally a contact email for replies. Click Send request.
- My tickets — your open and past requests are listed here. Click one to see the full conversation, reply, and close or reopen it.
- Automatic updates — the tab refreshes on its own, so when we reply, your ticket updates and shows a “new reply” marker.
Activate your licence first
To keep support genuine, contacting us requires your licence to be activated (the Licence tab). Your purchase code is how we confirm you’re a real customer — no separate password or key needed. If your licence isn’t activated yet, the tab will point you to the Licence tab to do that first.
Privacy
When you send a request, it transmits your message, your optional contact email, and your licence details (purchase code, domain, and product version) so we can identify your purchase and help you. No player data is ever sent.
Good to know
- It works for every buyer, out of the box — activate your licence and you can reach us directly from the admin.
- Standard CodeCanyon support (the item’s comments/support on the marketplace) is always available too.
- Ready to use. Nothing to configure on your side — just activate your licence and start a conversation.
Security
The Security tab is a read-only reference for the privacy- and logging-related
options that are set at the environment level (your server’s .env), rather than in the
admin. Because these affect data retention and how the platform sees visitor IP addresses, they live in the
environment for safety — the tab simply shows their current values so you can confirm them at a
glance. Any change is made in your .env and takes effect after a quick server restart.
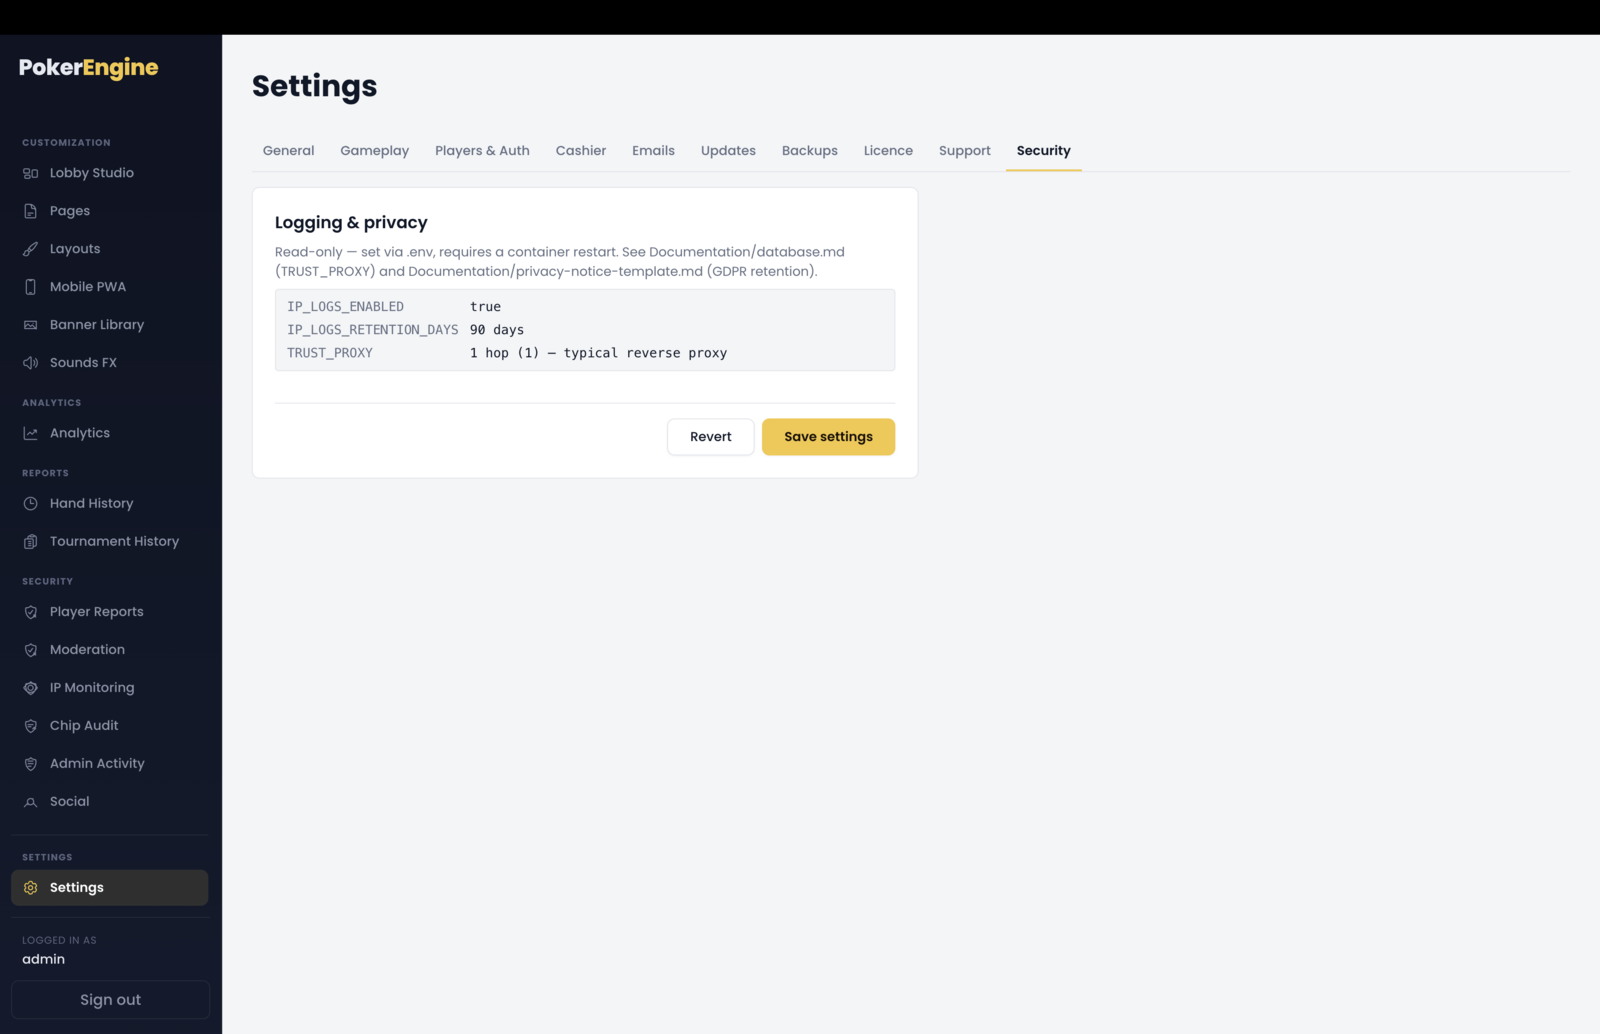
Logging & privacy
- IP address logging (
IP_LOGS_ENABLED) — whether player IP addresses are recorded (this feeds the IP Monitoring section). On by default. Set it tofalsein your environment to switch IP capture off entirely. - IP log retention (
IP_LOGS_RETENTION_DAYS) — how many days IP logs are kept before they’re automatically purged (default 90). This helps you meet your own privacy/GDPR retention policy — lower or raise it to match. - Trusted proxy (
TRUST_PROXY) — tells PokerEngine how many reverse proxies sit in front of it, so it reads the real visitor IP instead of the proxy’s. It shows “No proxy trust” when unset, and “1 hop — typical reverse proxy” when set to1. If you run behind a reverse proxy (Nginx, etc.), set this to1so IP logging, IP Monitoring and rate-limiting all see the true client address.
Changing these
Edit the value in your server’s .env, then restart the Node process — for example docker
compose restart (Docker), pm2 restart (PM2), or systemctl restart (systemd). The tab
reflects the new values once the server is back up.
Good to know
- Read-only by design. These are environment values, so they can’t be changed by accident from the admin — the tab is your at-a-glance confirmation of what’s set.
- Set Trusted proxy if you’re behind a reverse proxy. Otherwise IP logging, IP Monitoring and rate limits may record your proxy’s address instead of the visitor’s. Most single-proxy setups use
1. - Retention keeps you tidy and compliant. Old IP logs are purged automatically once they pass the retention window, so the data doesn’t pile up.
- Ready to use. Sensible defaults ship out of the box (IP logging on, 90-day retention, no proxy trust) — you only touch these if your hosting setup or privacy policy calls for it.
Social
The Social section (under Security) is the control panel for your platform’s social features. It’s a set of switches: a master switch that turns the whole social module on, and individual toggles for each feature so you expose exactly what you want. Several of these switches also enable features described in other sections (like Player Reports and chat moderation), so it’s worth setting this up early.
By default the social features are off — turn on the ones you want.
The master switch
Enable Social module is the master gate. While it’s off, none of the social features are active, even if their individual toggles are on. Turn it on first, then pick your features.
The features
Bots in social (“Bots act as players”)
This toggle decides whether bots show up as social entities — whether players can add them as friends, send them gifts, or report them (bot friend requests are auto-accepted). With it off, bots are excluded from all social interactions. Note this is only about social features — it’s completely separate from how bots play at your tables and from the include-bots options in Leaderboards and Ranking.
Presence panel
At the bottom, a read-only Presence panel shows how many players are currently online (bots are never counted) — a quick health check that the presence system is working.
Good to know